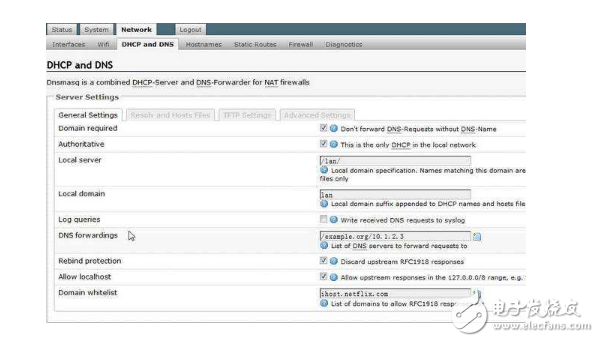

openwrt路由器防火墙配置方法
防火墙
描述
首先我们要明白,Openwrt 是一个 GNU/Linux 的发行版, 和其他大多数的发行版一样,Openwrt 的防火墙同样也是基于 iptables 。
其次,Openwrt支持两种途径配置 iptables ,一种就是 Openwrt 自己的 UCI 方式,另一种就是传统的 Linux 方式。
怎样更好的去使用OpenWRT防火墙?
首先我们要明白,Openwrt 是一个 GNU/Linux 的发行版,和其他大多数的发行版一样,Openwrt的防火墙同样也是基于 iptables 。
其次,Openwrt支持两种途径配置 iptables ,一种就是 Openwrt 自己的 UCI 方式,另一种就是传统的 Linux 方式。
OpenWRT内置防火墙介绍
OpenWRT下防火墙的默认行为已经可以满足路由器的需要,一般情况下无需修改,但一些特殊需求我们还需要动到防火墙配置的。
OpenWRT下的防火墙管理是由配置文件“/etc/config/firewall”进行控制管理的。此文件可以使用UCI进行控制,也可以用vi编辑器直接修改。但如果两种方式都使用时需要注意UCI命令修改会产生缓存,每次修改好要尽快确认保存避免出现冲突。而该文件最终会在/etc/init.d/firewall启动的时候由UCI进行解码并且生成iptables规则生效。因此使用者不需要了解iptables即可通过配置文件实现防火墙控制。
防火墙的修改生效,需要重启防火墙执行以下指令:/etc/init.d/firewallrestart

Firewall的文件结构
Firewall中分成default、zone、forwarding、rule、Redirect这五个部分,参见下图:
default:这是 firewall 文件的第一个小节。
zone:可以有数个 zone ,zone 又可以包含数个 networkinterfaces,例如LAN,WAN。
forwarding:位于的 zone 下面,主要作用是允许数据封包转发。
rule 以及 redirect:可以看作是 zone 子集,用来扩展进一步的封包限制。
下面详细的openwrt 防火墙设置方法介绍!希望对你有帮助!
openwrt 防火墙设置方法一:
这个在Luci的Web管理界面里会有啊,系统-》防火墙设置
命令行要用iptables命令,具体应该是iptables -t (table名) -A (匹配规则) -j ALLOW
openwrt 防火墙设置方法二:
OpenWrt 可以被描述为一个嵌入式的 Linux 发行版,(主流路由器固件有 dd-wrt,tomato,openwrt三类)而不是试图建立一个单一的
静态的系统。OpenWrt的包管理提供了一个完全可写的文件系统,从应用程序供应商提供的选择和配置
openwrt 防火墙设置方法三:
luci_git-14.287.73426-3f5cf37-1_ar71xx.ipk
luci-base_git-14.287.73426-3f5cf37-1_ar71xx.ipk
luci-ssl_git-14.287.73426-3f5cf37-1_ar71xx.ipk
luci-i18n-english_git-14.287.73426-3f5cf37-1_ar.。》
最后这个是语言包,你要喜欢中文的可以选择多下一个Chinese,但是英文的一定要有
uhttpd是提供网页服务器的,和LuCi不是一个系统
如果我没记错的话uhttpd在OpenWRT里是Apache的精简版
Index of /snapshots/trunk/ar71xx/packages/packages/
叫apache_2.2.29-1_ar71xx.ipk
安装之后要/etc/init.d/uhttpd enable,/etc/init.d/luci enable,/etc/init.d/uhttpd start,/etc/init.d/luci start
luci-ssl虽然是提供https的支持,但也要装,要不然http(不加密的)也打不开
基于OpenWrt防火墙配置(作为二级路由)
uci show firewall
uci add firewall rule
uci set firewall.@rule[-1].name=LuCI
uci set firewall.@rule[-1].src=wan
uci set firewall.@rule[-1].proto=tcp
uci set firewall.@rule[-1].dest_port=80
uci set firewall.@rule[-1].target=ACCEPT
uci commit
uci add firewall rule
uci set firewall.@rule[-1].name=SSH
uci set firewall.@rule[-1].src=wan
uci set firewall.@rule[-1].proto=tcp
uci set firewall.@rule[-1].dest_port=22
uci set firewall.@rule[-1].target=ACCEPT
uci commit
#手动更改:高级设置-》Dropbear设置-》接口-》wan
uci add firewall rule
uci set firewall.@rule[-1].name=Samba_1
uci set firewall.@rule[-1].src=wan
uci set firewall.@rule[-1].proto=tcp
uci set firewall.@rule[-1].dest_port=445
uci set firewall.@rule[-1].target=ACCEPT
uci add firewall rule
uci set firewall.@rule[-1].name=Samba_2
uci set firewall.@rule[-1].src=wan
uci set firewall.@rule[-1].proto=tcp
uci set firewall.@rule[-1].dest_port=8200
uci set firewall.@rule[-1].target=ACCEPT
uci commit
uci add firewall rule
uci set firewall.@rule[-1].name=nginx
uci set firewall.@rule[-1].src=wan
uci set firewall.@rule[-1].proto=tcp
uci set firewall.@rule[-1].dest_port=99
uci set firewall.@rule[-1].target=ACCEPT
uci commit
uci add firewall rule
uci set firewall.@rule[-1].name=FTP
uci set firewall.@rule[-1].src=wan
uci set firewall.@rule[-1].proto=tcp
uci set firewall.@rule[-1].dest_port=21
uci set firewall.@rule[-1].target=ACCEPT
uci commit
uci add firewall rule
uci set firewall.@rule[-1].name=telnet
uci set firewall.@rule[-1].src=wan
uci set firewall.@rule[-1].proto=tcp
uci set firewall.@rule[-1].dest_port=23
uci set firewall.@rule[-1].target=ACCEPT
uci commit
/etc/init.d/firewall restart
-
Openwrt开发指南 第29章 OpenWrt 防火墙介绍2023-07-15 6875
-
迅捷路由器防火墙功能应用实例2012-02-18 2280
-
发现 STM32 防火墙的安全配置2018-07-27 5432
-
Linux防火墙入门教程分享2020-12-28 1532
-
防火墙技术2009-06-16 871
-
ESR 系列路由器/ESV 系列VPN 防火墙使用说明VER2010-01-28 778
-
防火墙的配置2008-09-24 2676
-
无线路由器的防火墙2010-01-06 1181
-
路由器内置防火墙2010-01-08 996
-
如何配置Cisco PIX防火墙2010-01-13 734
-
openwrt路由器配置方法技巧分享2017-12-27 100749
-
网络出口应该选择路由器还是防火墙2020-02-07 15353
-
路由器和防火墙的比较,它们的区别都有哪些2020-08-25 14532
-
开源防火墙pfSense的安装及初始化2023-08-03 16587
-
传统防火墙与下一代防火墙的区别在哪呢?2023-09-02 3733
全部0条评论

快来发表一下你的评论吧 !

