

基于ASF的Atmel Studio 7.0使用方法介绍
电子说
描述
就在最近,Atmel终于推出了新版本IDE——Atmel Studio 7.0,该版本采用了微软最新的 Visual Studio 2015 平台,在速度、性能和代码视觉风格上都体现的淋淋尽致,用起来非常顺手,下面将结合实例,介绍Atmel Studio 7.0 的使用方法。
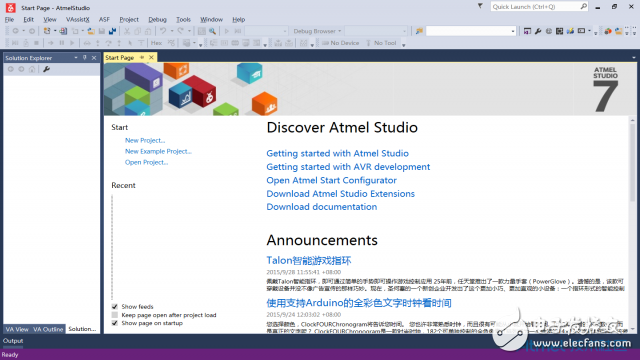
第1步:打开Atmel Studio 7.0
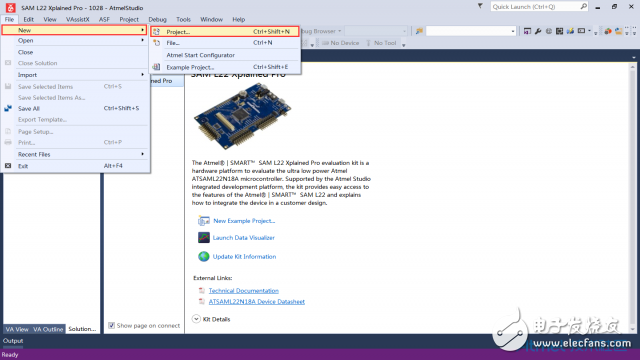
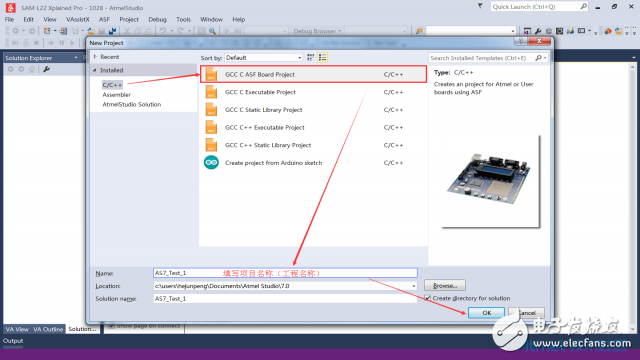
第2步:新建工程项目
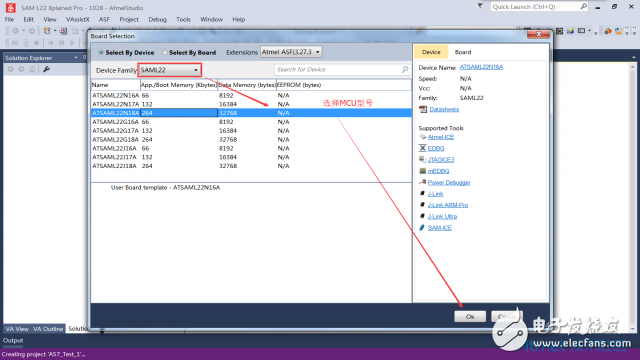
第3步:选择芯片型号
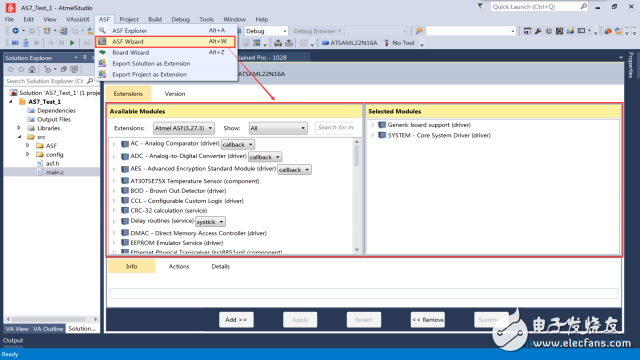
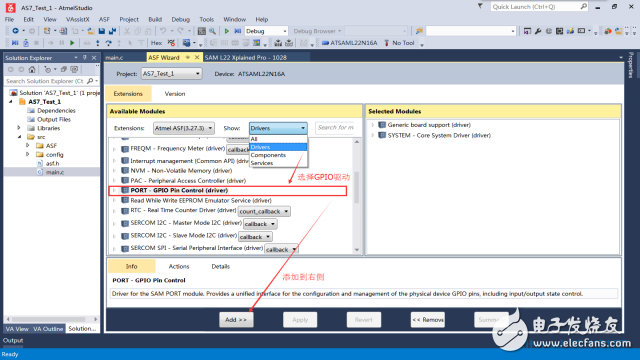
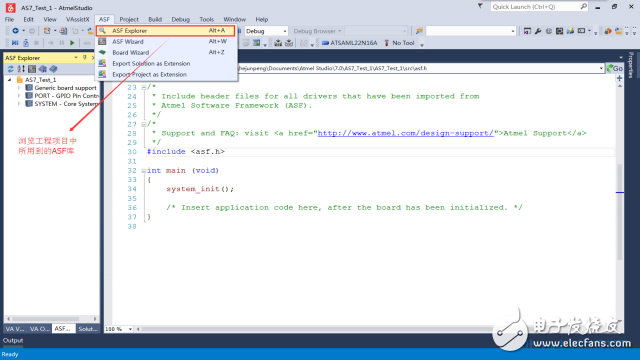
第4步:添加ASF 驱动库
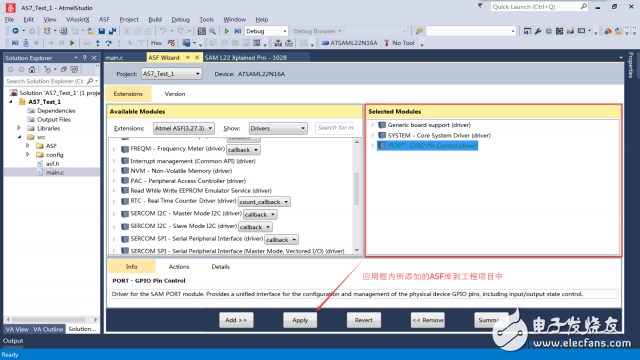
第5步:查看ASF驱动使用说明

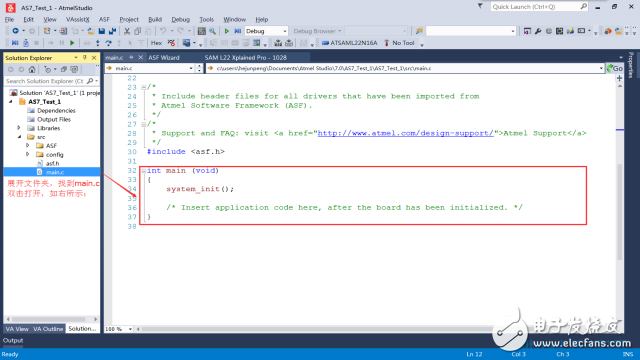
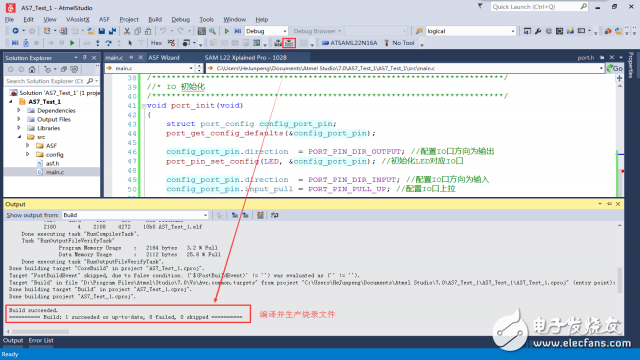
第6步:编写代码

源码:
#include //包含Atmel MCU软件库头文件
#define LED PIN_PC27 //定义LED所使用的IO口为 PC27
#define KEY PIN_PC01 //定义KEY所使用的IO口为 PC01
void port_init(void); //声明函数体
/************************************************************************/
//* IO 初始化
/************************************************************************/
void port_init(void)
{
struct port_config config_port_pin;
port_get_config_defaults(&config_port_pin);
config_port_pin.direction = PORT_PIN_DIR_OUTPUT; //配置IO口方向为输出
port_pin_set_config(LED, &config_port_pin); //初始化LED对应IO口
config_port_pin.direction = PORT_PIN_DIR_INPUT; //配置IO口方向为输入
config_port_pin.input_pull = PORT_PIN_PULL_UP; //配置IO口上拉
port_pin_set_config(KEY, &config_port_pin); //初始化KEY对应IO口
}
/************************************************************************/
//* 主程序
/************************************************************************/
int main (void)
{
system_init(); //系统初始化
/* Insert application code here, after the board has been initialized. */
port_init(); //IO初始化
while(1)
{
if (port_pin_get_input_level(KEY) == 0) //KEY按下,LED对应IO电平 = 0
{
port_pin_set_output_level(LED, 0);
}
else
{
port_pin_set_output_level(LED, 1);
}
}
}
第7步:编译并生产烧录文件
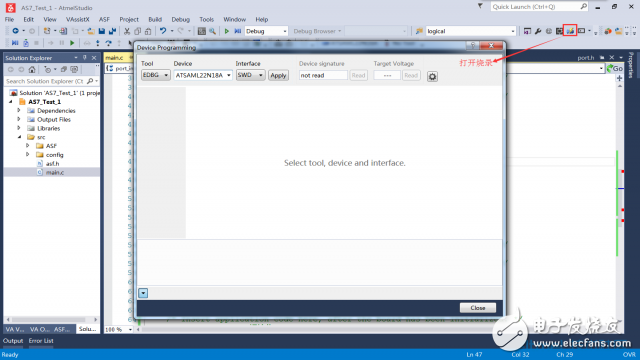
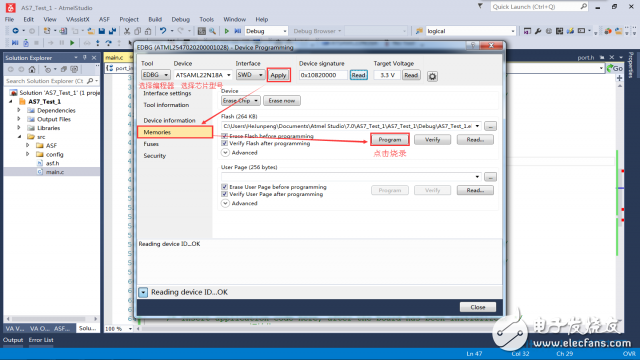
第8步:烧录文件到开发板
- 相关推荐
- 热点推荐
- Atmel
-
Atmel Studio 7.0怎么使用?2021-09-26 2021
-
为什么atmel studo7.0一装上就是这个问题?atmel studio 6.2就没有问题 2020-05-29 2243
-
求助Atmel studio 7.02020-04-14 2662
-
如何使用Studio 66和ASF?2018-07-10 3692
-
介绍Atmel软件框架ASF的结构与设计软件时使用的方法2018-07-06 4573
-
视频:Atmel,Studio 6中的ASF设计部分(5)2018-07-04 3171
-
AS7.0中快速创建一个ASF项目的步骤详解2018-02-09 2618
-
Atmel Studio 7.0编译优化级别在哪里设置?2017-11-29 5905
-
Atmel Studio 7.0 软件关于中文说明2016-12-16 14556
-
转:Atmel Studio 7.0 安装说明2016-08-03 13308
全部0条评论

快来发表一下你的评论吧 !
