

Ubuntu22.04 LTS部署zabbix7.0教程
描述
一、Ubuntu22.04 LTS 部署zabbix7.0
环境准备
| IP | 主机名 | 配置 |
|---|---|---|
| 10.0.0.50 | zabbix-01 | 2c4G |
| 10.0.0.51 | zabbix-agent | 2c4G |
| 10.0.0.52 | db | 2c4G |
1. 添加zabbix仓库
[root@zabbix-01:~]# wget https://repo.zabbix.com/zabbix/7.0/ubuntu/pool/main/z/zabbix-release/zabbix-release_latest_7.0+ubuntu22.04_all.deb
[root@zabbix-01:~]# dpkg -i zabbix-release_latest_7.0+ubuntu22.04_all.deb
[root@zabbix-01:~]# apt update
2. 安装 Zabbix 相关软件包
[root@zabbix-01:~]# apt install -y zabbix-server-mysql zabbix-frontend-php zabbix-nginx-conf zabbix-sql-scripts zabbix-agent
3. 安装MySQL
[root@db:~]# apt install -y mysql-server-8.0
[root@db:~]# netstat -tnulp | grep 3306
tcp        0      0 127.0.0.1:33060         0.0.0.0:*               LISTEN      1974/mysqld
tcp        0      0 127.0.0.1:3306          0.0.0.0:*               LISTEN      1974/mysqld
4. 创建初始数据库
[root@db:~]# mysql
Welcome to the MySQL monitor.  Commands end with ; or g.
Your MySQL connection id is 8
Server version: 8.0.40-0ubuntu0.22.04.1 (Ubuntu)

Copyright (c) 2000, 2024, Oracle and/or its affiliates.

Oracle is a registered trademark of Oracle Corporation and/or its
affiliates. Other names may be trademarks of their respective
owners.

Type 'help;' or 'h'forhelp. Type 'c' to clear the current input statement.

mysql> create database zabbix character set utf8mb4 collate utf8mb4_bin;
mysql> create user zabbix@'%' identified by 'zabbix';
mysql> grant all privileges on zabbix.* to zabbix@'%';
mysql> set global log_bin_trust_function_creators = 1;
mysql> quit;
导入初始架构和数据,系统将提示您输入新创建的密码
[root@zabbix-01:~]# scp /usr/share/zabbix-sql-scripts/mysql/server.sql.gz 10.0.0.52:/root
[root@db:~]# zcat server.sql.gz | mysql --default-character-set=utf8mb4 -uzabbix -p zabbix
Enter password:# 输密码的时候不显示字符,此处我输入了 zabbix

[root@db:~]# mysql
mysql> set global log_bin_trust_function_creators = 0;
mysql> quit;
5. 为Zabbix server配置数据库
[root@zabbix-01:~]# egrep '^DBHost|^DBName|^DBUser|^DBPassword' /etc/zabbix/zabbix_server.conf
DBHost=10.0.0.52
DBName=zabbix
DBUser=zabbix
DBPassword=zabbix
6. 为Zabbix前端配置PHP
[root@zabbix-01:~]# cat /etc/zabbix/nginx.conf
server {
        listen          8080;
        server_name     10.0.0.50;
...
7. 启动Zabbix server和agent进程
[root@zabbix-01:~]# systemctl restart zabbix-server zabbix-agent nginx php8.1-fpm
[root@zabbix-01:~]# systemctl enable zabbix-server zabbix-agent nginx php8.1-fpm
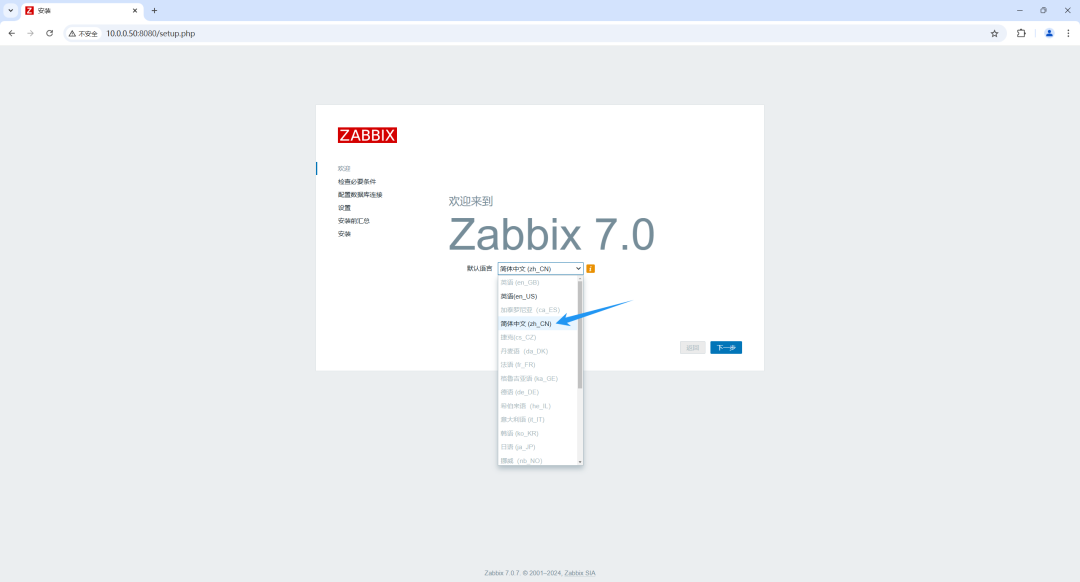
8. 设置中文web界面
10.0.0.50:8080
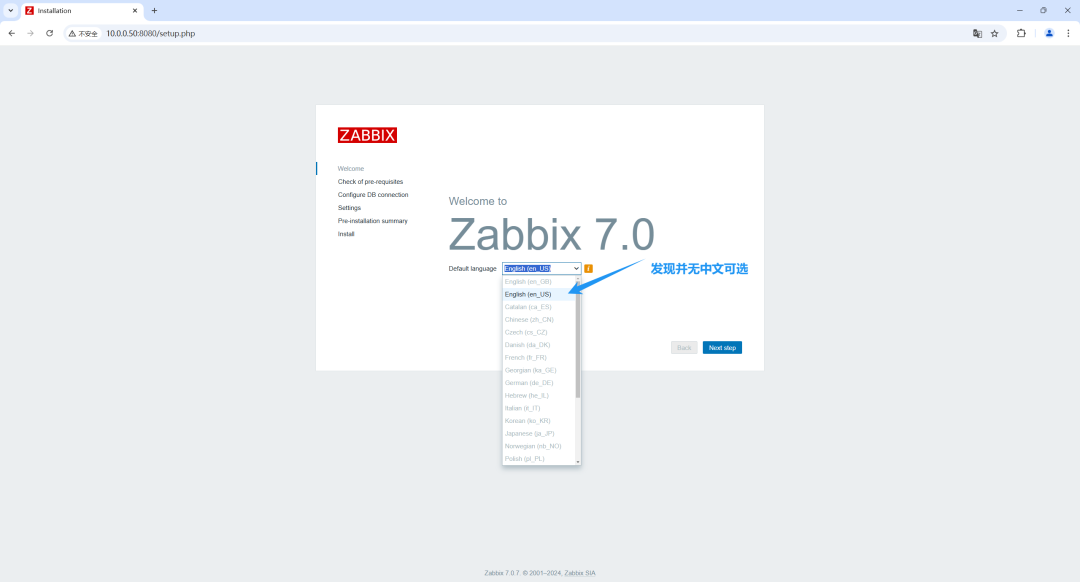
# 列出所有已安装的语言
[root@zabbix-01:~]# locale -a
C
C.utf8
POSIX
en_US.utf8

[root@zabbix-01:~]# sed -n '/zh_CN.UTF-8 UTF-8/p' /etc/locale.gen
# zh_CN.UTF-8 UTF-8
[root@zabbix-01:~]# sed -i 's/# zh_CN.UTF-8 UTF-8/zh_CN.UTF-8 UTF-8/' /etc/locale.gen
[root@zabbix-01:~]# sed -n '/zh_CN.UTF-8 UTF-8/p' /etc/locale.gen
zh_CN.UTF-8 UTF-8

[root@zabbix-01:~]# locale-gen
[root@zabbix-01:~]# systemctl restart zabbix-server zabbix-agent nginx php8.1-fpm
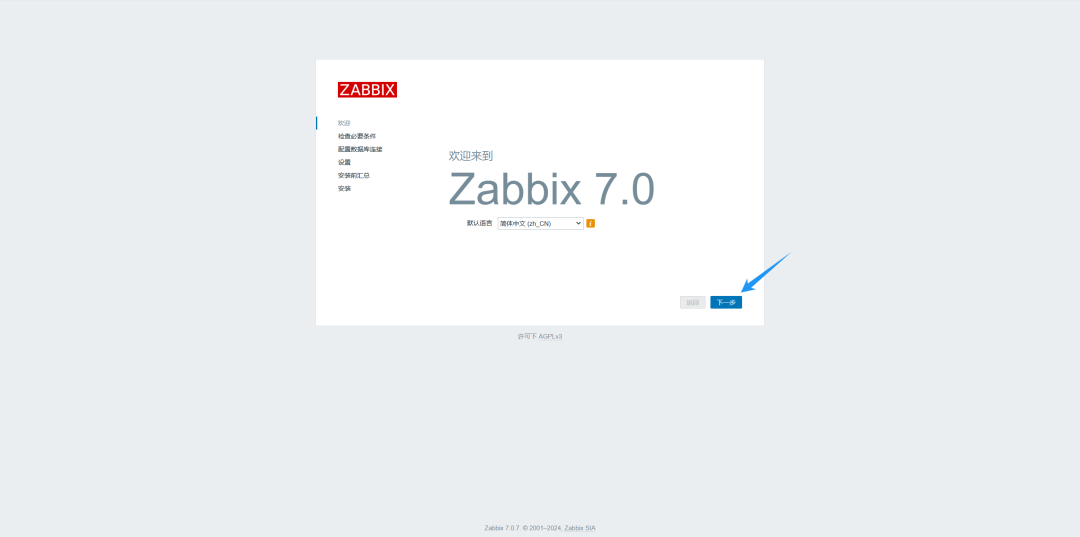
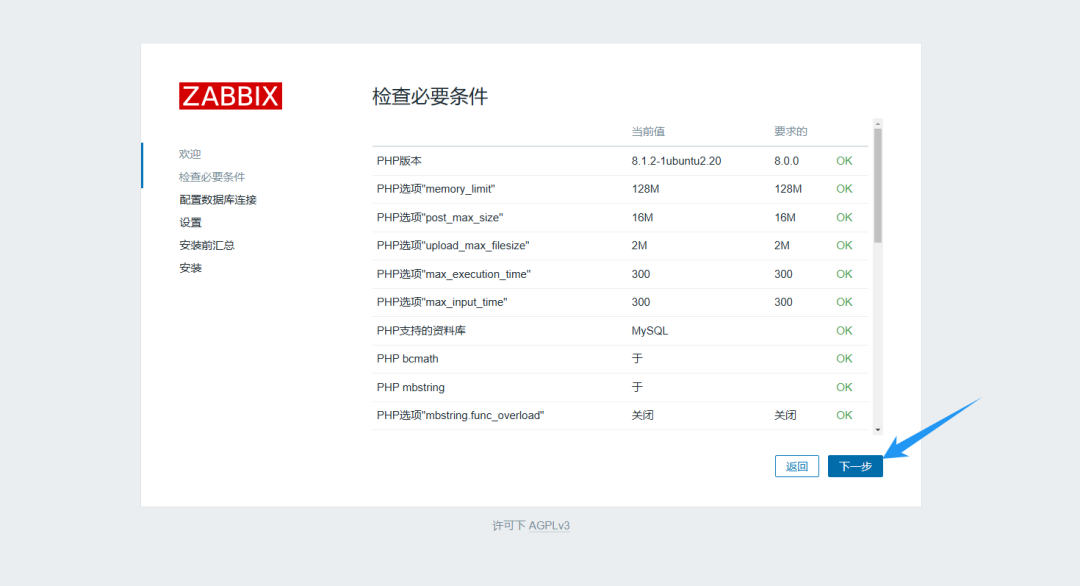
9. web界面安装zabbix

下一步将时区改为 (UTC+08:00) Asia/Shanghai, 图片上遗忘了,也可以后期去设置里面改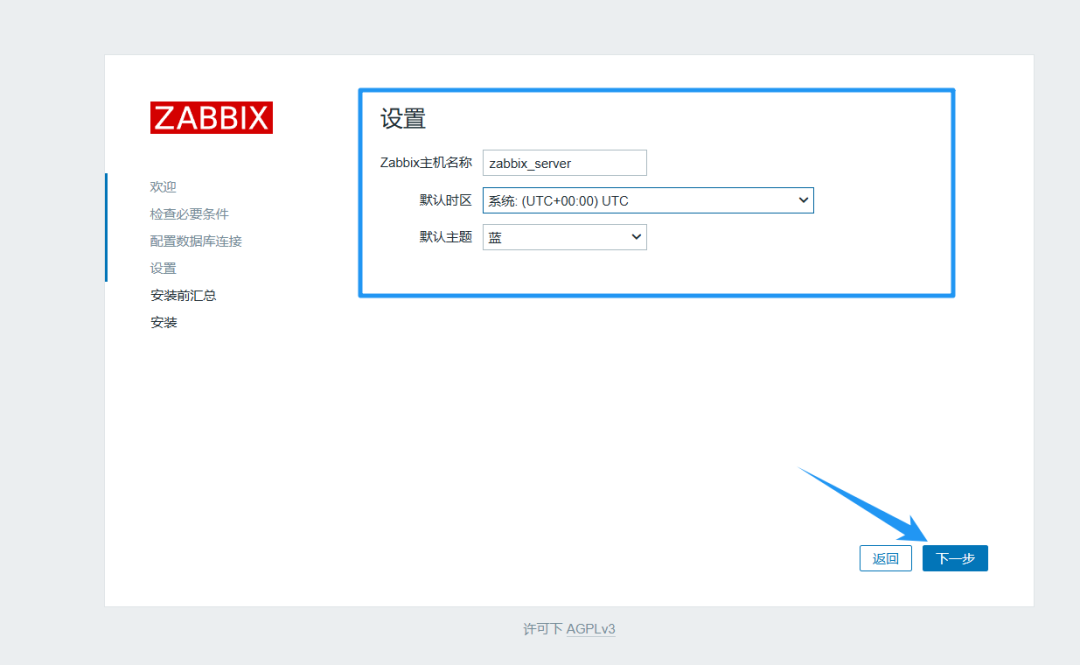

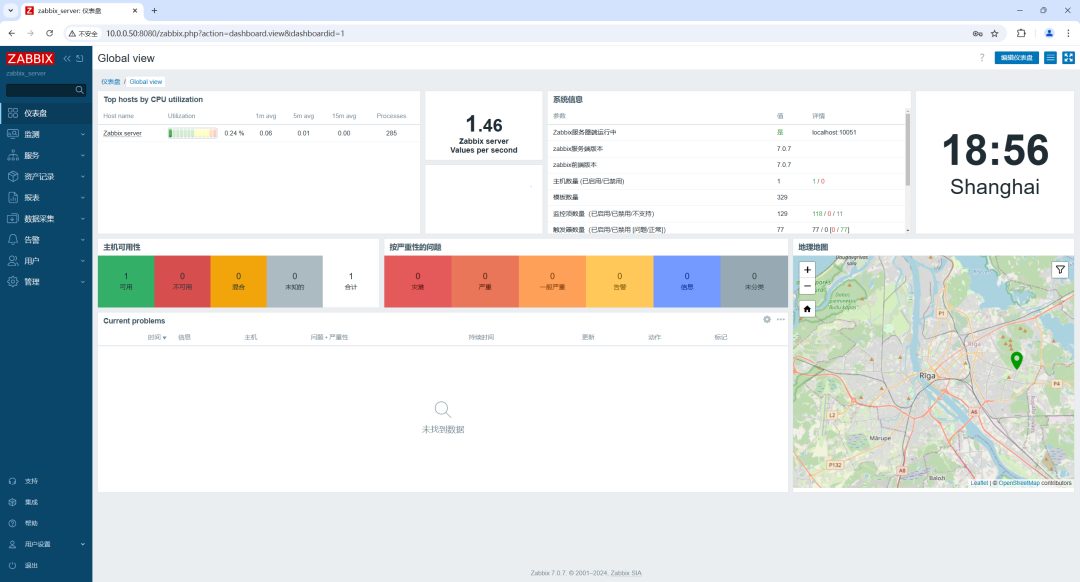
10.访问web界面
10.0.0.50:8080
账号:Admin
密码:zabbix
二、监控主机
1. 在需要监控的主机上安装zabbix-agent
[root@zabbix-agent:~]# apt -y install zabbix-agent
2. 修改zabbix-agent的配置文件
[root@zabbix-agent:~]# vim /etc/zabbix/zabbix_agentd.conf
...
117 Server=10.0.0.50
...
3. 重启zabbix-agent服务
[root@zabbix-agent:~]# systemctl restart zabbix-agent.service
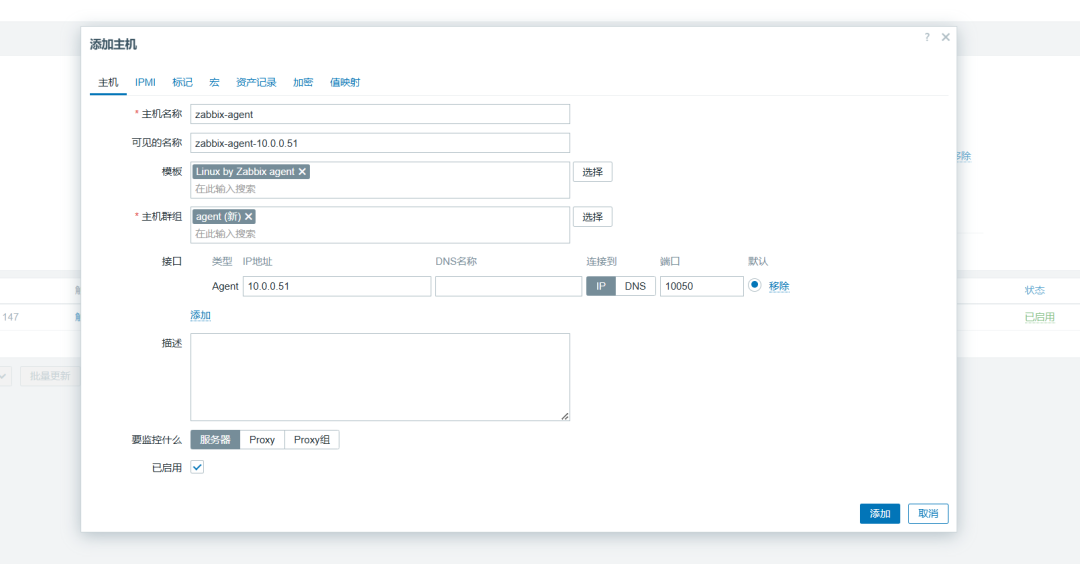
4. web界面添加主机
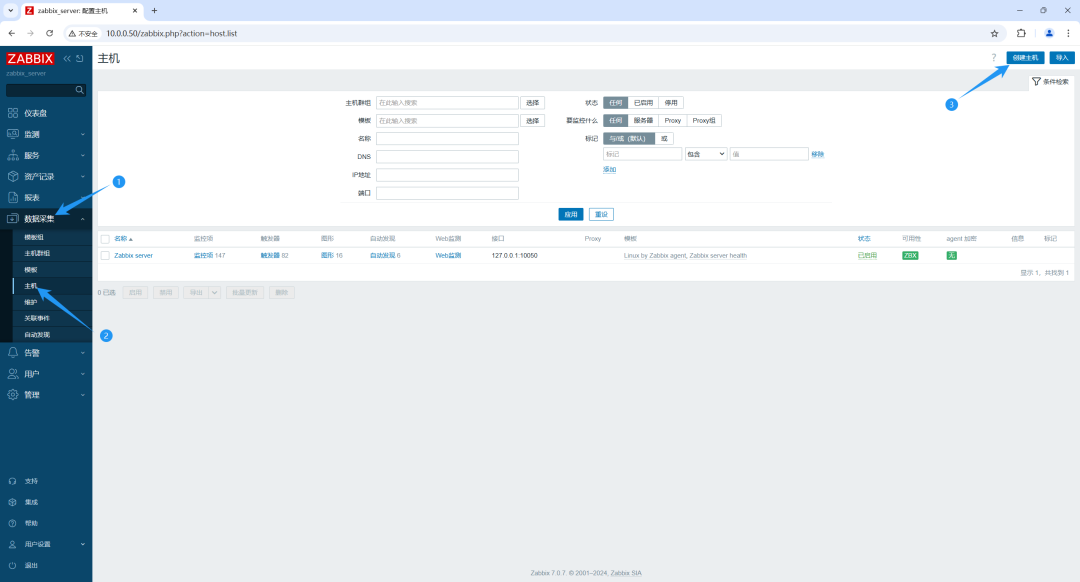
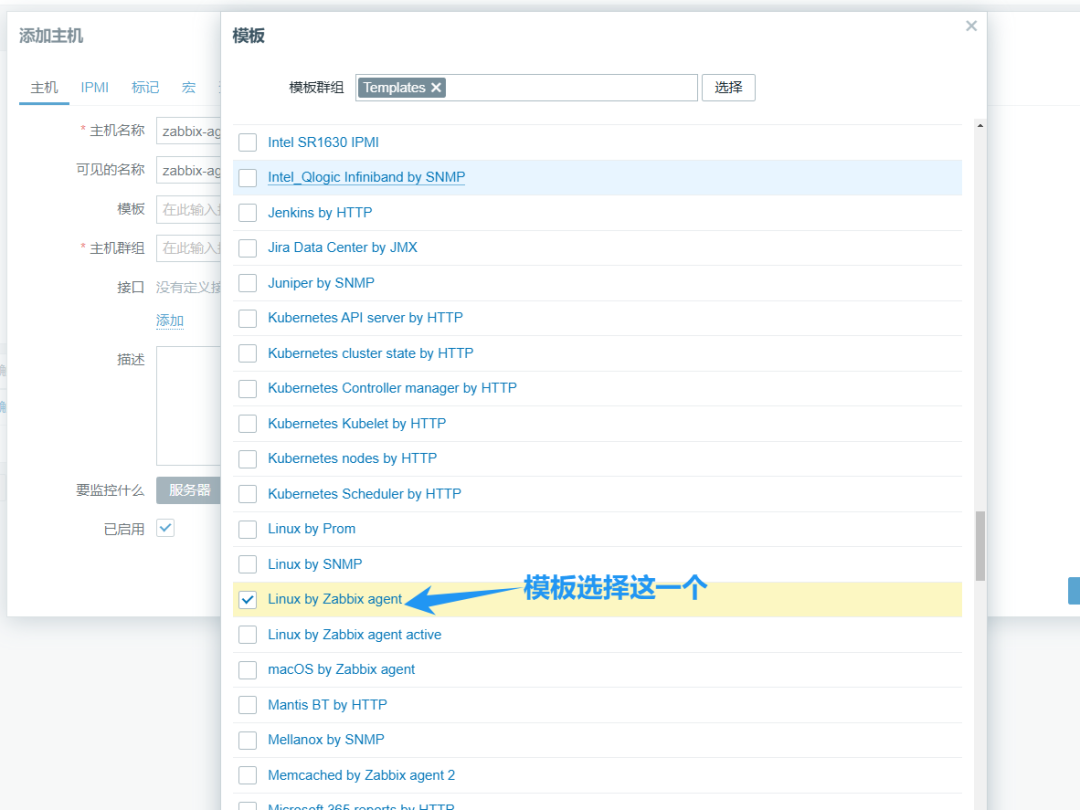
最终的配置
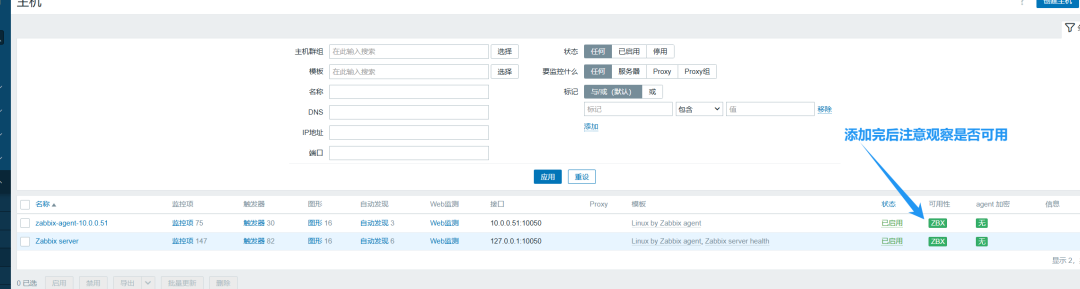
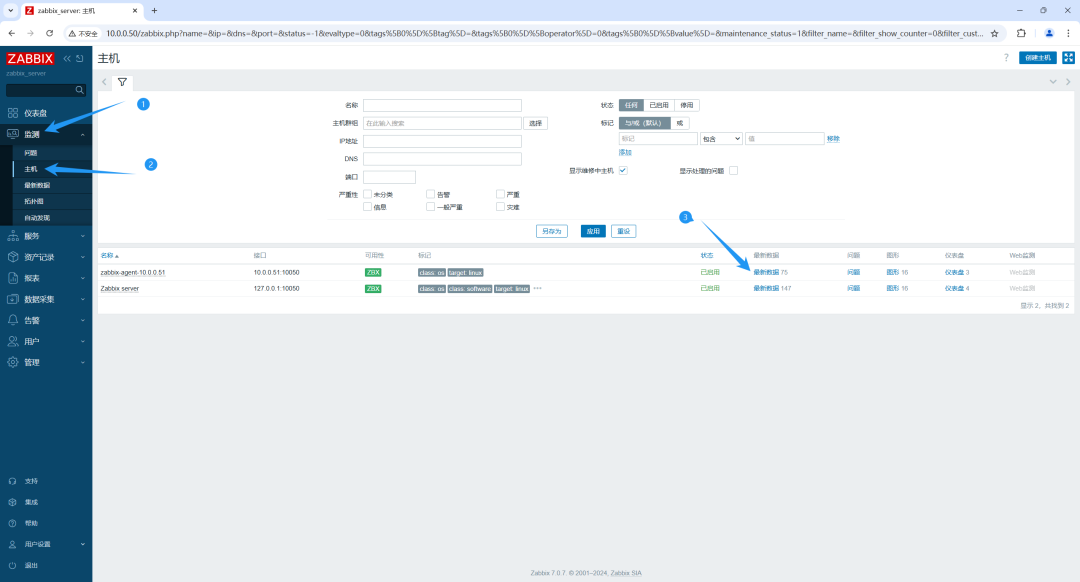
5. web界面查看主机监控

链接:https://www.cnblogs.com/cxjyyds/p/18624841
声明:本文内容及配图由入驻作者撰写或者入驻合作网站授权转载。文章观点仅代表作者本人,不代表电子发烧友网立场。文章及其配图仅供工程师学习之用,如有内容侵权或者其他违规问题,请联系本站处理。
举报投诉
-
如何在Ubuntu 22.04上搭建ftp服务器2023-08-21 2166
-
【开鸿智谷NiobeU4开发板免费试用体验】基于Ubuntu22.04的NiobeU4开发环境搭建2022-09-17 5395
-
OpenHarmony编译固件新增支持Ubuntu22.04平台2023-02-10 912
-
在ubuntu22.04中构建所需的软件报错怎么解决?2023-04-06 652
-
SDK环境部署在ubuntu22.04上,构建完成之后发现work路径下缺少文件如何解决?2023-09-12 530
-
【赛昉科技昉·星光RISC-V单板计算机试用体验】安装ubuntu Server 22.04及挂载分区2022-11-14 3403
-
MS Windows协议轻松远程访问 Ubuntu 22.04 桌面2023-05-29 5364
-
Ubuntu 24.04 LTS选用Linux 6.8为默认内核2024-01-29 2993
-
如何在Ubuntu 22.04上安装NVIDIA显卡驱动2025-05-20 6002
-
系统适配 | RK3588 Ubuntu22.04正式发布2025-09-05 2775
-
开发必看,RK3576基于Ubuntu22.04安装 测试ROS2机器人系统2026-03-13 608
-
瑞芯微RK3588 RKNN模型推理环境部署与功能测试技巧(上)2026-04-21 1218
-
瑞芯微RK3588 RKNN模型推理环境部署与功能测试技巧(下)2026-05-07 352
-
瑞芯微(EASY EAI)RV1126B ubuntu系统SDK源码获取2026-05-23 201
-
玩转RK3588远程控制,Ubuntu22.04 Wayland安装RustDesk工具2026-05-26 128
全部0条评论

快来发表一下你的评论吧 !
