

瑞芯微RK3576人体关键点识别算法(骨骼点)
描述
1.人体关键点识别简介
人体关键点识别是一种基于深度学习的对人进行检测定位与姿势估计的模型,广泛应用于体育分析、动物行为监测和机器人等领域,帮助机器实时解读物理动作。本算法具有运行效率高、实时性强的特点。
本人员检测算法在数据集表现如下所示:
| 人体关键点识别算法 | mAP pose@0.5 |
| Person Pose-S | 86.3 |
| Person Pose-M | 89.3 |
基于EASY-EAI-Orin-Nano(RK3576)硬件主板的运行效率:
| 算法种类 | 运行效率 |
| Person Pose-S | 53ms |
| Person Pose-M | 93ms |
17个人体关键点索引定义:
| 索引 | 定义 |
| 0 | 鼻子 |
| 1 | 左眼 |
| 2 | 右眼 |
| 3 | 左耳 |
| 4 | 右耳 |
| 5 | 左肩 |
| 6 | 右肩 |
| 7 | 左肘 |
| 8 | 右肘 |
| 9 | 左腕 |
| 10 | 右腕 |
| 11 | 左髋关节 |
| 12 | 右髋关节 |
| 13 | 左膝 |
| 14 | 右膝 |
| 15 | 左脚踝 |
| 16 | 右脚踝 |
2.快速上手
如果您初次阅读此文档,请阅读:《入门指南/源码管理及编程介绍/源码工程管理》,按需管理自己工程源码(注:此文档必看,并建议采用【远程挂载管理】方式,否则有代码丢失风险!!!)。
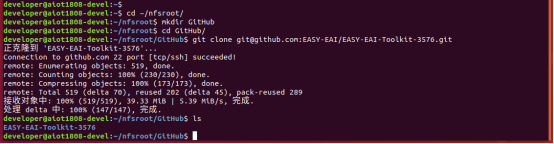
2.1开源码工程下载
先在PC虚拟机定位到nfs服务目录,再在目录中创建存放源码仓库的管理目录:
cd ~/nfsroot mkdir GitHub cd GitHub
再通过git工具,在管理目录内克隆远程仓库(需要设备能对外网进行访问)
git clone https://github.com/EASY-EAI/EASY-EAI-Toolkit-3576.git
注:
* 此处可能会因网络原因造成卡顿,请耐心等待。
* 如果实在要在gitHub网页上下载,也要把整个仓库下载下来,不能单独下载本实例对应的目录。
2.2开发环境搭建
通过adb shell进入板卡开发环境,如下图所示。
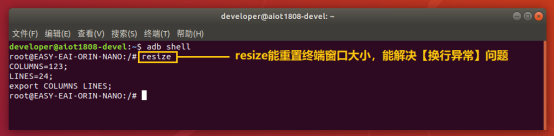
通过以下命令,把nfs目录挂载上nfs服务器。
mount -t nfs -o nolock : /home/orin-nano/Desktop/nfs/

2.3 例程编译
然后定位到板卡的nfs的挂载目录(按照实际挂载目录),进入到对应的例程目录执行编译操作,具体命令如下所示:
cd EASY-EAI-Toolkit-3576/Demos/algorithm-person_pose/ ./build.sh

2.4模型部署
要完成算法Demo的执行,需要先下载人体关键点识别算法模型。
百度网盘链接为:https://pan.baidu.com/s/1ln9kclhgl6JqXtOzS3y5PQ?pwd=1234 (提取码:1234 )。

同时需要把下载的人体关键点识别算法模型复制粘贴到Release/目录:

2.5例程运行及效果
进入开发板Release目录,执行下方命令,运行示例程序:
cd Release/ ./test-person_pose person_pose_m.model test.jpg
运行例程命令如下所示:

结果图片如下所示:

API的详细说明,以及API的调用(本例程源码),详细信息见下方说明。
3.人体关键点检测API说明
- 引用方式
为方便客户在本地工程中直接调用我们的EASY EAI api库,此处列出工程中需要链接的库以及头文件等,方便用户直接添加。
选项 | 描述 |
| 头文件目录 | easyeai-api/algorithm/person_pose |
| 库文件目录 | easyeai-api/algorithm/person_pose |
| 库链接参数 | -lperson_pose |
3.1人体关键点识别初始化函数
人体关键点识别初始化函数原型如下所示。
int person_pose_init(const char *c, person_pose_context_t *p_person_pose, int cls_num)
具体介绍如下所示。
| 函数名: person_pose_init() | |
| 头文件 | person_pose.h |
| 输入参数 | p_model_path: 算法模型的路 |
| 输入参数 | p_person_pose:算法的句柄 |
| 输入参数 | cls_num: 类别数 |
| 返回值 | 成功返回:0 |
| 失败返回:-1 | |
| 注意事项 | 无 |
3.2人体关键点识别运行函数
人体关键点识别运行函数person_pose_run原型如下所示。
std::vector person_pose_run(cv::Mat image, person_pose_context_t *p_person_pose, float nms_threshold, float conf_threshold);
具体介绍如下所示。
| 函数名:person_pose_run() | |
| 头文件 | person_pose.h |
| 输入参数 | image:图像数据输入(cv::Mat是Opencv的类型) |
| 输入参数 | p_person_pose: 算法的句柄 |
| 输入参数 | nms_threshold:NMS阈值 |
| 输入参数 | conf_threshold:置信度阈值 |
| 返回值 | std::vector:person pose检测结果 |
| 注意事项 | 无 |
3.3人体关键点识别释放函数
人体关键点识别释放函数原型如下所示。
int person_pose_release(person_pose_context_t* p_person_pose)
具体介绍如下所示。
| 函数名:person_pose_release() | |
| 头文件 | person_pose.h |
| 输入参数 | p_person_pose: 算法句柄 |
| 返回值 | 成功返回:0 |
| 失败返回:-1 | |
| 注意事项 | 无 |
4.人体关键识别算法例程
例程目录为Demos/algorithm-person_pose/test-person_pose.cpp,操作流程如下。

参考例程如下所示。
#include #include #include #include #include "person_pose.h" #include // 画线 cv::Mat draw_line(cv::Mat image, float *key1, float *key2, cv::Scalar color) { if (key1[2] > 0.1 && key2[2] > 0.1) { cv::Point pt1(key1[0], key1[1]); cv::Point pt2(key2[0], key2[1]); cv::circle(image, pt1, 2, color, 2); cv::circle(image, pt2, 2, color, 2); cv::line(image, pt1, pt2, color, 2); } return image; } // 绘制结果: // 0鼻子, 1左眼, 2右眼,3左耳,4右耳,5左肩,6右肩,7左肘,8右肘,9左腕,10右腕,11左髋关节,12右髋关节,13左膝,14右膝,15左脚踝,16右脚踝 cv::Mat draw_image(cv::Mat image, std::vector results) { long unsigned int i =0; for (i = 0; i < results.size(); i++) { // 绘制脸部 image = draw_line(image, results[i].keypoints[0], results[i].keypoints[1], CV_RGB(0, 255, 0)); image = draw_line(image, results[i].keypoints[0], results[i].keypoints[2], CV_RGB(0, 255, 0)); image = draw_line(image, results[i].keypoints[1], results[i].keypoints[3], CV_RGB(0, 255, 0)); image = draw_line(image, results[i].keypoints[2], results[i].keypoints[4], CV_RGB(0, 255, 0)); image = draw_line(image, results[i].keypoints[3], results[i].keypoints[5], CV_RGB(0, 255, 0)); image = draw_line(image, results[i].keypoints[4], results[i].keypoints[6], CV_RGB(0, 255, 0)); // 绘制上半身 image = draw_line(image, results[i].keypoints[5], results[i].keypoints[6], CV_RGB(0, 0, 255)); image = draw_line(image, results[i].keypoints[5], results[i].keypoints[7], CV_RGB(0, 0, 255)); image = draw_line(image, results[i].keypoints[7], results[i].keypoints[9], CV_RGB(0, 0, 255)); image = draw_line(image, results[i].keypoints[6], results[i].keypoints[8], CV_RGB(0, 0, 255)); image = draw_line(image, results[i].keypoints[8], results[i].keypoints[10], CV_RGB(0, 0, 255)); image = draw_line(image, results[i].keypoints[5], results[i].keypoints[11], CV_RGB(0, 0, 255)); image = draw_line(image, results[i].keypoints[6], results[i].keypoints[12], CV_RGB(0, 0, 255)); image = draw_line(image, results[i].keypoints[11], results[i].keypoints[12], CV_RGB(0, 0, 255)); // 绘制下半身 image = draw_line(image, results[i].keypoints[11], results[i].keypoints[13], CV_RGB(255, 255, 0)); image = draw_line(image, results[i].keypoints[13], results[i].keypoints[15], CV_RGB(255, 255, 0)); image = draw_line(image, results[i].keypoints[12], results[i].keypoints[14], CV_RGB(255, 255, 0)); image = draw_line(image, results[i].keypoints[14], results[i].keypoints[16], CV_RGB(255, 255, 0)); cv::Rect rect(results[i].left, results[i].top, (results[i].right - results[i].left), (results[i].bottom - results[i].top)); cv::rectangle(image, rect, CV_RGB(255, 0, 0), 2); } return image; } /// 主函数 int main(int argc, char **argv) { if (argc != 3) { printf("%s \n", argv[0]); return -1; } const char *p_model_path = argv[1]; const char *p_img_path = argv[2]; printf("Model path = %s, image path = %s\n\n", p_model_path, p_img_path); cv::Mat image = cv::imread(p_img_path); printf("Image size = (%d, %d)\n", image.rows, image.cols); int ret; person_pose_context_t yolo11_pose; memset(&yolo11_pose, 0, sizeof(yolo11_pose)); person_pose_init(p_model_path, &yolo11_pose, 1); double start_time = static_cast(cv::getTickCount()); std::vector results = person_pose_run(image, &yolo11_pose, 0.35, 0.35); double end_time = static_cast(cv::getTickCount()); double time_elapsed = (end_time - start_time) / cv::getTickFrequency() * 1000; std::cout << "person pose run time: " << time_elapsed << " ms" << std::endl; // 绘制结果 image = draw_image(image, results); cv::imwrite("result.jpg", image); printf("Detect size = %ld\n", results.size()); ret = person_pose_release(&yolo11_pose); return ret; }
-
基于RK3576开发板的人脸识别算法2025-05-07 3101
-
瑞芯微RK3588与RK3576技术参数详解2025-09-23 9600
-
米尔瑞芯微RK3576实测轻松搞定三屏八摄像头2025-01-17 2584
-
国产开发板的端侧AI测评-基于米尔瑞芯微RK35762025-02-14 2045
-
适配多种系统,米尔瑞芯微RK3576核心板解锁多样化应用2025-05-23 7132
-
Onenet云网关方案应用--基于米尔瑞芯微RK3576开发板2025-06-06 1744
-
单板挑战4路YOLOv8!米尔瑞芯微RK3576开发板性能实测2025-09-12 3571
-
RK3576机器人核心:三屏异显+八路摄像头,重塑机器人交互与感知2025-10-29 1293
-
基于米尔RK3576核心板的国产割草机器人解决方案2026-04-24 497
-
怎样使用Rock-X SDK对人体骨骼点关键点进行开发获取呢2022-06-29 2381
-
瑞芯微RK3576|触觉智能:开启科技新篇章2024-03-21 2401
-
有奖丨米尔 瑞芯微RK3576开发板免费试用2024-11-12 1667
-
追加名额丨米尔瑞芯微RK3576开发板有奖试用2024-11-22 1611
-
瑞芯微RK3576主板YNH-536-规格书2025-05-19 577
-
瑞芯微RK3576与RK3576S有什么区别,性能参数配置与型号差异解析2025-08-14 2975
全部0条评论

快来发表一下你的评论吧 !
