

详解gitlab+jenkins如何打造ceph的rpm自动编译
电子说
描述
前置条件
准备jenkins和gitlab的安装,这个过程请自行谷歌
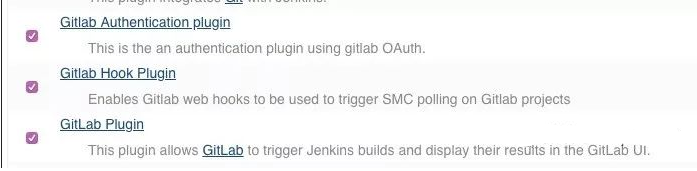
jenkins 插件设置
需要添加的插件:Gitlab Hook、Build Authorization Token Root、Gitlab Authentication、Gitlab

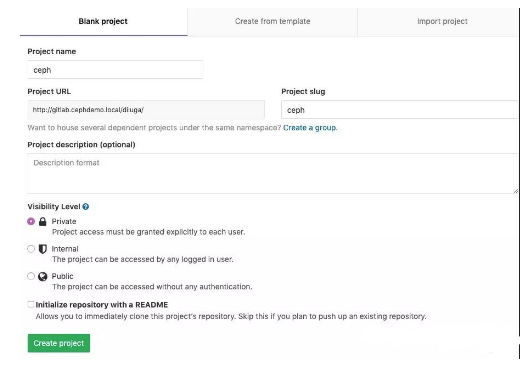
gitlab新建ceph
源码包上传到gitlab
在 http://download.ceph.com/tarballs/ 下载对应的软件包版本,以12.2.12为例
解压软件包
[root@demohost1 supdev]# tar zxf ceph-12.2.12.tar.gz #解压[root@demohost1 ceph-12.2.12]# cd ceph-12.2.12[root@demohost1 ceph-12.2.12]# lsadmin ceph-erasure-code-corpus ChangeLog CONTRIBUTING.rst debian do_freebsd.sh fusetrace make-apk.sh man
pom.xml README.alpine.md README.solaris share
udevalpine ceph-object-corpus cmake COPYING doc Doxyfile INSTALL make-
debs.sh mirroring qa
README.FreeBSD README.xio srcAUTHORS ceph.spec
CMakeLists.txt COPYING-GPL2 doc_deps.deb.txt etc
install-deps.sh make-dist NEWS
README README.git-subtree run-make-check.sh SubmittingPatches.rstbin ceph.spec.in
CodingStyle COPYING-LGPL2.1 do_cmake.sh examples keys
make-srpm.sh PendingReleaseNotes README.aix README.md selinux
systemd[root@demohost1 ceph-12.2.12]# find . -name ".gitignore"| xargs rm -f #关键步骤,剔除掉.gitignore,不然后面编译依赖检查会报错
初始化git,提交到gitlab仓库
[root@demohost1 ceph-12.2.12]# git initInitialized empty Git repository in /home/supdev/ceph-12.2.12/.git/[root@demohost1 ceph-12.2.12]# pwd/home/demo/ceph-12.2.12[root@demohost1 ceph-12.2.12]# git remote add origin http://gitlab.cephdemo.local/diluga/ceph.git[root@demohost1 ceph-12.2.12]# git add --all . The file will have its original line endings in your working directory.warning: CRLF will be replaced by LF in src/rapidjson/thirdparty/gtest/googletest/msvc/gtest_unittest.vcproj.The file will have its original line endings in your working directory.[root@demohost1 ceph-12.2.12]# git commit -m "Initial commit"[master (root-commit) 85a9fab] Initial commit Committer: root
jenkins 任务设置
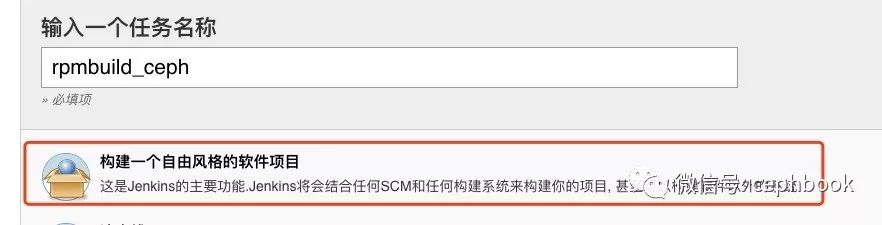
新建一个自由风格的软件项目,输入"rpmbuilid_ceph"
之后在源码管理里面选择git,输入之前新建的gitlab项目信息,设置相应的分支,这里选的是默认master分支
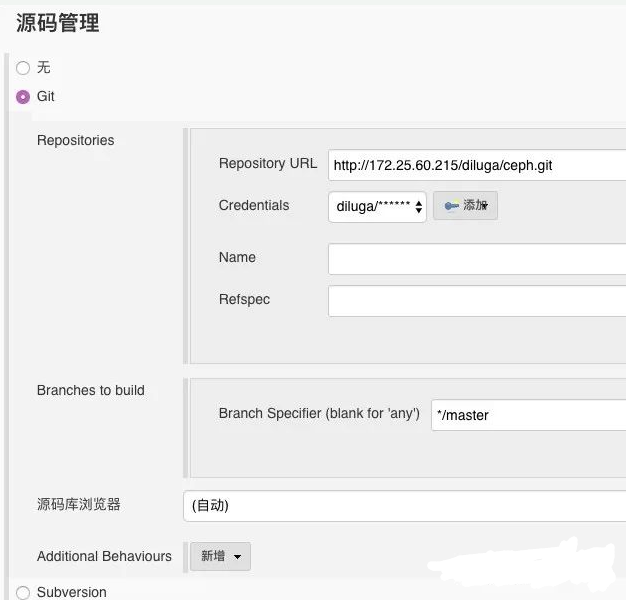
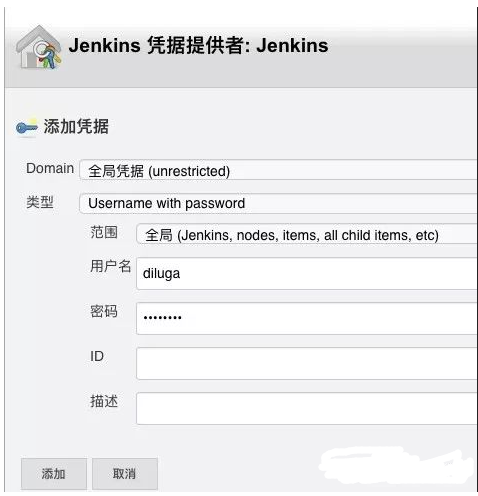
Credentials部分,选择“添加”,输入gitlab的账号和密码如下
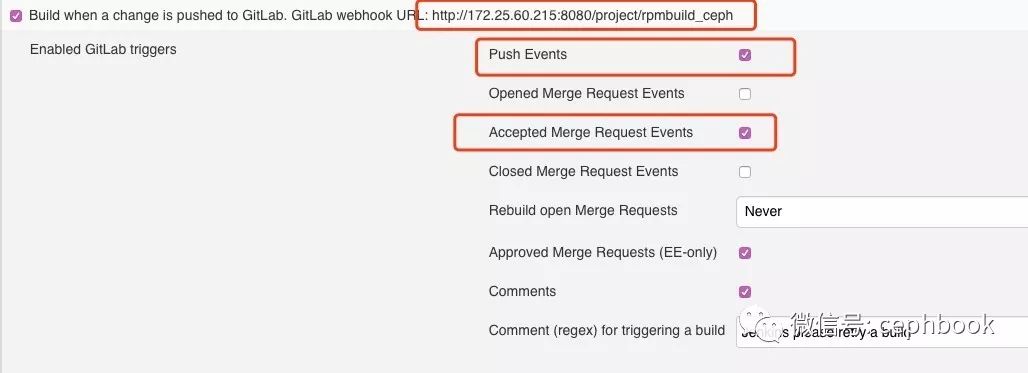
之后设置 构建触发器,选择“Build when a change is pushed to GitLab”,记录“GitLab webhook URL”,选择在 “Push Events” 和 “Accepted Merge Request Events” 两种事件类型的时候触发webhook通知。
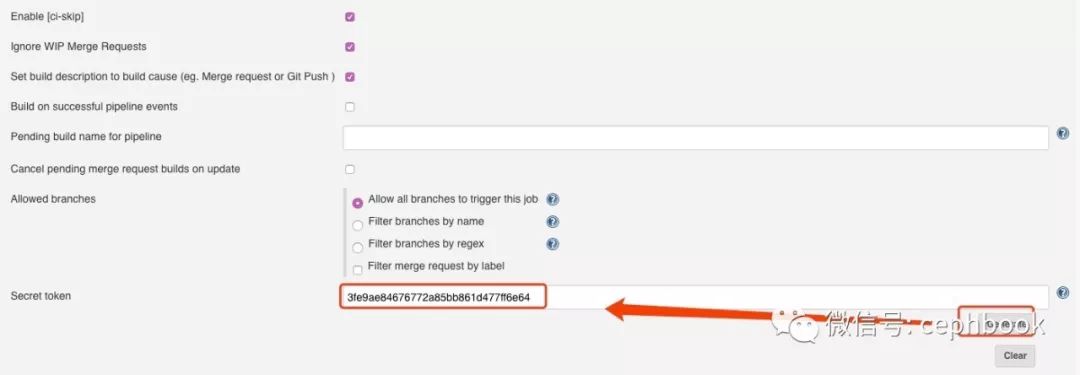
同时在Secret token 点击“Generate”,记录生成的token字段
最后选择"构建” -> "执行 shell",输入对应的rpm编译打包脚本,点击保存,完成jenkins设置。
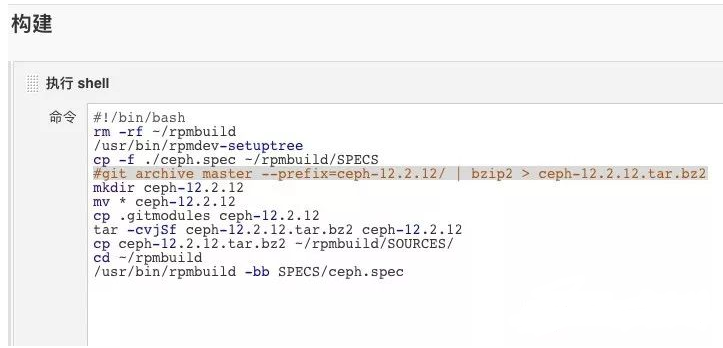
脚本如下
#!/bin/bashrm -rf ~/rpmbuild/usr/bin/rpmdev-setuptreecp -f ./ceph.spec ~/rpmbuild/SPECS#git archive master --prefix=ceph-12.2.12/ | bzip2 > ceph-12.2.12.tar.bz2mkdir ceph-12.2.12mv * ceph-12.2.12cp .gitmodules ceph-12.2.12tar -cvjSf ceph-12.2.12.tar.bz2 ceph-12.2.12cp ceph-12.2.12.tar.bz2 ~/rpmbuild/SOURCES/cd ~/rpmbuild/usr/bin/rpmbuild -bb SPECS/ceph.spec
gitlab webhook设置
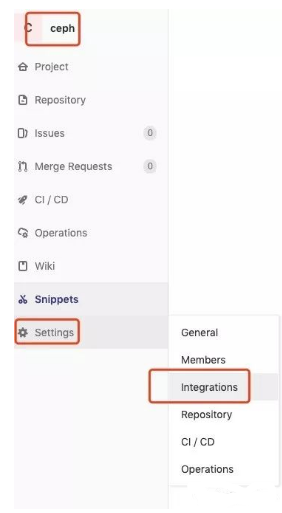
打开gitlab 对应的项目,在 settings -> integrations
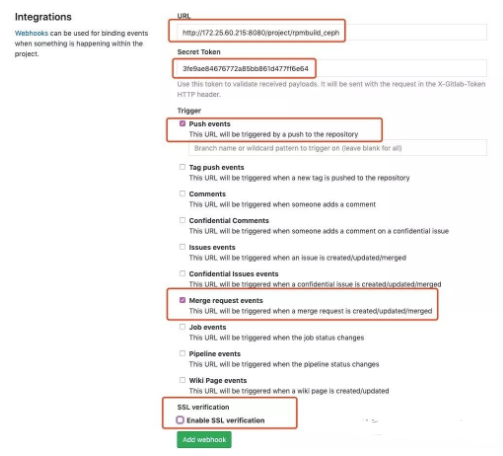
输入之前的“GitLab webhook URL” 和 token,勾选 push和 merge 两种类型的事件,如果没用到SSL,则取消SSL认证。
启动编译
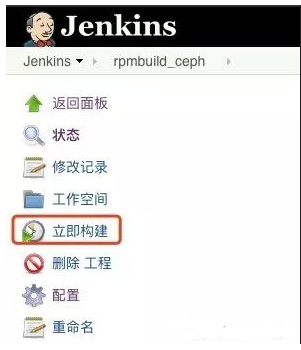
回到jenkins对应的"rpmbuild_ceph"任务列表,点击“立即构建”,开始编译ceph的rpm包,
编译过程可以通过点击具体任务,查看“控制台输出”,看到编辑的当前进度状态。
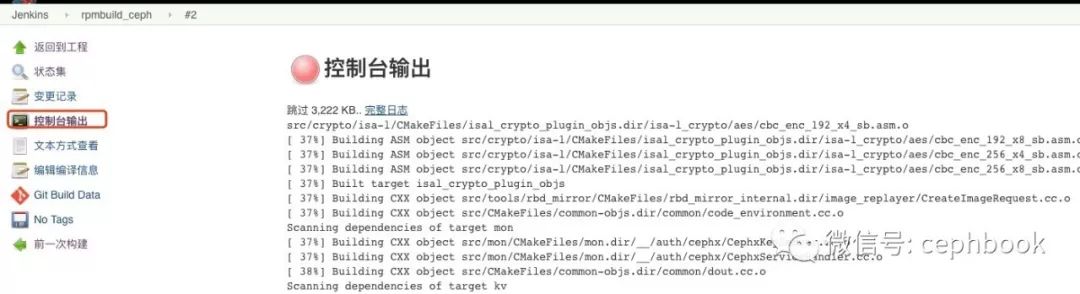
编译完成后,RPM包会存储在jenkins节点的/root/rpmbuild/下。
总结
上面的设置需要注意的有3点
代码提交到gitlab一定要剔除掉“.gitignore”,当然你可以手工去修改具体内容,不然后面编译会报错。
jenkins是基于gitlab的pull和merge事件来触发后台的自动编译,所有后续在gitlab上面的代码pull和merge操作都会触发相应版本的rpm包编译,注意这里只针对源码的master分支做了处理,各位根据实际情况进行调整。
源码里面的“ceph.spec”文件写死了一些配置,如果你改变了编译流程细节,则需要修改对应的配置内容,比如源件包名称必须是"ceph-12.2.12.tar.bz2",具体可以参考ceph.spec内容。
-
Jenkins 与 SonarQube 集成部署,自动化代码质量监控2025-01-07 1462
-
基于Jenkins+GitLab+Maven实现代码自动打包编译发布2023-11-20 7036
-
Ceph是什么?Ceph的统一存储方案简析2022-10-08 2127
-
autobuild-ceph远程部署Ceph及自动构建Ceph2022-05-05 695
-
ceph-zabbix监控Ceph集群文件系统2022-04-26 786
-
Prelink的交叉编译和使用详解2020-06-20 4851
-
ansible playbook+jenkins如何实现自动新增域名2020-06-03 1460
-
Gitlab安装及集成LDAP2019-07-09 1824
-
jenkins自动化部署2018-02-06 5541
-
jenkins简单的使用教程_jenkins安装与配置2017-12-20 10692
全部0条评论

快来发表一下你的评论吧 !
