
资料下载

使用WisBlock生态系统向Ubidots发送数据
描述
项目概况
在本教程中,我们将使用 RAK1906 开发一个应用程序,这是一个可以测量温度、湿度、压力和气体的传感器。我们还将使用RAK13101,它是Quectel mc20 无线通信模块,允许使用SIM 卡通过TCP/UDP 协议将数据发送到云端,因此我们可以将数据存储在Ubidots 平台中。
什么是TCP/UDP?
TCP 代表传输控制协议。它是 Internet 最重要的协议之一,由 Vint Cerf 和 Robert Kahn 在 70 年代开发。与UDP(User Datagram Protocol )一样,它是对应于OSI模型传输层的协议,其主要目的是在数据网络中建立连接以交换数据。它最重要的特性之一是它保证数据的传递没有错误并且按照它们发送的相同顺序。
产品列表
- WisBlock 底板 | RAK5005-O
- 用于带有 LoRa SX1262 的 LoRaWAN 的 Nordic nRF52840 BLE 核心模块 | RAK4631 / RAK4631-R
- 环境传感器BOSCH BME680 | RAK1906
- GSM移远MC20CE | RAK13101
- 电池连接器电缆/5 根电池线
- –0.3V 至 4.3V 电池
- SIM卡
一步步
智慧模块
该物联网硬件项目所需的WisBlock 模块由底座、核心、无线和传感器组成。首先,让我们深入了解每个模块的作用及其工作原理:
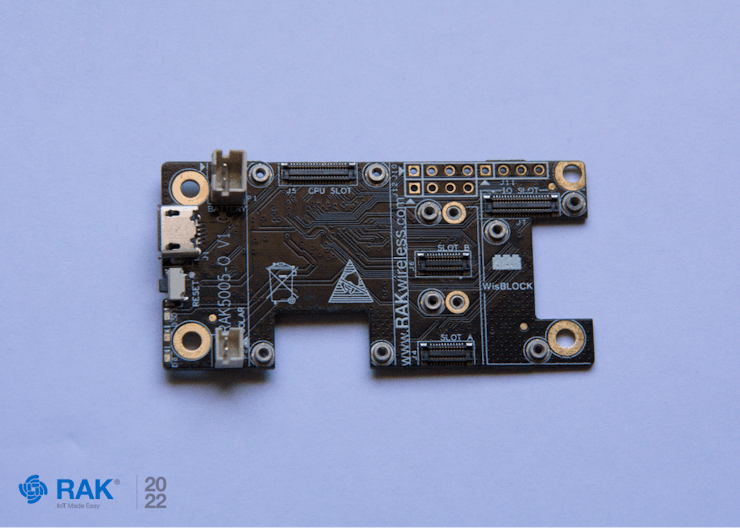
RAK5005-O,也称为WisBlock底板
该基板为所有 WisBlock 模块提供电源和数据。它支持核心、显示器连接和传感器本身。稍后我们将看到一切看起来如何。
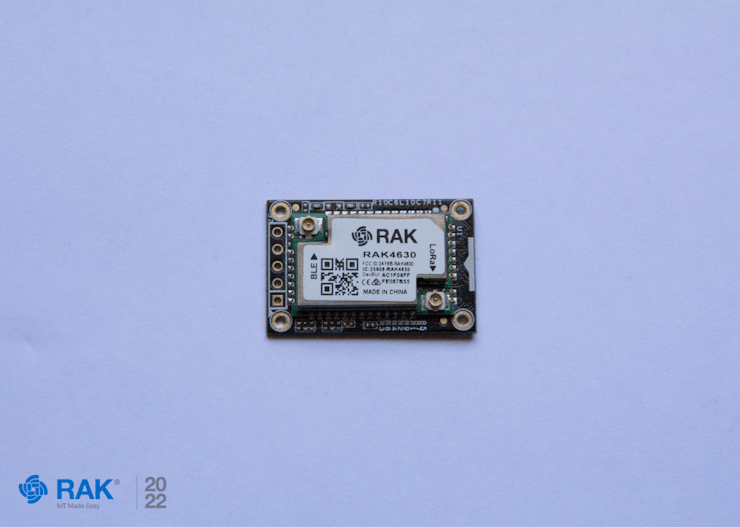
RAK4631,也称为WisBlock LPWAN模块
基于超低功耗 MCU Nordic nRF52840,这是该项目的核心,包含 SX1262 Semtech LoRa ® IC 和 BLE(低功耗蓝牙)。
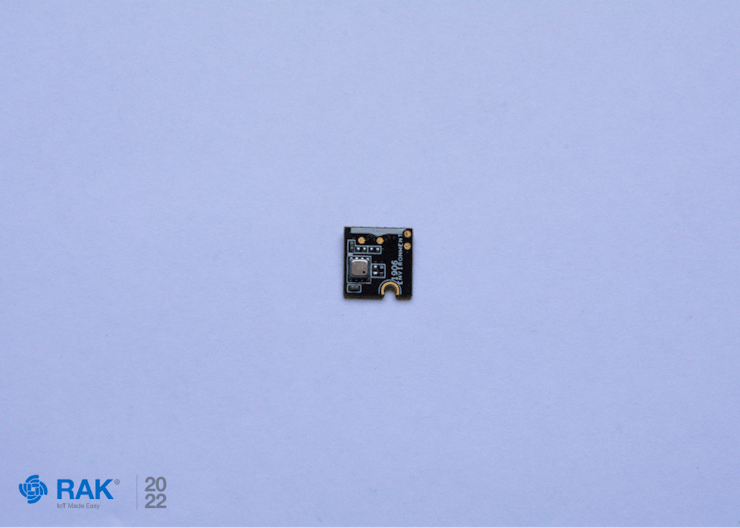
RAK1906,又称WisBlock环境传感器
该传感器基于 Bosch® BME680 模块,可以同时测量多个量级,例如:
- 温度
- 湿度
- 高度
- IAQ(室内空气质量)
- 气体:二氧化碳
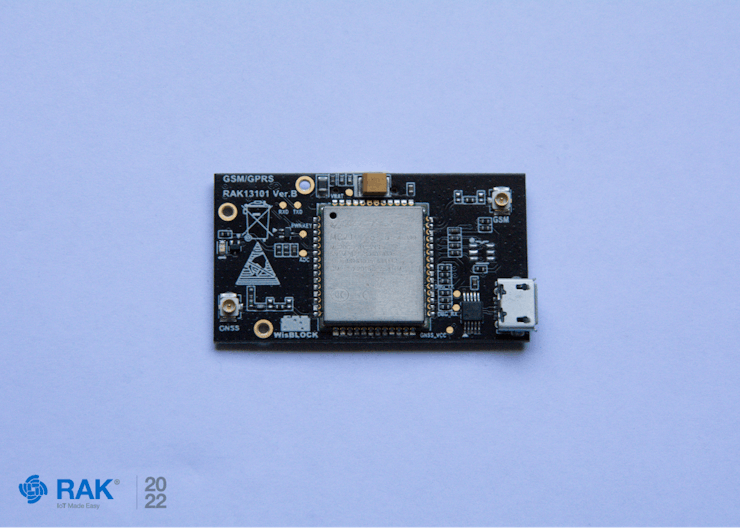
RAK13101,也称为GSM/GPRS模块
该模块通过使用 Quectel MC20CE 蜂窝模块在 WisBlock 平台上提供 GSM/GPRS 功能。
如何连接一切
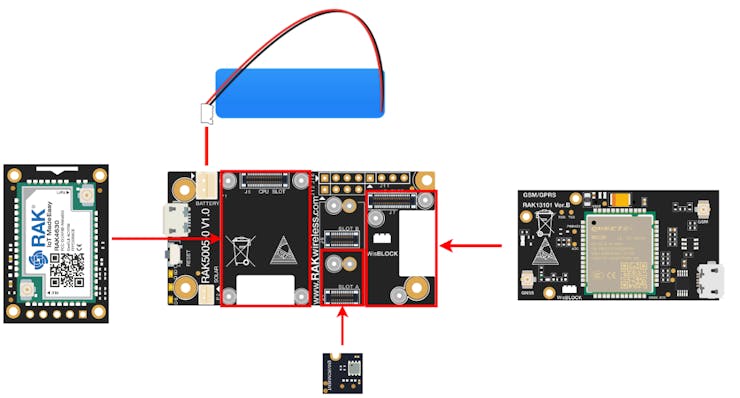
现在您知道您需要什么模块以及它们如何工作,让我们将 RAK4631 Core 连接到 CPU 插槽。
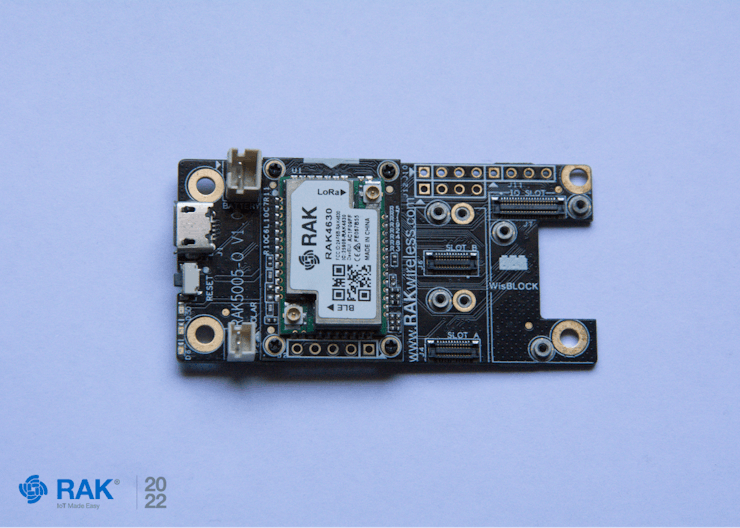
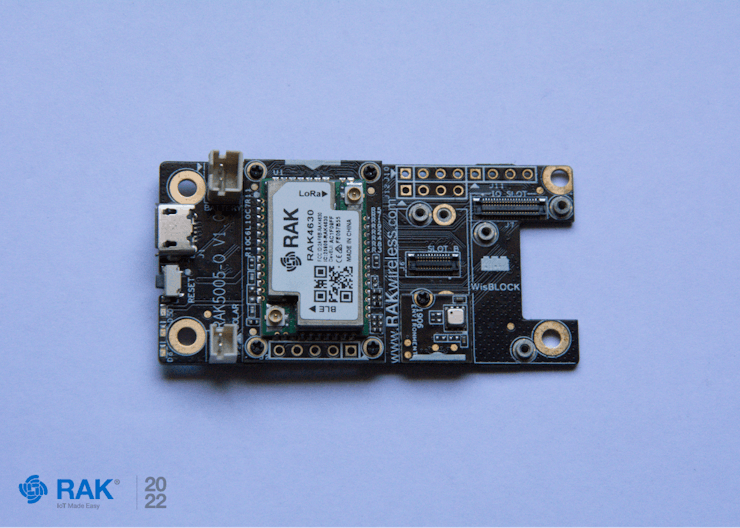
然后,RAK5005-O底座的Slot A中的RAK1906传感器,均使用M1.2x3螺丝。
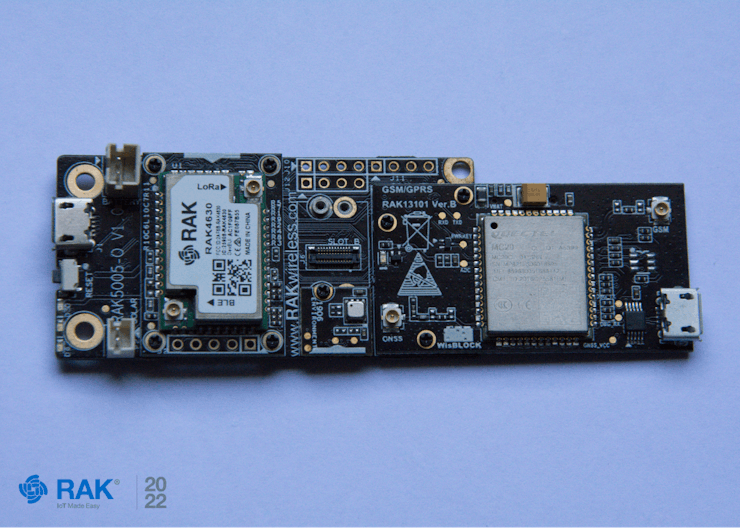
接下来,使用 M1.2x3 螺钉将 RAK13101 连接到 IO 插槽。
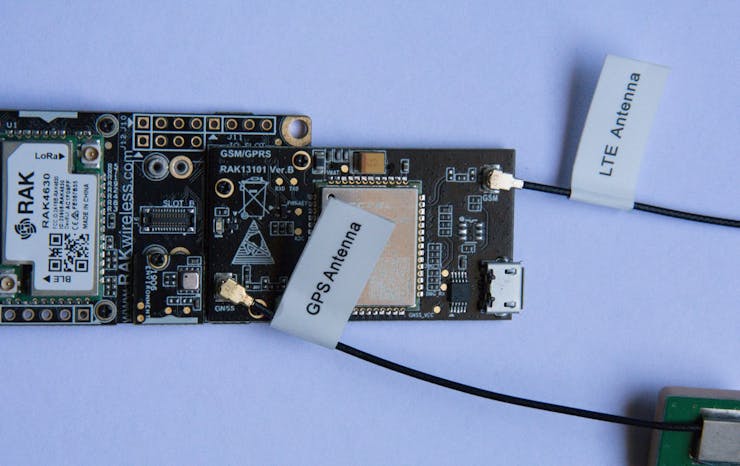
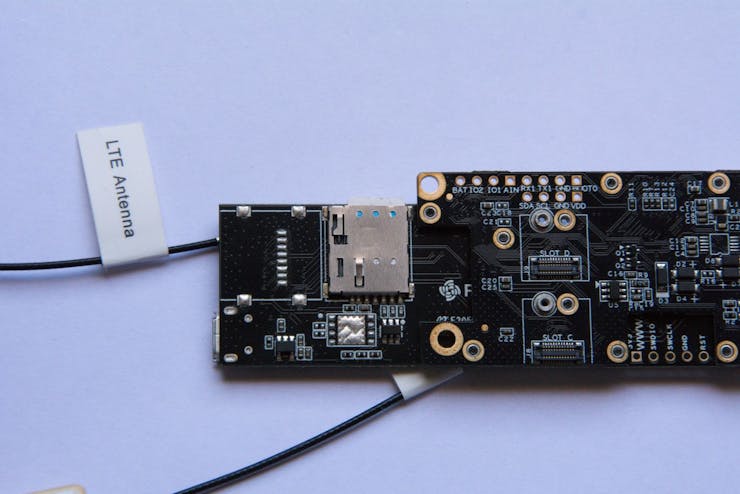
对于此模块,将天线连接到正确的位置:GPS 天线连接到 GNSS 连接器,LTE 天线连接到 GSM 连接器,就像这样。
最后,将SIM卡插入RAK13101模块的背面,往里推,直到听到咔哒一声。
这是查看连接方式的示意图。
上传固件
Arduino BSP安装
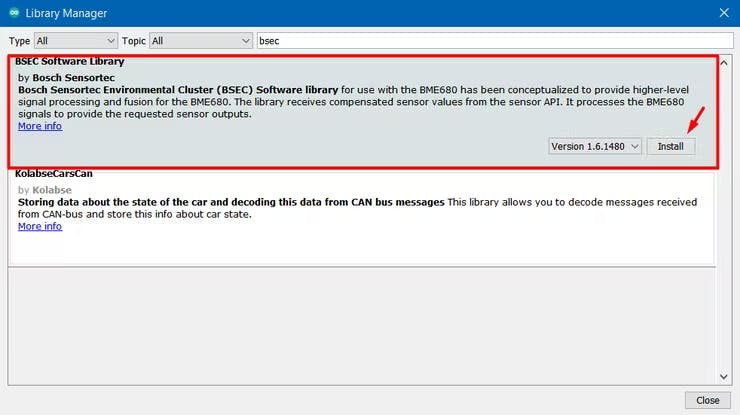
对于此步骤,您可以参考我们的文档,因为我们需要 RAK4631 内核的 BSP。安装 BSP 后,我们需要一些额外的库。转到工具 > 管理库以打开库管理器。然后,使用名称搜索它们并安装我们在下图中突出显示的那些,或者您也可以在代码中找到它们。
检查由 Bosch Sensortec 制作的库名称“BSEC Software Library”。
创建 Ubidots 帐户
现在,让我们在Ubidots平台创建账户,您可以在这里注册。
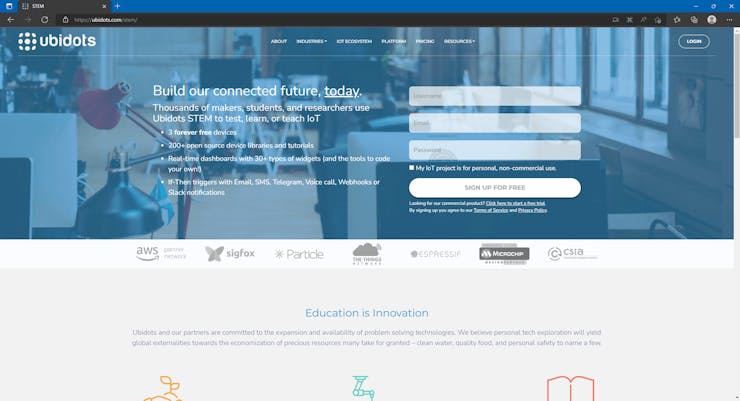
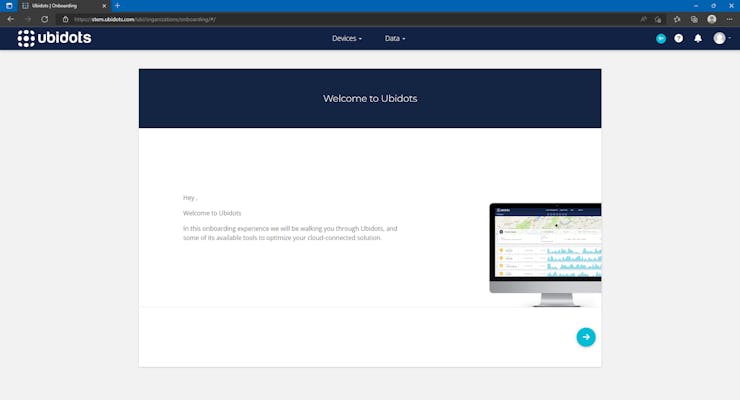
创建帐户后,您将看到入职页面。
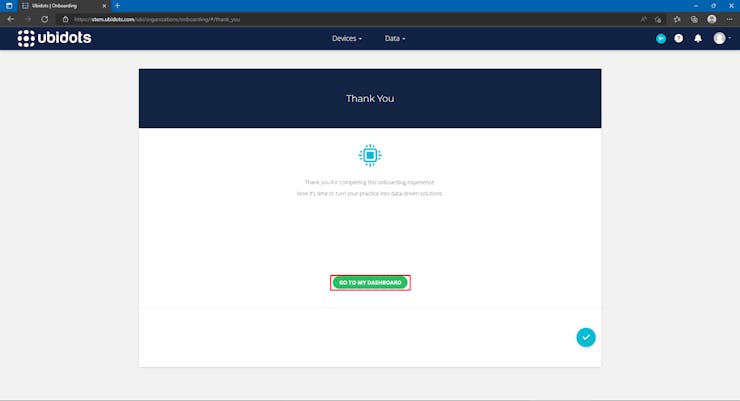
入职后单击“转到我的仪表板”按钮。
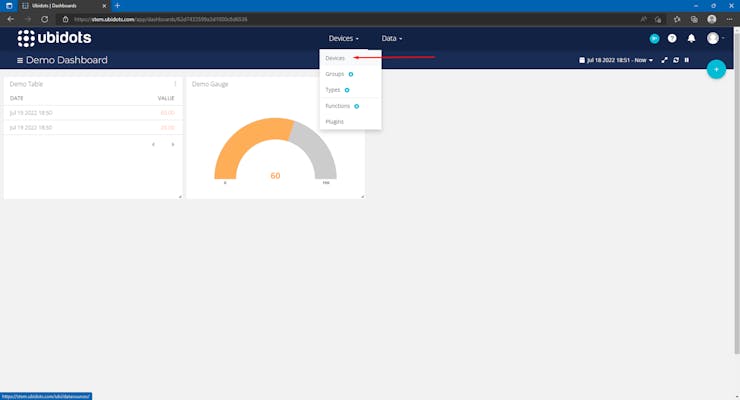
现在您将看到一个演示仪表板,单击顶部的设备,然后再次单击设备。
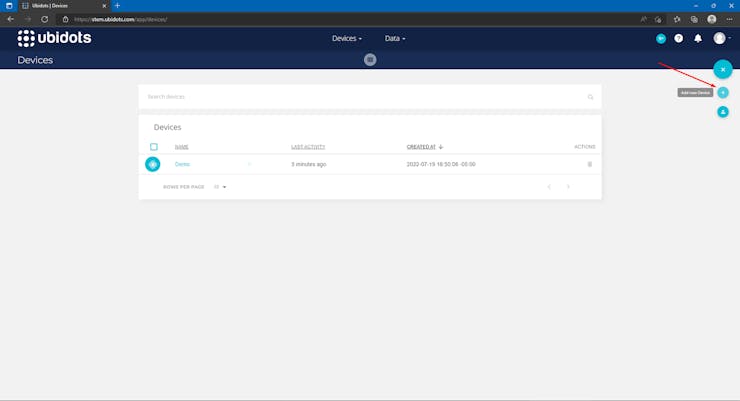
之后,您将看到演示设备。单击屏幕右侧的+按钮和添加新设备选项。
单击空白设备按钮。
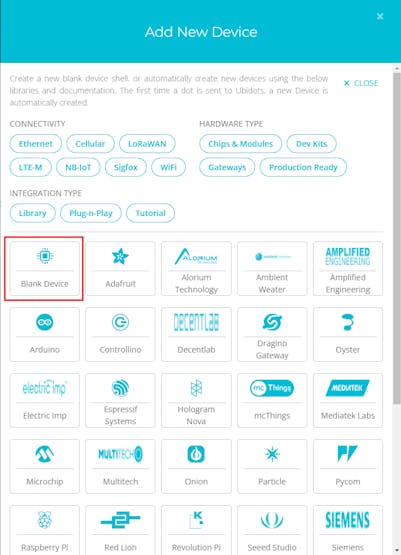
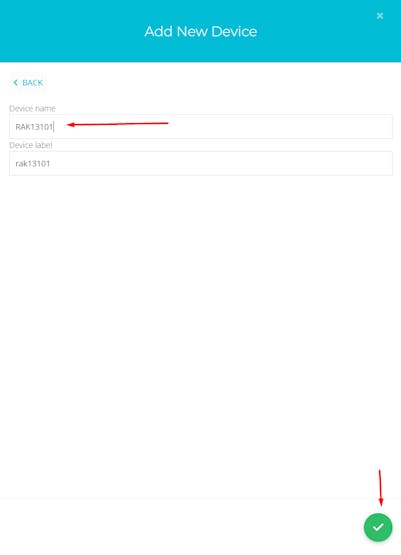
然后键入您的设备名称,在本例中为RAK13101。稍后单击窗口右下角的复选标记。
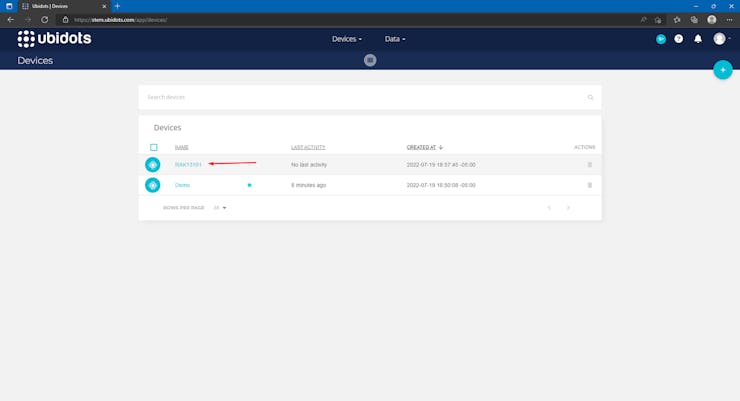
新设备将以给定名称出现在屏幕上,单击它。
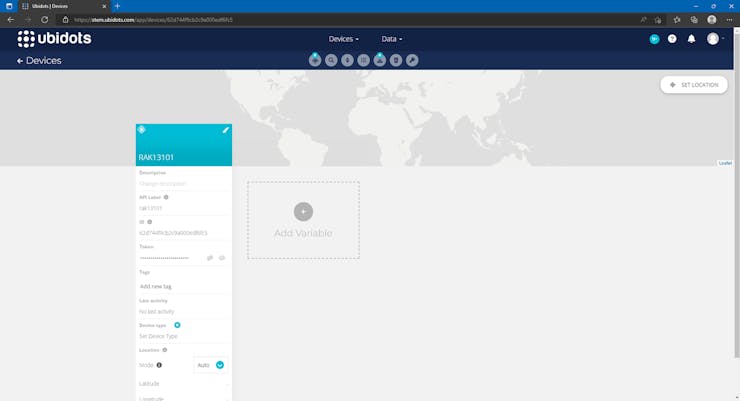
您将看到您的设备没有数据,现在您需要保存默认令牌以供稍后在固件中使用。
单击您的用户图片,然后单击 API 凭据选项。
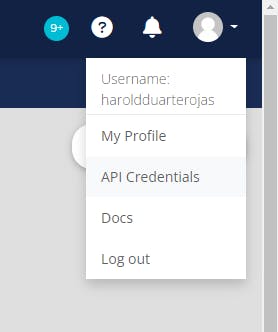
API 密钥 wl 和默认令牌将出现。单击它以显示它,或者只需单击复制按钮,稍后您将需要该令牌。

创建草图
复制此项目的固件并将其粘贴到新的 Arduino 草图中。为此,请单击“文件”>“新建”,然后粘贴以下代码(您也可以在我们的GitHub 上找到它):
在粘贴新代码之前考虑删除 Void Loop 和 Void Setup
/**
   @file RAK13101_TCP_Ubidots_example.ino
   @author harold.duarte@rakwireless.com
   @brief example of the use of the RAK13101 with the TCP protocol and the ubidots platform
   @version 0.1
   @date 2022-07-19
   @copyright Copyright (c) 2022
**/
#include
#define POWER_KEY WB_IO5 //powerkey for the GPRS module
#include  //RAK1906
#include  //RAK1906
Adafruit_BME680 bme;
// Might need adjustments
#define SEALEVELPRESSURE_HPA (1008.76) //Barometric Pressure in mbar

void bme680_init()
{
  Wire.begin();

  if (!bme.begin(0x76)) {
    Serial.println("Could not find a valid BME680 sensor, check wiring!");
    return;
  }

  // Set up oversampling and filter initialization
  bme.setTemperatureOversampling(BME680_OS_8X);
  bme.setHumidityOversampling(BME680_OS_2X);
  bme.setPressureOversampling(BME680_OS_4X);
  bme.setIIRFilterSize(BME680_FILTER_SIZE_3);
  bme.setGasHeater(320, 150); // 320*C for 150 ms
}


void setup() {

  Serial.println("MC20 power up!");
  Serial1.begin(115200); // GPRS shield baud rate
  Serial.begin(115200); //RAK4631 BR
  delay(100);

  // Initialize the built in LED
  pinMode(LED_BUILTIN, OUTPUT);
  digitalWrite(LED_BUILTIN, LOW);

  time_t timeout = millis();
  bool moduleSleeps = true;
  if (moduleSleeps)
  {
    // Module slept, wake it up
    pinMode(POWER_KEY, OUTPUT);
    digitalWrite(POWER_KEY, 0);
    delay(200);
    digitalWrite(POWER_KEY, 1);
    delay(2000);
    digitalWrite(POWER_KEY, 0);
    delay(1000);
    while (!Serial)
    {
      if ((millis() - timeout) < 5000)
      {
        delay(100);
        digitalWrite(LED_BUILTIN, !digitalRead(LED_BUILTIN));
      }
      else
      {
        break;
      }
    }
    bme680_init();

  }
}

void loop() {

  if (! bme.performReading()) {
    Serial.println("Failed to perform reading :(");
    return;
  }

  delay(15000); //waits 15 seconds to send data again
  tcp();
}


void tcp()
{
  Serial1.println("AT+QIMODE=0");  //Use AT+QIMODE command to select TCPIP Stack mode, it is non-transparent mode when AT+QIMODE=0, and AT+QIMODE=1 is transparent
  delay(200);
  ShowSerialData();
  Serial1.println("AT+QICSGP=1,\"internet.movistar.com.co\",\"movistar\",\"movistar\",0"); //Use AT+QICSGP=1,internet.movistar.com.co,movistar,movistar,0 to set APN as internet.movistar.com.co,user name as movistar,password as movistar
  delay(500);
  ShowSerialData();
  Serial1.println("AT+QIREGAPP");  //Start TCPIP task
  delay(200);
  ShowSerialData();
  Serial1.println("AT+QICSGP?");  //Check the current connecting mode(1: GPRS connecting mode£¬0: CSD connecting mode)
  delay(200);
  ShowSerialData();
  Serial1.println("AT+QIACT");  //The current connecting mode is GPRS connecting mode
  delay(200);
  ShowSerialData();
  Serial1.println("AT+QILOCIP");  //Get the local IP address
  delay(400);
  ShowSerialData();
  Serial1.println("ATV1");  //Use ATV1 to set the response format
  delay(200);
  ShowSerialData();
  Serial1.println("AT+QIHEAD=1");  //Use AT+QIHEAD=1 to add the header information when receive data
  delay(200);
  ShowSerialData();
  Serial1.println("AT+QIDNSIP=1");  //Use AT+QIDNSIP=0 to use the IP address to establish TCP/UDP session, while AT+QIDNSIP=1 is use the domain name to establish TCP/UDP session
  delay(200);
  ShowSerialData();
  Serial1.println("AT+QIOPEN=\"TCP\",\"industrial.api.ubidots.com\",\"9012\"");  //Use AT+QIOPEN=TCP,industrial.api.ubidots.com,9012 to connect to a TCP server (IP address: industrial.api.ubidots.com:9012) If return CONNECT OK means successfully connected to the remote server
  delay(5000);
  ShowSerialData();
  Serial1.println("AT+QISEND");  //AT+QISEND, send data to server, ">" from the UART indicates the following input data is considered as data to be send. After receiving ">", input data (TEST), the maximum length of the data is 1460, the data beyond 1460 will be omitted. Then use to send data. When receive SEND OK means the data has been sent+z>
  delay(2000);
  ShowSerialData();
  Serial1.println(">");
  delay(200);
  ShowSerialData();
  double temp = bme.temperature;
  double hum = bme.humidity;
  double pres = bme.pressure / 100.0;
  double co2 = bme.gas_resistance / 1000.0;
  String token = "BBFF-5mRERLy7jMPS9G0vHoAoTIoPz99IEQ"; //Default token from your ubidots account
  String device_name = "RAK13101"; //your device name on the ubidots platform
  String StrThree = "ubidots/1.0|POST|" + token + "|" + device_name + "=>Temperature:" + temp + ",Humidity:" + hum + ",Pressure:" + pres + ",Gas:" + co2 + "|end" ;
  Serial1.println(StrThree);//send message
  delay(1000);
  ShowSerialData();
  Serial1.println((char)26); // Ctrl+z
  Serial1.println();
  delay(200);
  ShowSerialData();
  Serial1.println("AT+QICLOSE"); //Use AT+QICLOSE to close the connecting of TCP/UDP
  delay(1000);
  ShowSerialData();
  Serial1.println("AT+QIDEACT"); //Use AT+QIDEACT to deactivate GPRS context
  delay(1000);
  ShowSerialData();

}


void ShowSerialData()// if you want to see the AT commands on the Serial Monitor
{
  while (Serial1.available() != 0)
    Serial.write(Serial1.read());
}
您之前复制的令牌需要在第 129 行进行更改,在第 130 行您还需要复制您在 Ubidots 平台上使用的设备名称,它应该如下所示:
String token = "BBFF-5mRERLy7jMPS9G0vHoAoTIoPz99IEQ"; //Default token from your ubidots account
  String device_name = "RAK13101"; //your device name on the ubidots platform
  String StrThree = "ubidots/1.0|POST|" + token + "|" + device_name + "=>Temperature:" + temp + ",Humidity:" + hum + ",Pressure:" + pres + ",Gas:" + co2 + "|end" ;
上传固件并在上传后使用重置按钮重置设备一次。28秒后,您将在Ubidots平台上看到您的信息!
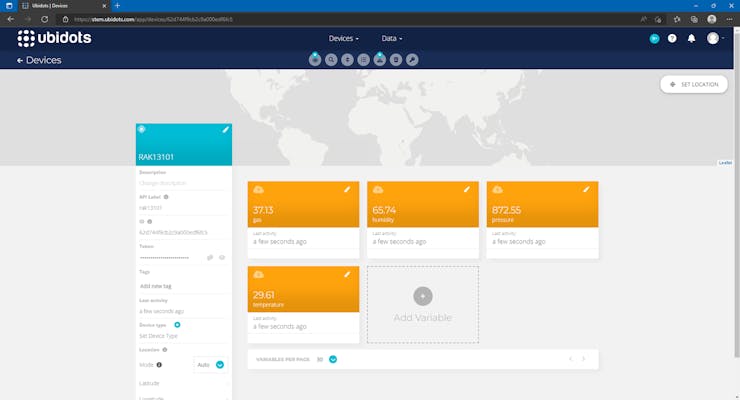
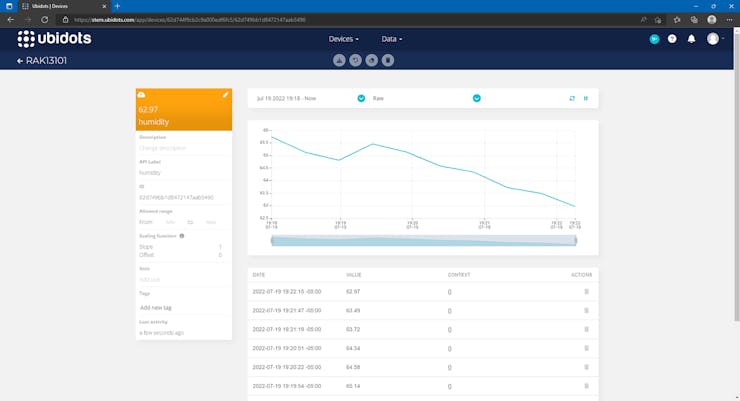
您可以打开每个变量并查看带有多个选项的图形,例如 RAW 数据、平均值、最小值、最大值、求和和计数、样本日期以及每个变量的更多信息
结论
我们完成了!您可以使用 Sim 卡通过 GPRS 网络成功发送数据,并使用 WisBlock 模块连接到 Ubidots 等云服务。此外,您将能够一次读取许多变量,例如温度、湿度、压力和二氧化碳水平。您甚至可以将它连接到您的手机并读取世界任何地方的数据!正如我们常说的#IoTMadeEasy。
此外,请关注我们的Hackster Hub 并成为我们社区的一员,以了解更多 DIY IoT 项目和新闻。
如果您想购买我们的产品,请访问我们的商店
欢迎与我们分享,写下你的疑惑,在评论区与我们互动。
声明:本文内容及配图由入驻作者撰写或者入驻合作网站授权转载。文章观点仅代表作者本人,不代表电子发烧友网立场。文章及其配图仅供工程师学习之用,如有内容侵权或者其他违规问题,请联系本站处理。 举报投诉
- 相关下载
- 相关文章


