资料下载

连接到AWS IoT的RIOT-OS应用程序
描述
请注意,本教程假设您使用的是 Linux PC。
先决条件
这个项目建立在这个项目中开发的云基础设施之上。
1-您必须遵循以下步骤:
2-您必须安装 Git。如果没有安装 Git,可以在这里下载。
搭建 MQTT-SN 透明网关
1- 打开终端并运行以下命令来设置网关:
> git clone -b experiment https://github.com/eclipse/paho.mqtt-sn.embedded-c
> cd paho.mqtt-sn.embedded-c/MQTTSNGateway
> make SENSORNET=udp6
> make install
> make clean
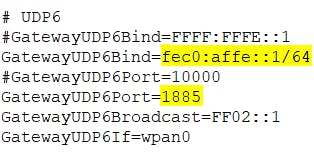
2-打开gateway.conf文件并以这种方式编辑内容:
#**************************************************************************
# Copyright (c) 2016-2019, Tomoaki Yamaguchi
#
# All rights reserved. This program and the accompanying materials
# are made available under the terms of the Eclipse Public License v1.0
# and Eclipse Distribution License v1.0 which accompany this distribution.
#
# The Eclipse Public License is available at
#    http://www.eclipse.org/legal/epl-v10.html
# and the Eclipse Distribution License is available at
#   http://www.eclipse.org/org/documents/edl-v10.php.
#***************************************************************************
#
# config file of MQTT-SN Gateway
#

#BrokerName=mqtt.eclipse.org
#BrokerPortNo=1883
#BrokerSecurePortNo=8883

BrokerName=localhost
BrokerPortNo=1884
#BrokerSecurePortNo=8883

#
# When AggregatingGateway=YES or ClientAuthentication=YES,
# All clients must be specified by the ClientList File
#

ClientAuthentication=NO
AggregatingGateway=NO
QoS-1=NO
Forwarder=NO

#ClientsList=/path/to/your_clients.conf

PredefinedTopic=NO
#PredefinedTopicList=/path/to/your_predefinedTopic.conf

#RootCAfile=/etc/ssl/certs/ca-certificates.crt
#RootCApath=/etc/ssl/certs/
#CertsFile=/path/to/certKey.pem
#PrivateKey=/path/to/privateKey.pem

GatewayID=1
GatewayName=PahoGateway-01
KeepAlive=900
#LoginID=your_ID
#Password=your_Password


# UDP
GatewayPortNo=10000
MulticastIP=225.1.1.1
MulticastPortNo=1883

# UDP6
#GatewayUDP6Bind=FFFF:FFFE::1
GatewayUDP6Bind=fec0:affe::1/64
#GatewayUDP6Port=10000
GatewayUDP6Port=1885
GatewayUDP6Broadcast=FF02::1
GatewayUDP6If=wpan0

# XBee
Baudrate=38400
SerialDevice=/dev/ttyUSB0
ApiMode=2

# LOG
ShearedMemory=NO;
基本上,您必须配置 MQTT 部分(我们将与之交互的代理,在我的情况下它是一个localhost并在1884端口中运行)。

另一件重要的事情是您必须绑定 upd6 地址(fec0:affe::1/64与您在 RIOT-OSREADME文件中看到的用于 MQTT-SN 连接的地址相同)和端口(1885是允许您从 RIOT 接收消息的端口实例)。

3- 要执行网关,请从安装 Paho 的目录打开终端并运行以下命令:
> ./MQTT-SNGateway
将 Mosquitto MQTT 代理桥接到 AWS IoT
1- 安装 Mosquitto 代理。你可以在这里下载。
2- 现在,您需要配置网桥,以便 Mosquitto 代理可以创建到 AWS IoT 的连接。为此,您必须创建一个新mosquitto_bridge.conf文件并在其中写入以下行:
# =================================================================
# Bridges to AWS IOT
# =================================================================

# AWS IoT endpoint
connection awsiot
address a6as4ru7uhh5u-ats.iot.us-east-1.amazonaws.com:8883

# Specifying which topics are bridged
# topic awsiot_to_localgateway in 1
# topic localgateway_to_awsiot out 1
# topic both_directions both 1
topic sensor/values both 1

# Setting protocol version explicitly
bridge_protocol_version mqttv311
bridge_insecure false

# Bridge connection name and MQTT client Id,
# enabling the connection automatically when the broker starts.
cleansession true
clientid bridgeawsiot
start_type automatic
notifications false
log_type all

# =================================================================
# Certificate based SSL/TLS support
# -----------------------------------------------------------------
#Path to the rootCA
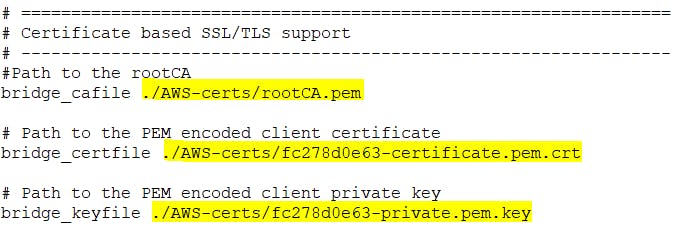
bridge_cafile ./AWS-certs/rootCA.pem

# Path to the PEM encoded client certificate
bridge_certfile ./AWS-certs/fc278d0e63-certificate.pem.crt

# Path to the PEM encoded client private key
bridge_keyfile ./AWS-certs/fc278d0e63-private.pem.key
用您自己的端点替换此部分很重要:

在这里你必须插入你的证书的路径:

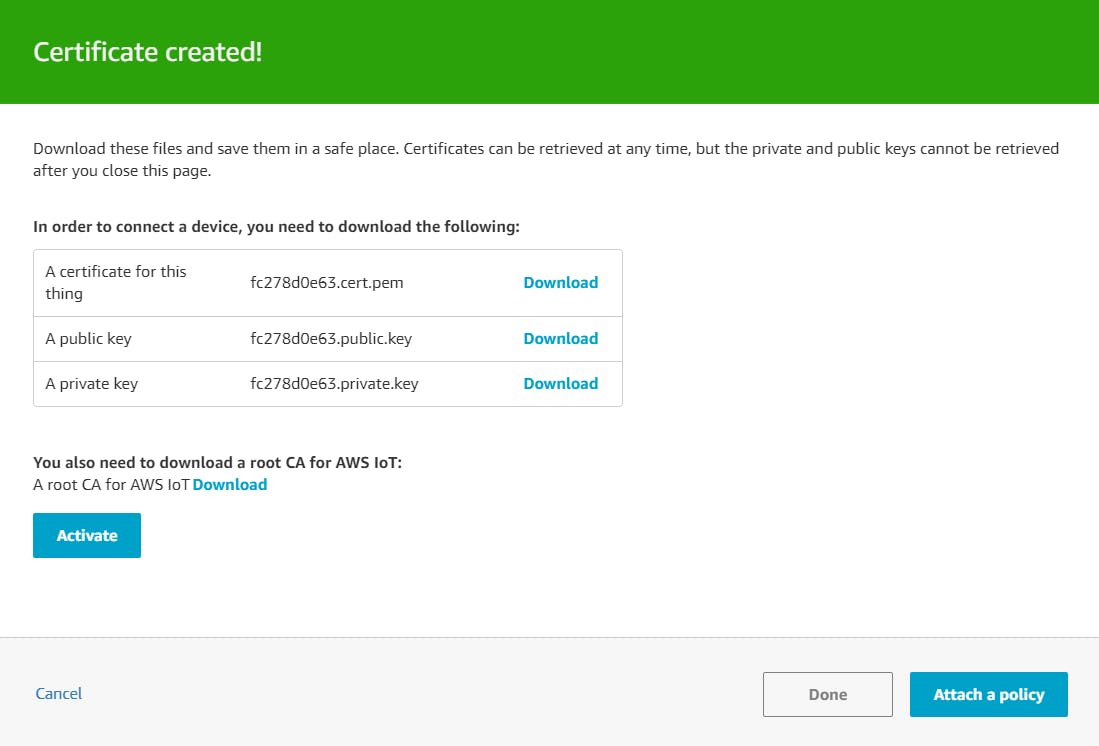
请记住,您已在此步骤中下载并保存了证书:

3- 要在端口上运行 Mosquitto 代理1884,请从配置文件的根目录打开终端,然后执行以下命令:
> sudo mosquitto -c ./mosquitto_bridge.conf –p 1884
防暴应用
初步要求
您必须已安装:
-
吉特。
声明:本文内容及配图由入驻作者撰写或者入驻合作网站授权转载。文章观点仅代表作者本人,不代表电子发烧友网立场。文章及其配图仅供工程师学习之用,如有内容侵权或者其他违规问题,请联系本站处理。 举报投诉
- 相关下载
- 相关文章


