
资料下载


使用电报机器人进行自动化开源
李明聪
分享资料个
描述
嘿极客,希望你做得很好。在本文中,我们将制作一个非常有趣的项目,即使用电报机器人进行自动化。在这个项目中,我们将在电报机器人的帮助下控制三个 LED。除了 LED,您还可以根据需要连接其他设备。您可以在我们的网站上阅读全文。
什么是电报机器人
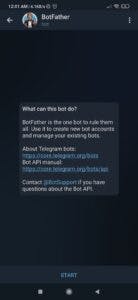
在开始之前,请在您的智能手机上下载电报应用程序并在其上注册一个帐户。然后去搜索栏搜索botfather并打开带有蓝色勾号的帐户。
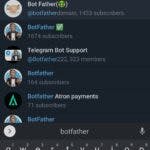
现在单击开始启动机器人,您会找到一个菜单。
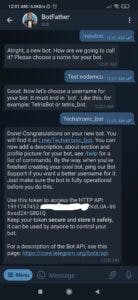
然后单击新机器人以创建一个新项目。

现在它会要求您提供一个合适的用户名,然后为您想要制作的机器人提供一个唯一的名称。对于用户名,最后使用 _bot,如下所示。在此之后,您将获得一个必须复制的唯一令牌 ID。然后将此ID粘贴到代码中。然后打开你的机器人。
打开类型 start 后,它会回复你的消息,如下图所示。现在根据您的需要在应用程序上发送命令,例如开/关灯,LED 根据您的操作打开和关闭。请参阅下面给出的屏幕截图。
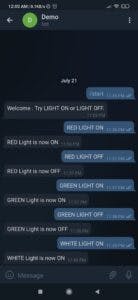
当您键入RED LIGHT ON时,红色 LED 将亮起,如下所示。
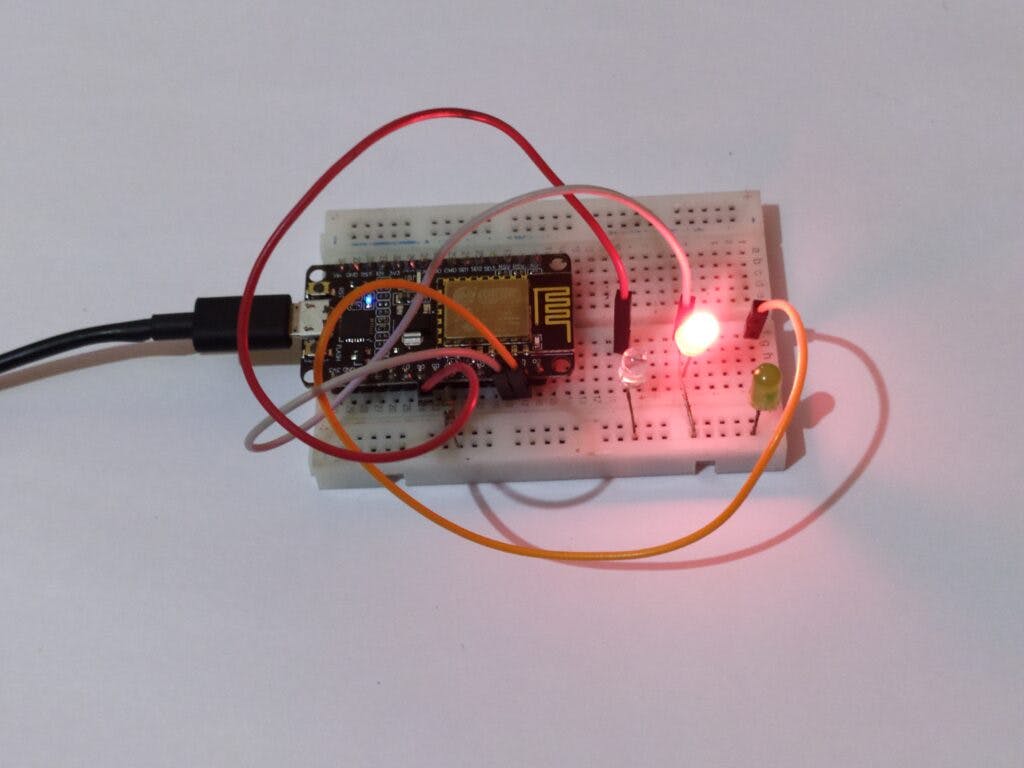
当您键入GREEN LIGHT ON时,绿色 LED 将亮起。
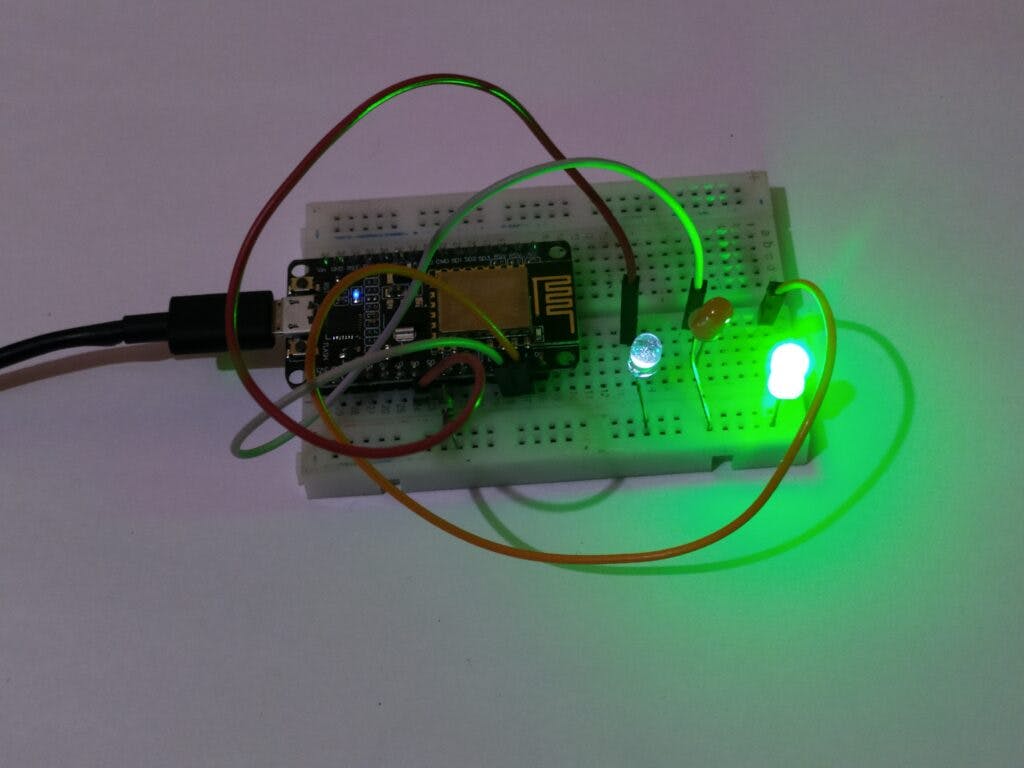
如果您键入WHITE LIGHT ON ,白色 LED 将亮起。
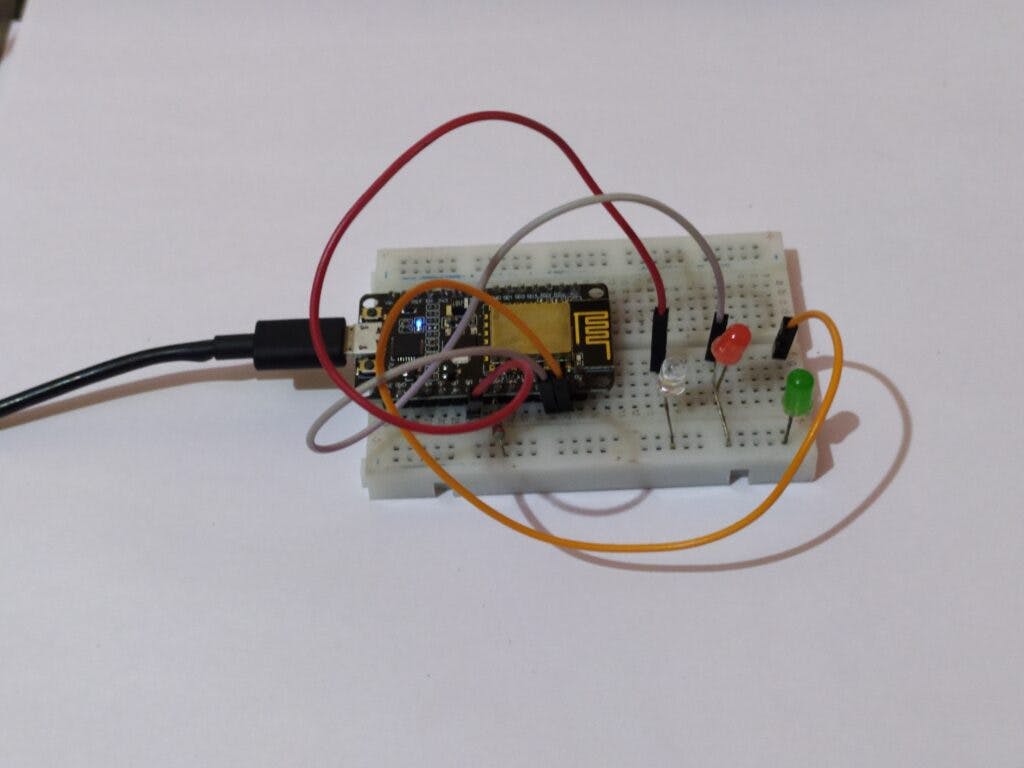
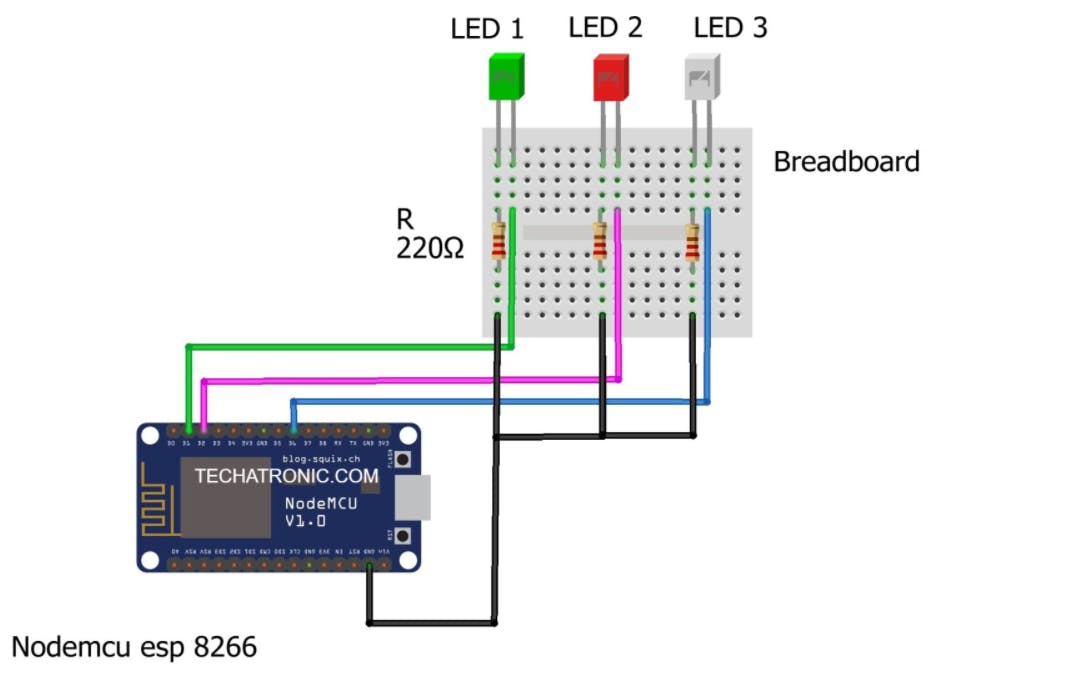
所需组件
- NodeMCU esp8266
- 三个不同颜色的 LED
- 220欧姆电阻
- 跳线和面包板
- 用于上传代码的 USB 电缆
电报机器人自动化电路图
电报机器人代码
注意:请将下面给出的代码上传到 NodeMCU。
//Techatronic.com
#include "CTBot.h"
CTBot myBot;
String ssid = "xxxxxxxxxxxx";   // REPLACE SSID WITH YOUR WIFI SSID
String pass = "xxxxxxxxxxxx"; // REPLACE Password YOUR WIFI PASSWORD, IF ANY
String token = "---------------------------------------------------";  // REPLACE Token WITH YOUR TELEGRAM BOT TOKEN
uint8_t greenled = 5;
uint8_t redled = 4;
uint8_t whiteled = 12;
void setup() {
// initialize the Serial
Serial.begin(115200);
Serial.println("Starting TelegramBot...");
// connect the ESP8266 to the desired access point
myBot.wifiConnect(ssid, pass);
// set the telegram bot token
myBot.setTelegramToken(token);
// check if all things are ok
if (myBot.testConnection())
Serial.println("\ntestConnection OK");
else
Serial.println("\ntestConnection NOK");
// set the pin connected to the LED to act as output pin
pinMode(redled, OUTPUT);
digitalWrite(redled, LOW);
pinMode(greenled, OUTPUT);
digitalWrite(greenled, LOW);
pinMode(whiteled, OUTPUT);
digitalWrite(whiteled, LOW);
}
void loop() {
// a variable to store telegram message data
TBMessage msg;
// if there is an incoming message...
if (myBot.getNewMessage(msg)) {
if (msg.text.equalsIgnoreCase("RED LIGHT ON")) {       // if the received message is "LIGHT ON"...
digitalWrite(redled, HIGH);                // turn on the LED
myBot.sendMessage(msg.sender.id, "RED Light is now ON"); // notify the sender
}
else if (msg.text.equalsIgnoreCase("RED LIGHT OFF")) {    // if the received message is "LIGHT OFF"...
digitalWrite(redled, LOW);               // turn off the led
myBot.sendMessage(msg.sender.id, "RED Light is now OFF"); // notify the sender
}
else if (msg.text.equalsIgnoreCase("GREEN LIGHT ON")){
digitalWrite(greenled, HIGH);                // turn on the LED
myBot.sendMessage(msg.sender.id, "GREEN Light is now ON"); // notify the sender
}
else if (msg.text.equalsIgnoreCase("GREEN LIGHT OFF")){
digitalWrite(greenled, LOW);               // turn off the led
myBot.sendMessage(msg.sender.id, "GREEN Light is now OFF"); // notify the sender
}
else if (msg.text.equalsIgnoreCase("White LIGHT ON")){
digitalWrite(whiteled, HIGH);                // turn on the LED
myBot.sendMessage(msg.sender.id, "WHITE Light is now ON"); // notify the sender
}
else if (msg.text.equalsIgnoreCase("WHITE LIGHT OFF")){
digitalWrite(whiteled, LOW);               // turn off the led
myBot.sendMessage(msg.sender.id, "WHITE Light is now OFF"); // notify the sender
}
else {                          // otherwise...
// generate the message for the sender
String reply;
reply = (String)"Welcome " + msg.sender.username + (String)". Try LIGHT ON or LIGHT OFF.";
myBot.sendMessage(msg.sender.id, reply);       // and send it
}
}
// wait 500 milliseconds
delay(500);
}
我们希望您喜欢这个项目。此外,请查看我们网站上有关 Arduino和Raspberry Pi的教程。
学习愉快!

声明:本文内容及配图由入驻作者撰写或者入驻合作网站授权转载。文章观点仅代表作者本人,不代表电子发烧友网立场。文章及其配图仅供工程师学习之用,如有内容侵权或者其他违规问题,请联系本站处理。 举报投诉
- 相关下载
- 相关文章


