资料下载

步道保护NFT开源分享
描述
0. 结果
远足真的很有趣,但有时远足径的使用过于频繁,以至于当地的生态系统可能会面临风险。例如,偏离轨道并造成损坏。此外,非法狩猎也会使该物种处于危险之中。
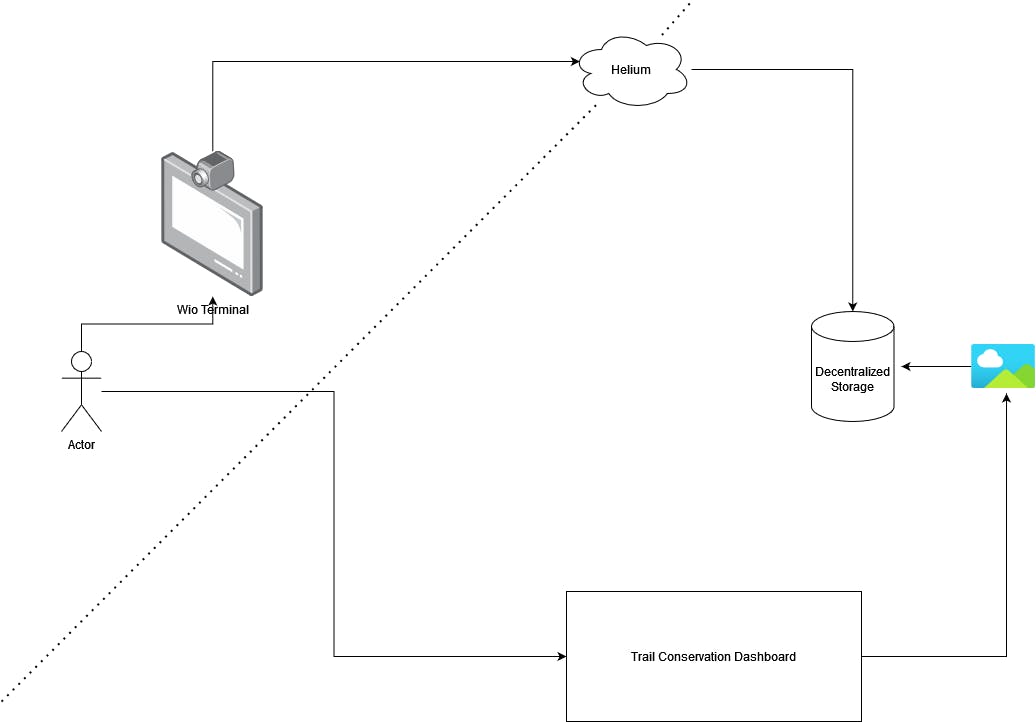
目标:奖励徒步旅行者报告活动和步道状况,以及使用部署在各个远足地点的 Wio 终端收集有关步道的传感器信息。


1.建造
1.a 硬件
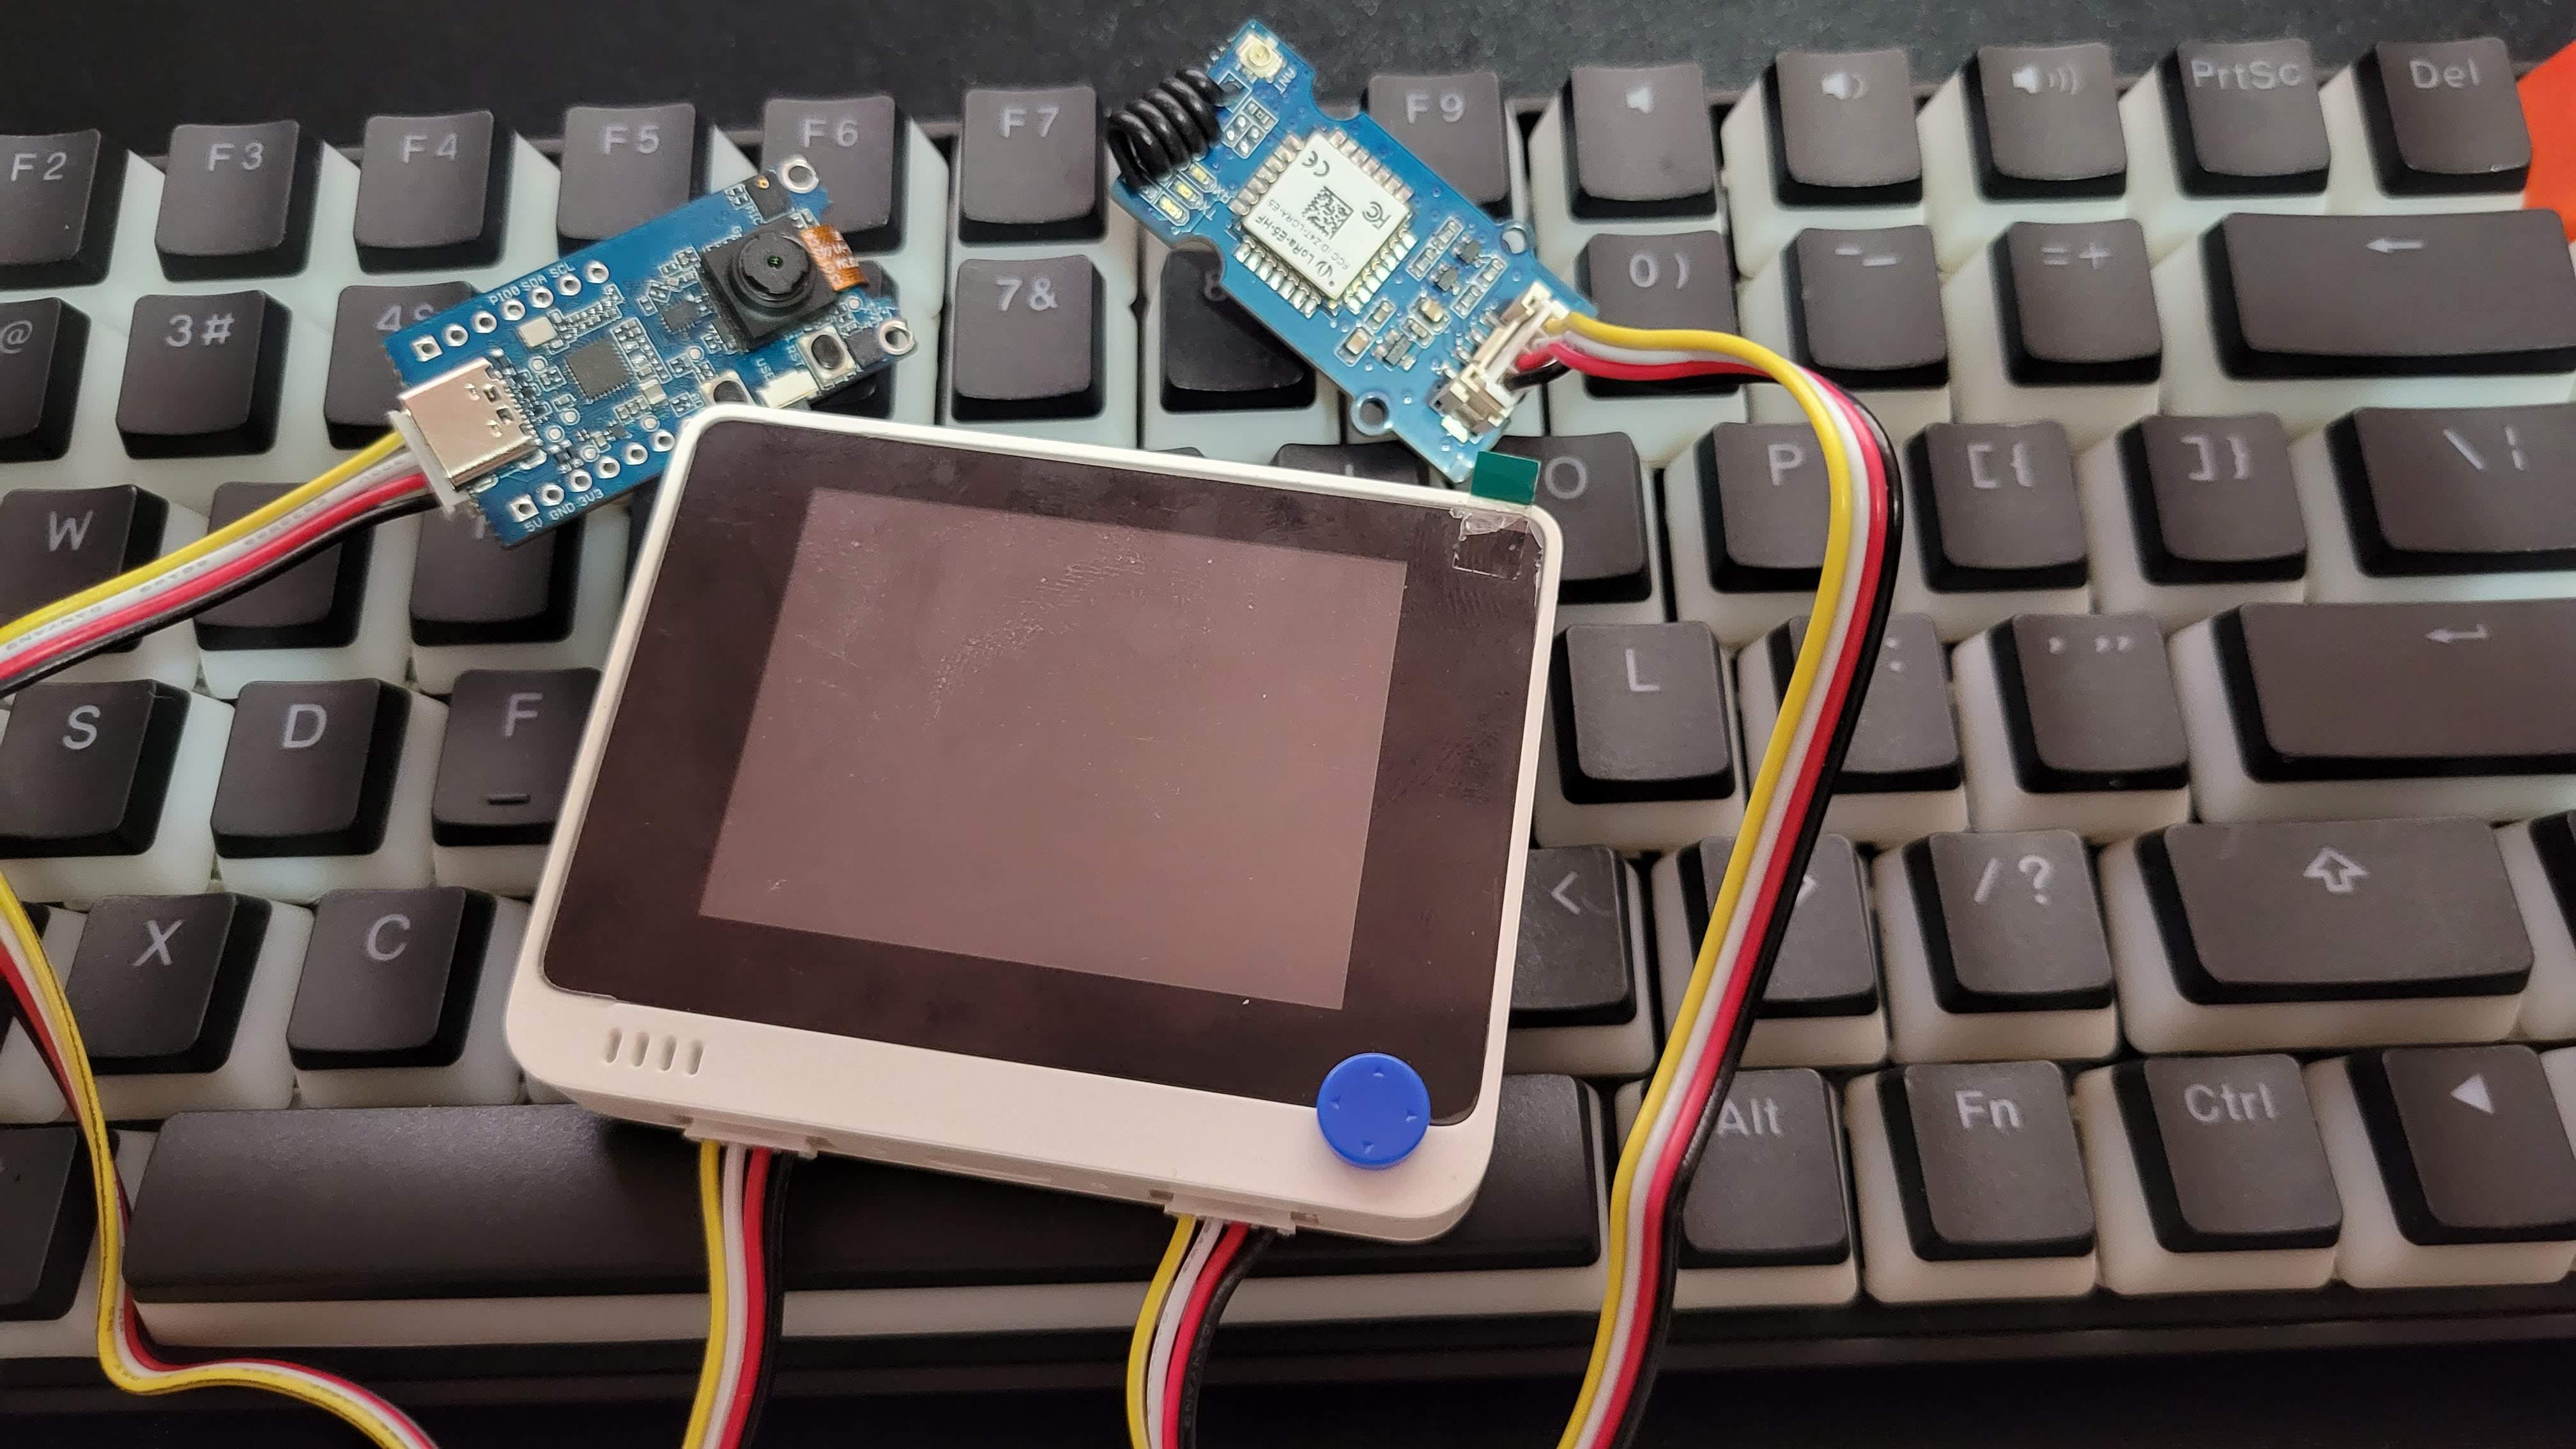
Seeed Studio LoRaWAN 开发套件使这对用户非常友好,无需真正的硬件技能。
该套件配备了所需的所有基本传感器。在本指南中,我们将使用套件中包含的 LoRa-E5 和 AI 视觉传感器。
将 AI 摄像头连接到左侧端口,将 LoRa 连接到右侧端口。

使用以下 Arduino 代码并上传到 Wio 终端。
#include
#include "disk91_LoRaE5.h"
#include "Seeed_Arduino_GroveAI.h"
#include
#include "TFT_eSPI.h"
#define FF17 &FreeSans9pt7b

// keys
uint8_t deveui[] = {0x...};
uint8_t appeui[] = {0x...};
uint8_t appkey[] = {0x...};

GroveAI ai(Wire);
TFT_eSPI tft;
Disk91_LoRaE5 lorae5(false); // true, false whatever

void setup()
{

  Wire.begin();
  Serial.begin(115200);
  randomSeed(analogRead(0));

  tft.begin();
  tft.setRotation(3);
  tft.fillScreen(TFT_BLACK);
  tft.setFreeFont(FF17);
  tft.fillScreen(TFT_BLACK);
  tft.setCursor(0, 20);

  Serial.println("begin");
  tft.println("begin");

  uint32_t start = millis();

  tft.println("LoRa E5 Init");

  // init the library, search the LORAE5 over the different WIO port available
  if (!lorae5.begin(DSKLORAE5_SEARCH_WIO))
  {
    Serial.println("LoRa E5 Init Failed");
    tft.println("LoRa E5 Init Failed");
    while (1)
      ;
  }

  tft.println("LoRa E5 Setup");
  // Setup the LoRaWan Credentials
  if (!lorae5.setup(
        DSKLORAE5_ZONE_US915, // LoRaWan Radio Zone EU868 here
        deveui,
        appeui,
        appkey))
  {
    Serial.println("LoRa E5 Setup Failed");
    tft.println("LoRa E5 Setup Failed");
    while (1);
  }

  if (ai.begin(ALGO_OBJECT_DETECTION, MODEL_EXT_INDEX_1)) // Object detection and pre-trained model 1
  {
    Serial.print("Version: ");
    Serial.println(ai.version());
    Serial.print("ID: ");
    Serial.println(ai.id());
    Serial.print("Algo: ");
    Serial.println(ai.algo());
    Serial.print("Model: ");
    Serial.println(ai.model());
    Serial.print("Confidence: ");
    Serial.println(ai.confidence());
    tft.print("AI version ");
    tft.println(ai.version());
  }
  else
  {
    Serial.println("Algo begin failed. Program halting here.");
    tft.println("Algo begin failed. Program halting here.");
    while (1)
      ;
  }
}

void loop()
{
  uint32_t tick = millis();
  tft.fillScreen(TFT_BLACK);
  tft.setCursor(0, 20);
  tft.println("Begin ai invoke");
  //  tft.println(ai.state());
  if (ai.invoke()) // begin invoke
  {
    tft.println("wait for ai invoke");
    while (1) // wait for invoking finished
    {
      CMD_STATE_T ret = ai.state();
      if (ret == CMD_STATE_IDLE)
      {
        break;
      }
      delay(20);
    }
    tft.println("AI state ready");
    uint8_t len = ai.get_result_len(); // receive how many people detect
    if (len)
    {
      int time1 = millis() - tick;
      Serial.print("Time consuming: ");
      Serial.println(time1);
      Serial.print("Number of people: ");
      Serial.println(len);
      tft.println("Ident success");
      object_detection_t data; //get data

      for (int i = 0; i < len; i++)
      {
        Serial.println("result:detected");
        Serial.print("Detecting and calculating: ");
        Serial.println(i + 1);
        ai.get_result(i, (uint8_t *)&data, sizeof(object_detection_t)); //get result

        Serial.print("confidence:");
        Serial.print(data.confidence);
        Serial.println();

        uint8_t data[] = { random() };


        tft.fillScreen(TFT_BLACK);
        tft.setFreeFont(FF17);
        tft.setCursor(0, 20);
        Serial.print("Unique code: ");
        tft.print("Unique code: ");
        for (int i = 0; i < 4; i++)
        {
          Serial.print(data[i]);
          tft.print(data[i]);
        }

        Serial.println();
        tft.println();

        tft.println("sending to Helium");
        // Send an uplink message. The Join is automatically performed
        if (lorae5.send_sync(
              1,            // LoRaWan Port
              data,         // data array
              sizeof(data), // size of the data
              false,        // we are not expecting a ack
              7,            // Spread Factor
              14            // Tx Power in dBm
            ))
        {
          Serial.println("Uplink done");
          if (lorae5.isDownlinkReceived())
          {
            Serial.println("A downlink has been received");
            if (lorae5.isDownlinkPending())
            {
              Serial.println("More downlink are pending");
            }
          }
        } else {
          Serial.println("uplink failed");
        }
        delay(30000);
      }
    }
    else
    {
      //      Serial.println("No identification");
      delay(1000);
    }
  }
  else
  {
    delay(1000);
    Serial.println("Invoke Failed.");
    tft.println("Invoke Failed.");
  }
}
LoRa 代码基于https://github.com/disk91/Disk91_LoRaE5并且有许多示例可以在完全提交上述代码之前测试设备。
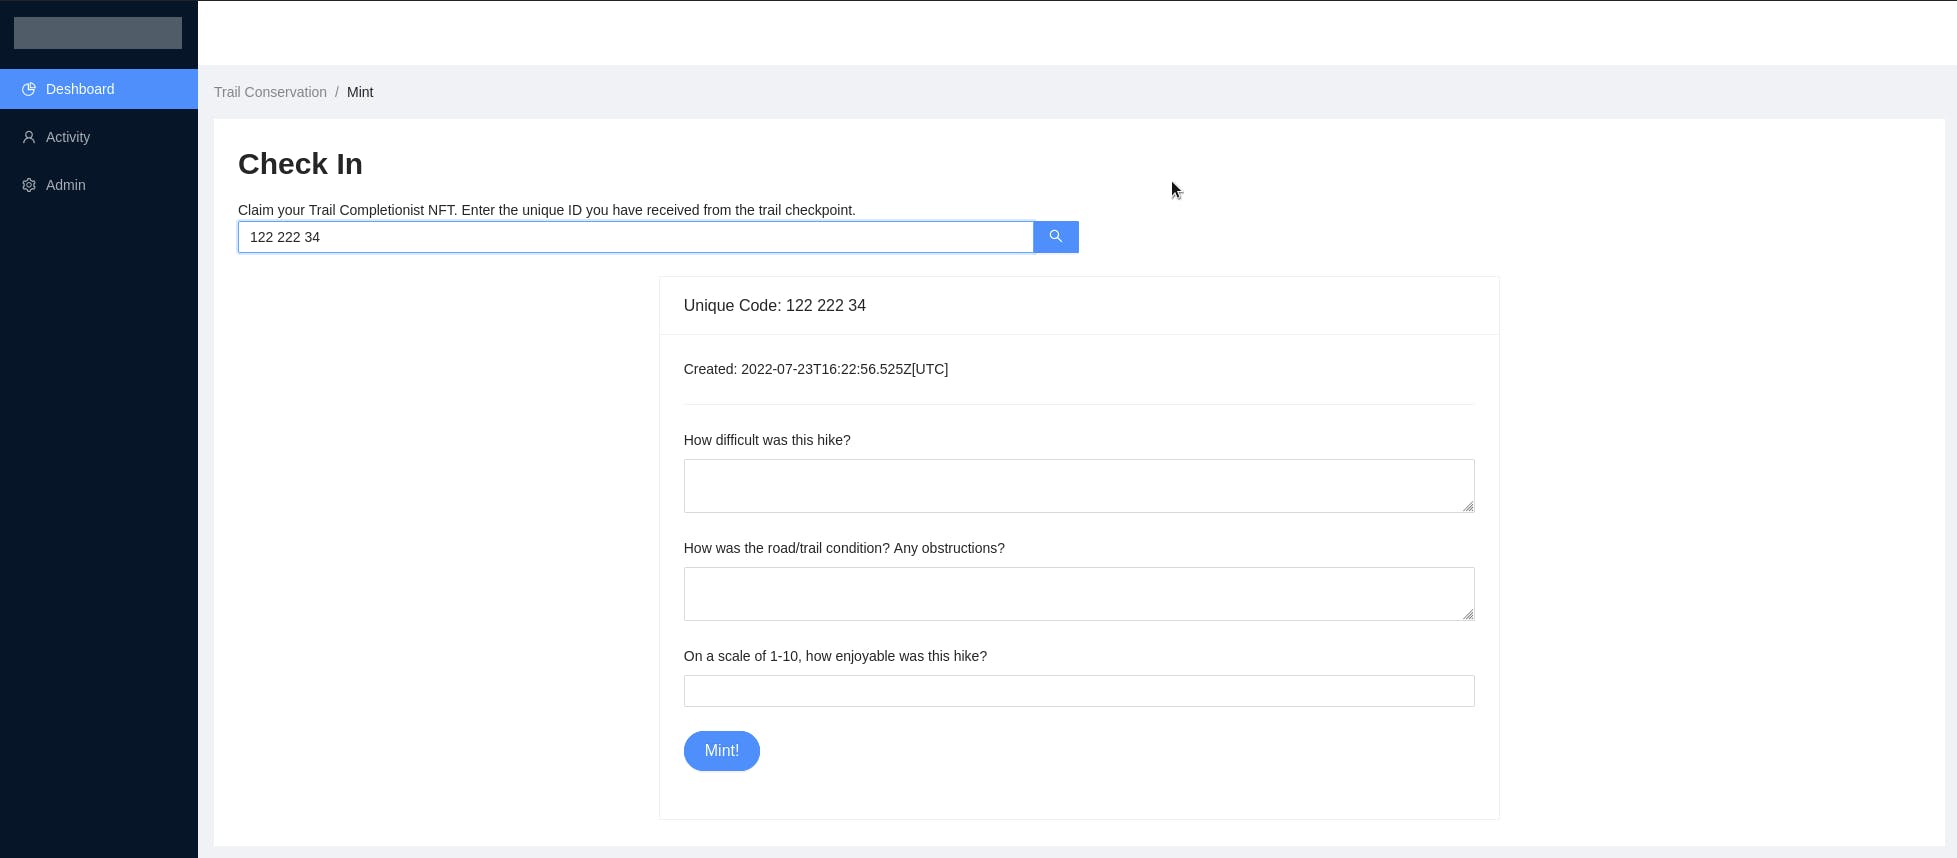
该代码将检测到一个人,然后显示一个随机数,然后可以在前端兑换该随机数以领取 NFT。终端应显示以下内容:
1.b 软件
1.ba 氦气
这部分将是工作的主体。应设置 Helium 控制台,使集成流程如下所示

uniq_code_decoder 定义为:
function Decoder(bytes, port, uplink_info) {
  var decoded = {};

  if (port == 1) {
    decoded.unique_code = bytes;
  }

  return decoded;
}
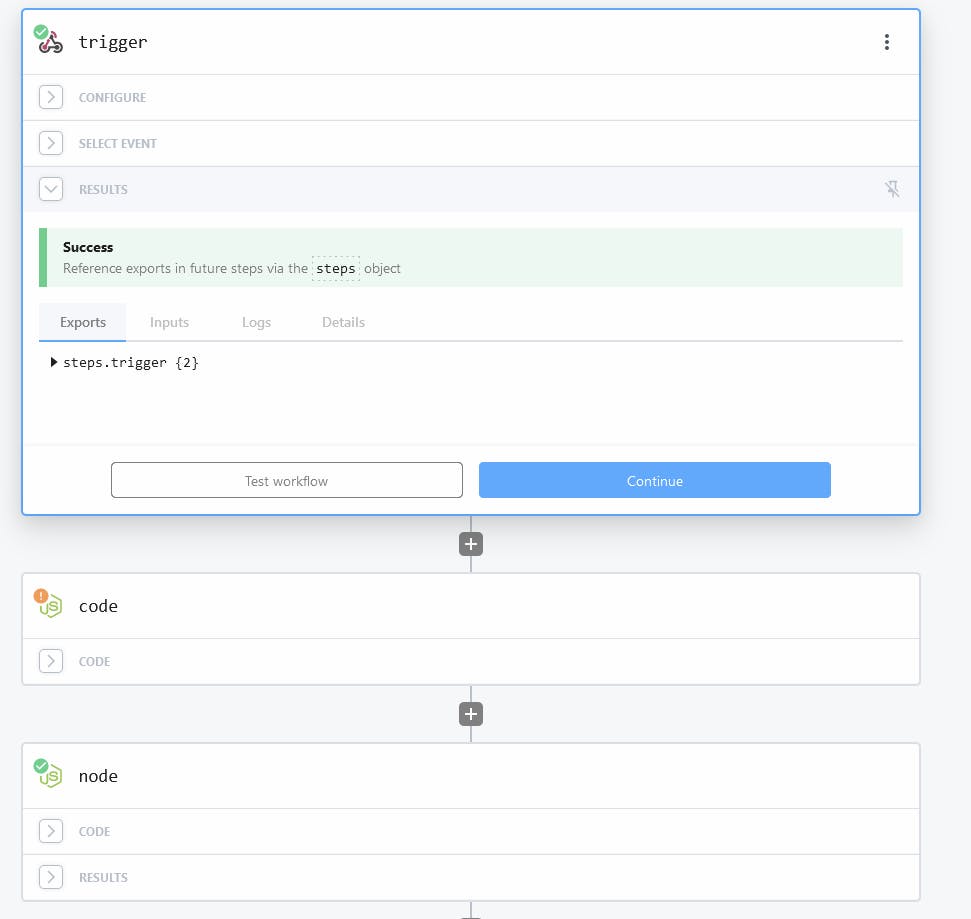
对于 webhook 阶段,我选择使用 RequestBin:

对于“节点”阶段,代码是:
import { FormData, Blob } from "formdata-node";
import { FormDataEncoder } from "form-data-encoder";
import {Readable} from "stream"
import fetch from "node-fetch"

// To use previous step data, pass the `steps` object to the run() function
export default defineComponent({
  async run({ steps, $ }) {
    // Return data to use it in future steps
    const url = "https://api.web3.storage/upload";

    let sensorData = {
        "device_pinValue": steps.trigger.event.body.decoded.payload.unique_code
    };
    console.log(sensorData);
    let form = new FormData();
    let blob = new Blob([new TextEncoder().encode(JSON.stringify(sensorData))], { type: "application/json;charset=utf-8" });
    console.log(blob);

    form.append('file', blob, steps.trigger.event.body.uuid + ".json");
    console.log(form);
    const encoder = new FormDataEncoder(form)

    const key = "web3APIKEY"
    const options = {
      method: "post",
      headers: Object.assign({}, encoder.headers, {"Authorization": "Bearer "+ key}),
      body: Readable.from(encoder)
    }


    const resp = await fetch(url, options);
    const text = await resp.text()
    console.log(text);
    return resp;
  },
})
“web3APIKEY”需要替换为来自web3.storage (免费)的 API 密钥。
这部分也可以由后端代码提供服务。
1.bb web3传送门
前端代码位于: https: //github.com/exp0nge/trail-conservation/tree/master/trail-ui它是使用 ReactJS 构建的,因此应该非常易读。有几个集成:
- NFTPort:使用来自终端的唯一代码铸造 Trail Completionist NFT
- Pexels:NFT 图像
- web3.storage:NFT镜像备份的去中心化存储
声明:本文内容及配图由入驻作者撰写或者入驻合作网站授权转载。文章观点仅代表作者本人,不代表电子发烧友网立场。文章及其配图仅供工程师学习之用,如有内容侵权或者其他违规问题,请联系本站处理。 举报投诉
- 相关下载
- 相关文章


