
资料下载

手势识别:用于8位微控制器的TinyML
描述
介绍
在这个项目中,我将展示一种开始使用 TinyML 的简单方法:在Arduino板上实现机器学习模型,同时创建一些很酷的东西:基于加速度计的手势识别系统。
为了使实验更简单,该系统设计为仅识别两种手势:出拳和弯曲动作(在数据科学领域,二元分类)。
这个实验的最大挑战是试图在一个非常小的设备上运行预测模型:一个 8 位微控制器。为此,您可以使用Neuton。
Neuton是一个 TinyML 框架。它允许在没有任何编码和一点机器学习经验的情况下自动构建神经网络,并将它们嵌入到小型计算设备中。它支持8位、16位和32 位微控制器。
实验分为三个步骤:
- 捕获训练数据集
- 使用Neuton训练模型
- 在Arduino上部署和运行模型

设置
手势识别系统由以下部分组成:
- 微控制器:Arduino Mega 2560
- 加速度计传感器:GY-521模块此模块围绕InvenSense MPU-6050构建:传感器在单个 IC 中包含 3 轴 MEMS 加速度计和 3 轴 MEMS 陀螺仪。它的操作非常精确,因为它包含每个通道精确的数字转换器。它可以同时捕捉X、Y和Z轴的值。与 MCU 的通信使用I2C接口进行。
GY-521 由Arduino Mega 电源部分的5V和GND引脚供电,而对于数据通信,则使用I2C引脚(引脚 20 和引脚 21)。其余引脚是可选的,对于此应用无用。
要验证 GY-521 模块是否正确供电,请连接Arduino板的 USB 电缆并检查安装在传感器板上的 LED 是否亮起。
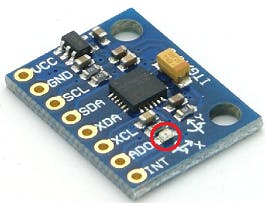
验证传感器电源后,通过下载Adafruit MPU6050 Arduino 库并打开“绘图仪”示例检查I2C通信是否正常工作。
将示例草图上传到Arduino板上,打开Tools菜单中的“ Serial Plotter ” ,在baud下拉菜单中设置115200 ,然后“摇动”sensor板。预期结果如下:
现在,系统已准备好收集加速度计和陀螺仪数据。
1. 捕获训练数据
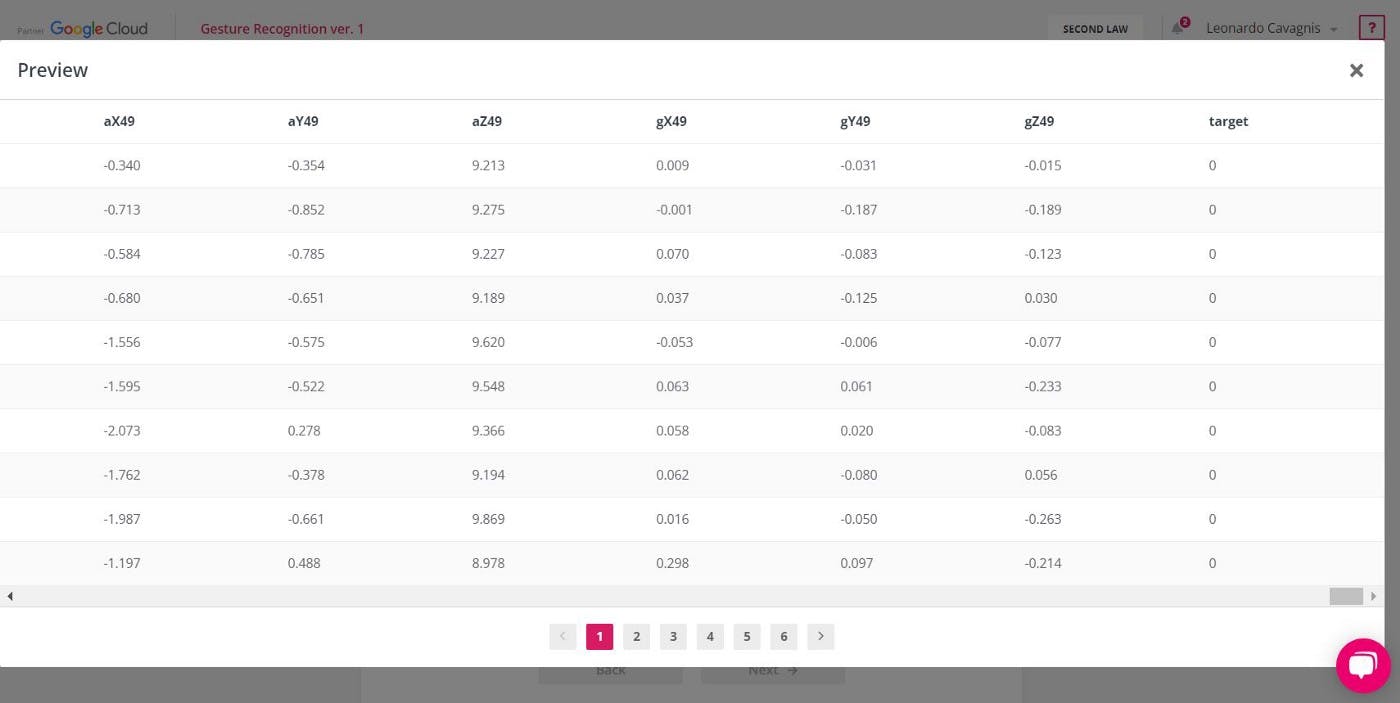
构建预测模型的第一步是收集足够的运动测量值。这组测量值称为训练数据集,它将用于训练Neuton神经网络构建器。
实现这一点的最简单方法是通过捕获加速度和陀螺仪测量并将结果存储在文件中来重复多次相同的两个动作(冲压和弯曲)。为此,您创建一个专用于传感器数据采集的Arduino草图。该程序将获取每个运动的测量值,并将在串行端口控制台上打印传感器测量值输出。
您将执行至少 60 个动作:第一个动作 ( punch ) 30 个,第二个动作 ( flex ) 30 个。对于每个动作,您将在 1 秒的时间窗口内获得 50 个加速度和 50 个陀螺仪测量值(采样时间:20ms —50Hz )。在这个实验中,60 个动作就足够了。通过增加运动测量的数量,您可以提高模型的预测能力。但是,大型数据集可能会导致模型过拟合。没有“正确”的数据集大小,但建议采用“反复试验”的方法。
Arduino草图的串行端口输出将根据Neutontraining 数据集要求进行格式化。
下面,用于创建数据集的Arduino程序:
- IMU 传感器初始化和 CSV 标头生成:
#define NUM_SAMPLES 50

Adafruit_MPU6050 mpu;

void setup() {
  // init serial port
  Serial.begin(115200);
  while (!Serial) {
    delay(10);
  }
  // init IMU sensor
  if (!mpu.begin()) {
    while (1) {
      delay(10);
    }
  }

  // configure IMU sensor
  // [...]

  // print the CSV header (ax0,ay0,az0,...,gx49,gy49,gz49,target)
  for (int i=0; i
    Serial.print("aX");
    Serial.print(i);
    Serial.print(",aY");
    Serial.print(i);
    Serial.print(",aZ");
    Serial.print(i);
    Serial.print(",gX");
    Serial.print(i);
    Serial.print(",gY");
    Serial.print(i);
    Serial.print(",gZ");
    Serial.print(i);
    Serial.print(",");
  }
  Serial.println("target");
}
- 采集 30 个连续动作。如果加速度总和高于某个阈值(例如,2.5 G ),则检测到运动的开始。
#define NUM_GESTURES    30
#define GESTURE_0       0
#define GESTURE_1       1
#define GESTURE_TARGET  GESTURE_0
//#define GESTURE_TARGET  GESTURE_1

void loop() {
  sensors_event_t a, g, temp;

  while(gesturesRead < NUM_GESTURES) {
    // wait for significant motion
    while (samplesRead == NUM_SAMPLES) {
      // read the acceleration data
      mpu.getEvent(&a, &g, &temp);

      // sum up the absolutes
      float aSum = fabs(a.acceleration.x) +
                   fabs(a.acceleration.y) +
                   fabs(a.acceleration.z);

      // check if it's above the threshold
      if (aSum >= ACC_THRESHOLD) {
        // reset the sample read count
        samplesRead = 0;
        break;
      }
    }

    // read samples of the detected motion
    while (samplesRead < NUM_SAMPLES) {
        // read the acceleration and gyroscope data
        mpu.getEvent(&a, &g, &temp);

        samplesRead++;

        // print the sensor data in CSV format
        Serial.print(a.acceleration.x, 3);
        Serial.print(',');
        Serial.print(a.acceleration.y, 3);
        Serial.print(',');
        Serial.print(a.acceleration.z, 3);
        Serial.print(',');
        Serial.print(g.gyro.x, 3);
        Serial.print(',');
        Serial.print(g.gyro.y, 3);
        Serial.print(',');
        Serial.print(g.gyro.z, 3);
        Serial.print(',');

        // print target at the end of samples acquisition
        if (samplesRead == NUM_SAMPLES) {
          Serial.println(GESTURE_TARGET);
        }

        delay(10);
    }
    gesturesRead++;
  }
}
首先,在打开串行监视器并将GESTURE_TARGET设置为GESTURE_0的情况下运行上述草图。然后,将GESTURE_TARGET设置为GESTURE_1运行。对于每次执行,执行相同的动作 30 次,尽可能确保以相同的方式执行动作。
将两个运动的串行监视器输出复制到一个文本文件中,并将其重命名为“trainingdata.txt”。.csv ”。
2. 使用 Neuton TinyML 训练模型
Neuton自动执行训练,无需任何用户交互。使用Neuton训练神经网络既快速又简单,分为三个阶段:
- 数据集:上传和验证
- 培训:自动机器学习
- 预测:结果分析和模型下载
2.1。数据集:上传和验证
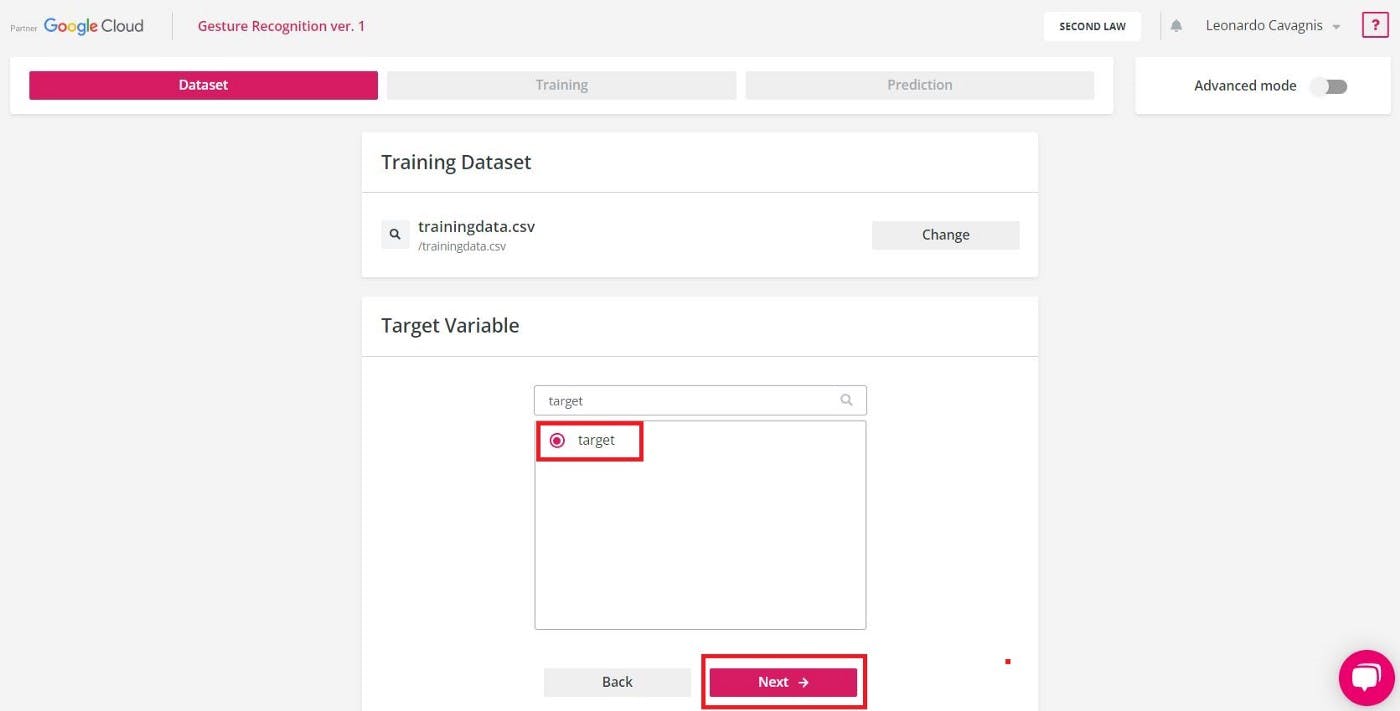
- 首先,创建一个新的Neuton解决方案并将其命名(例如Gesture Recognition )。

- 上传 CSV 训练数据集文件。
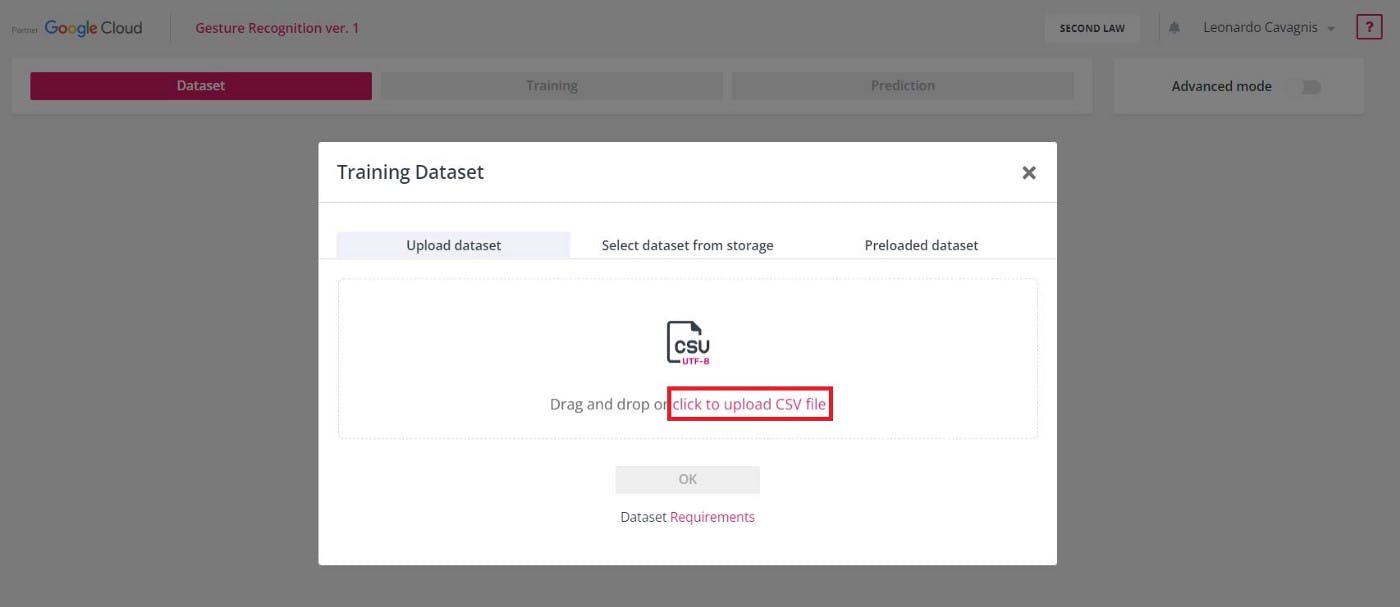
- Neuton根据数据集要求验证 CSV 文件。
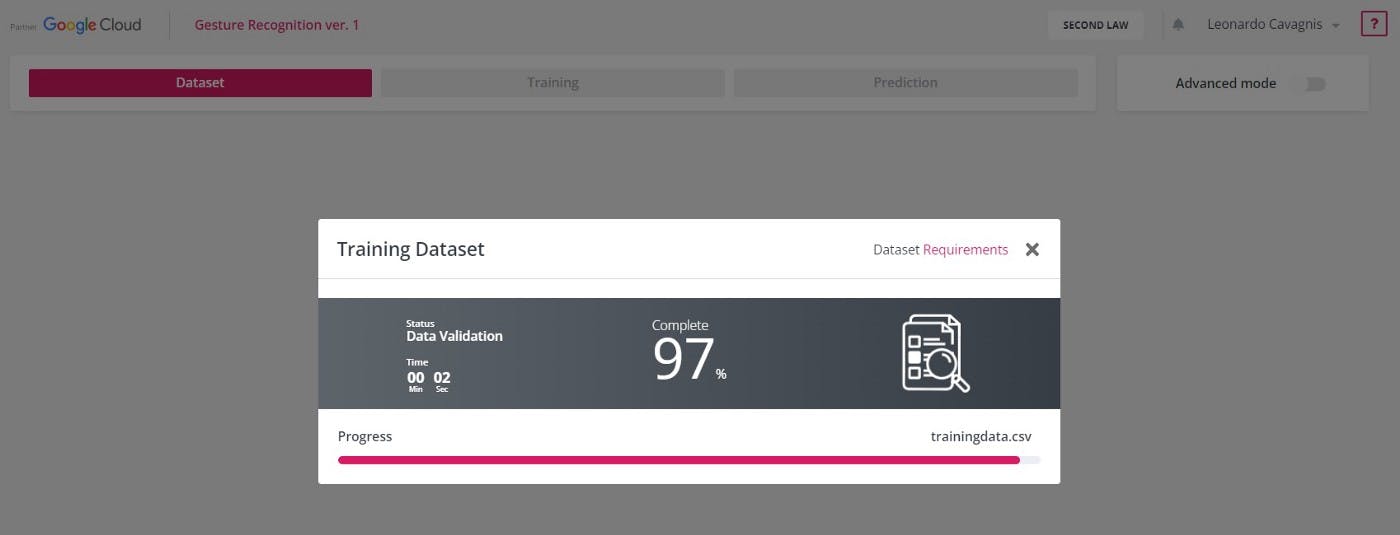
- 如果 CSV 文件符合要求,将出现绿色对勾,否则将显示错误消息。
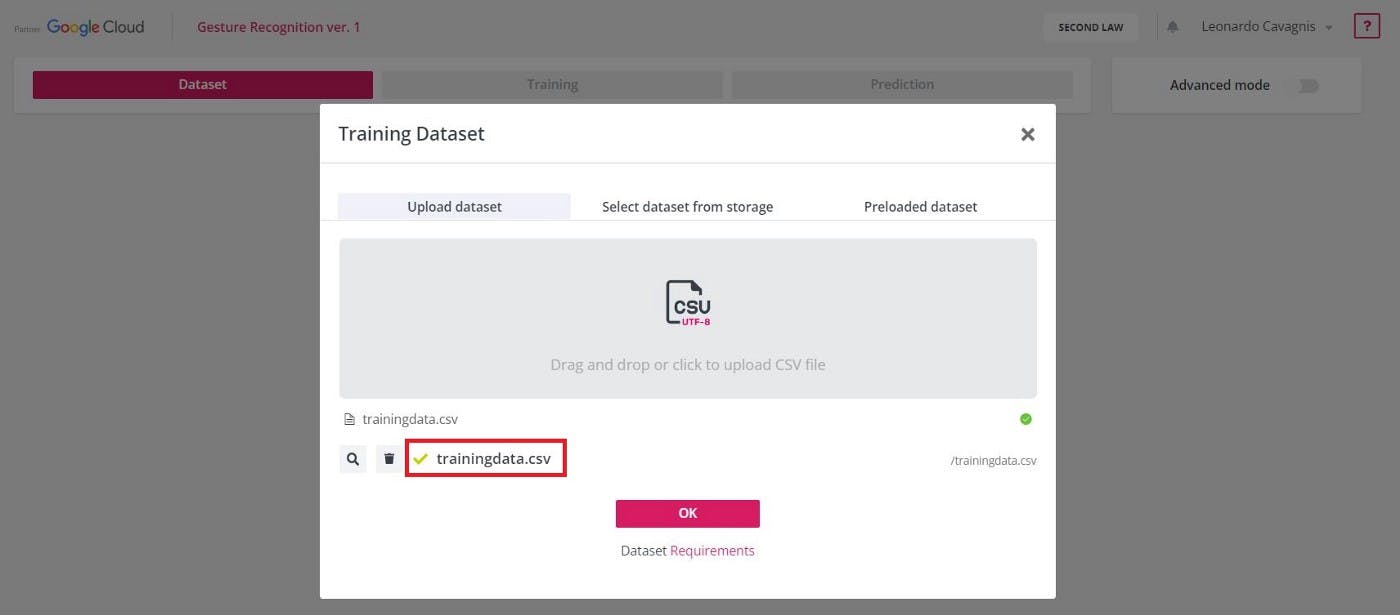
- 选择目标变量的列名(例如,目标),然后单击“下一步”。
2.2. 培训:汽车机器学习
现在,让我们进入训练的核心!
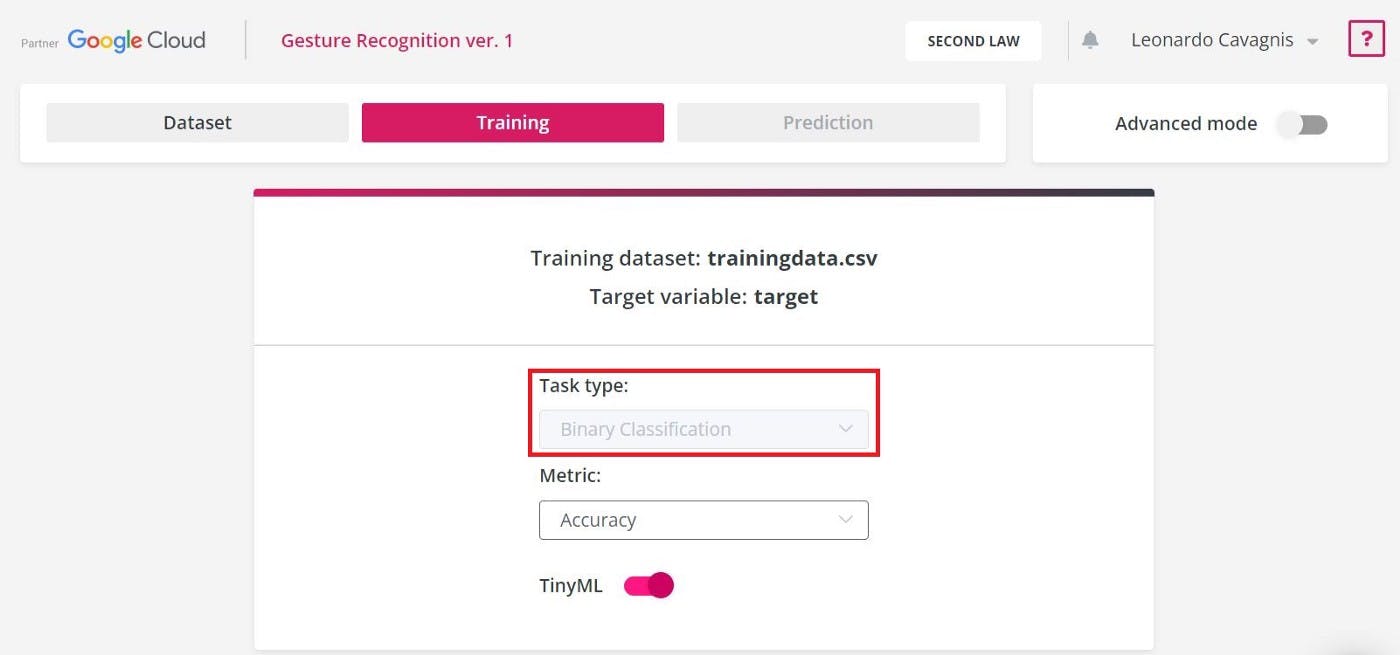
- Neuton分析训练数据集的内容并定义 ML 任务类型。使用此数据集,可以自动检测二进制分类任务。
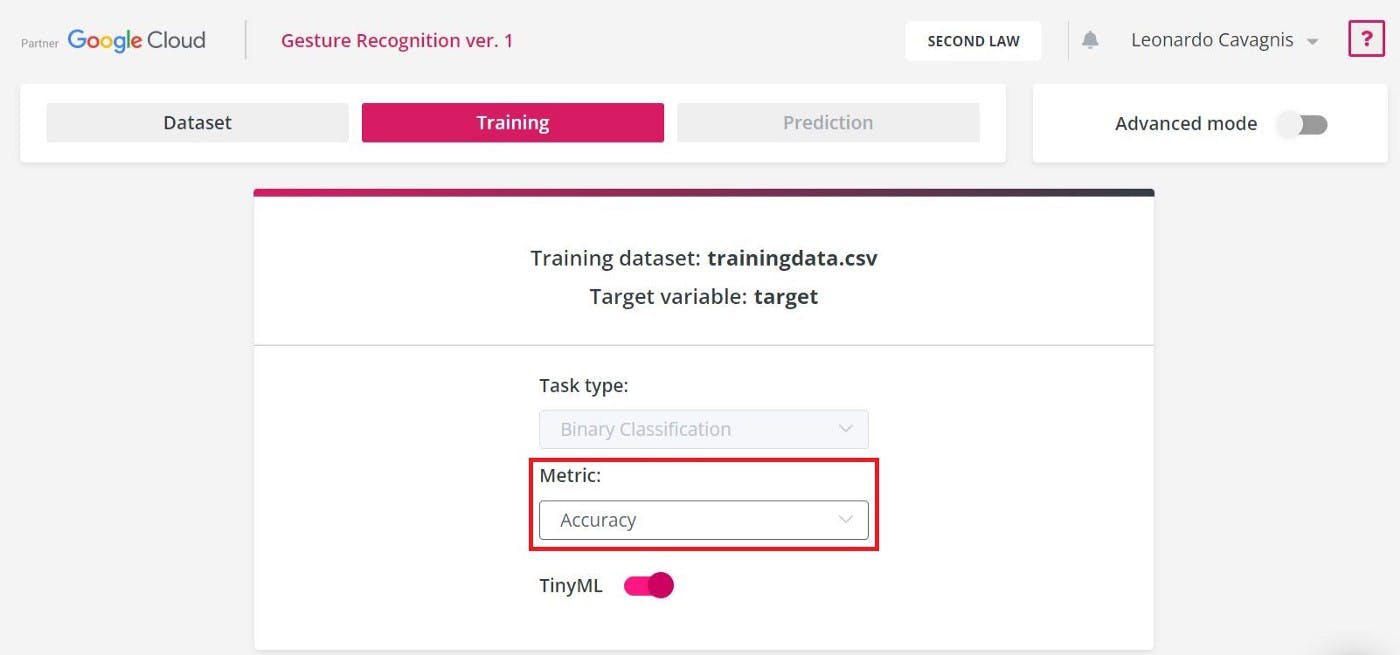
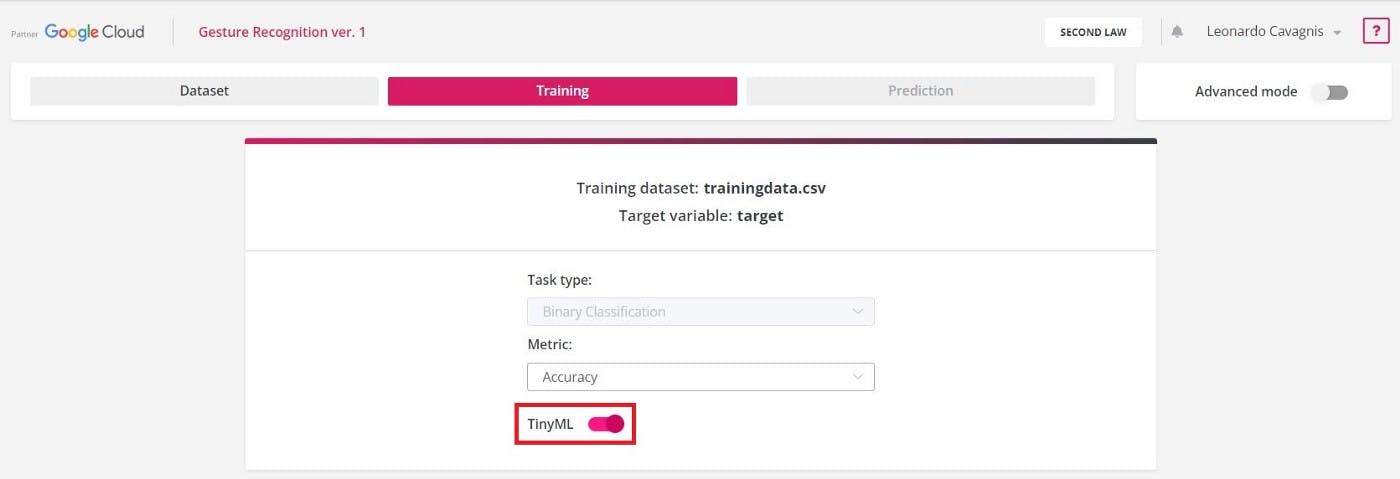
- Metric用于在训练期间监控和衡量模型的性能。对于此实验,您使用准确度指标:它表示预测类别的准确度。值越高,模型越好。
- 启用TinyML选项以允许Neuton为微控制器构建微型模型。
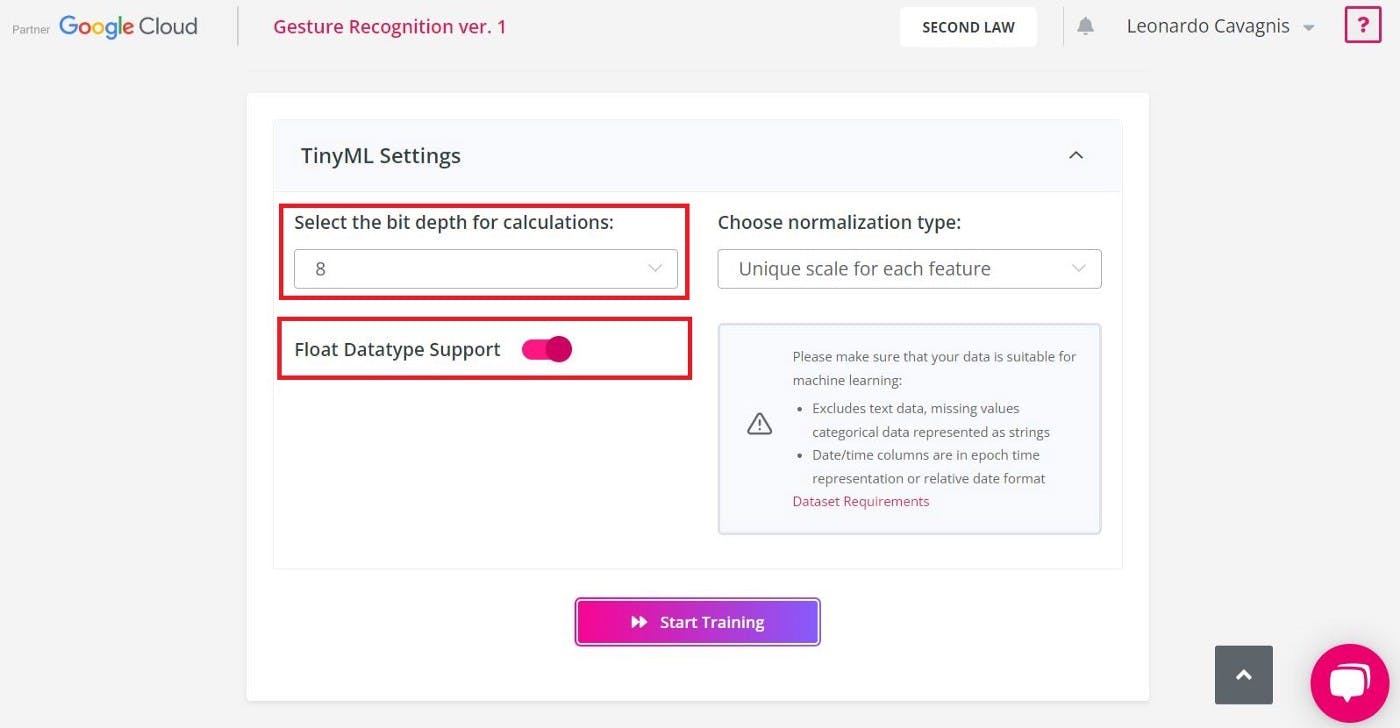
- 在 TinyML 设置页面中,在下拉菜单中选择“ 8-bit ”并启用“ Float datatype support”选项。这是因为实验中使用的微控制器是支持浮点数的 8 位 MCU。
- 按下“开始训练”按钮后,您将看到过程进度条和完成百分比。
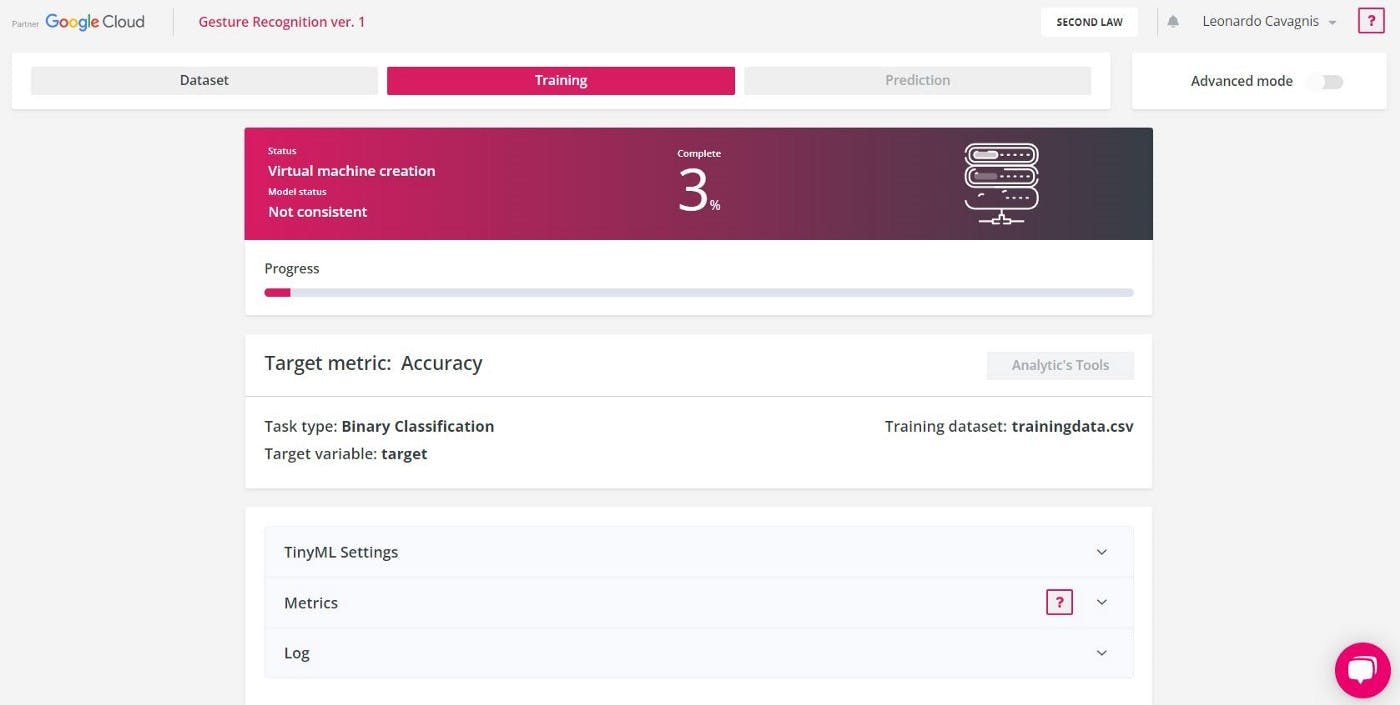
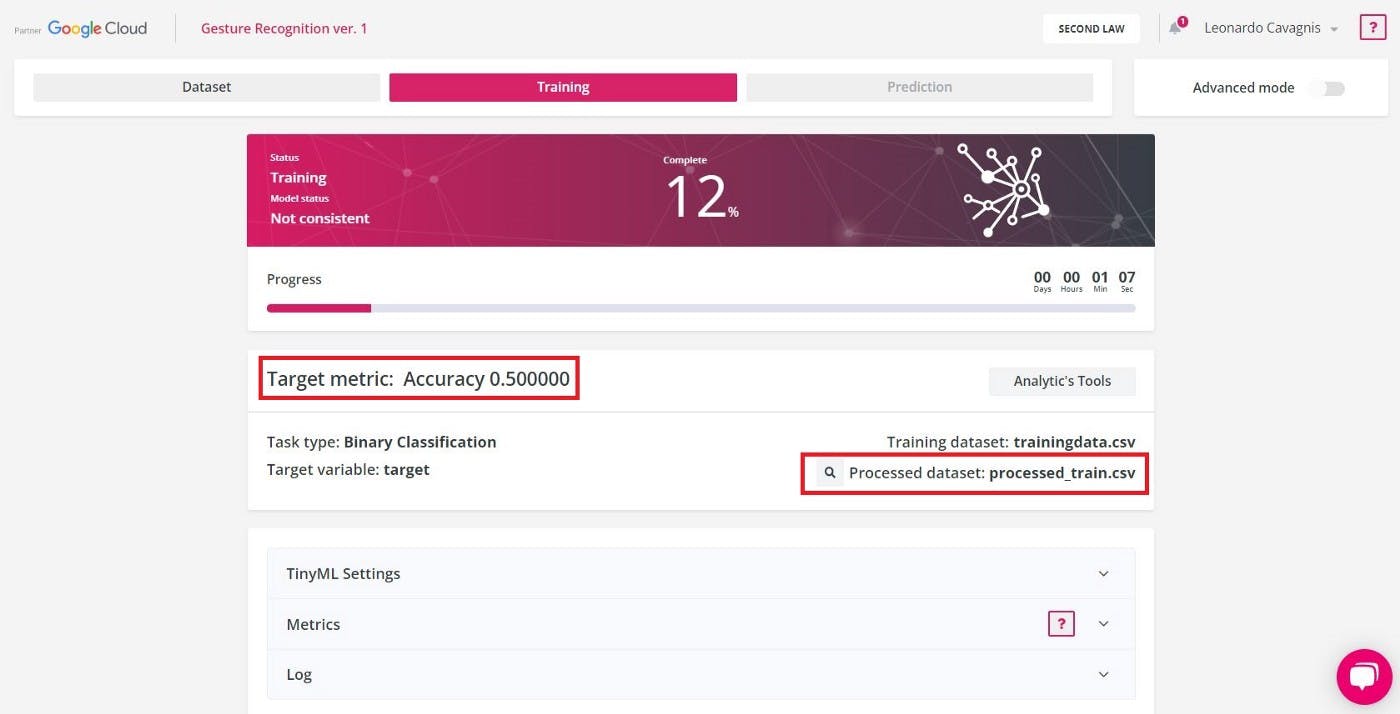
- 第一步是数据预处理。这是准备(清理、组织、转换等)原始数据集以使其适合训练和构建 ML 模型的过程。
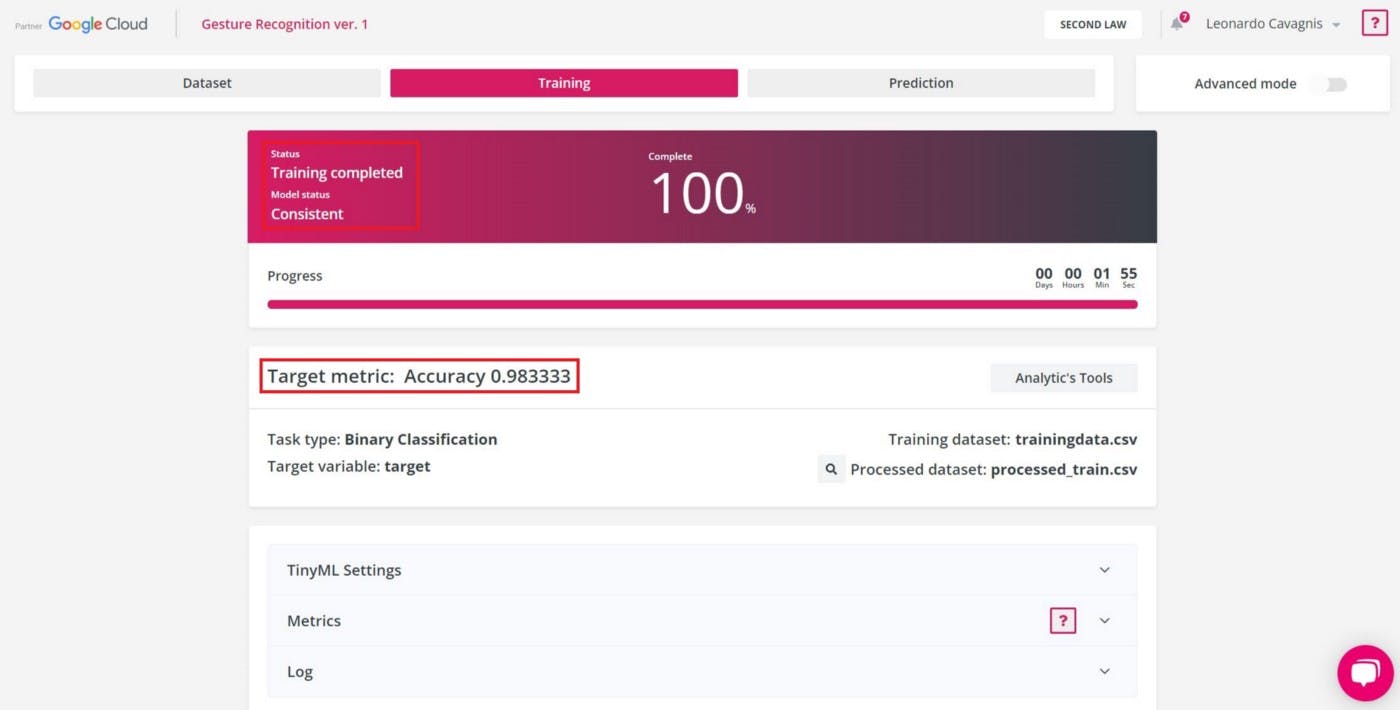
- 数据预处理完成后,模型训练开始。该过程可能需要很长时间;您可以关闭窗口并在该过程完成后返回。在训练期间,您可以通过观察模型状态(“一致”或“不一致”)和目标指标值来监控实时模型性能。
- 培训完成后,“状态”将变为“培训完成” 。模型是一致的并且已经达到了最好的预测能力。
2.3. 预测:结果分析和模型下载
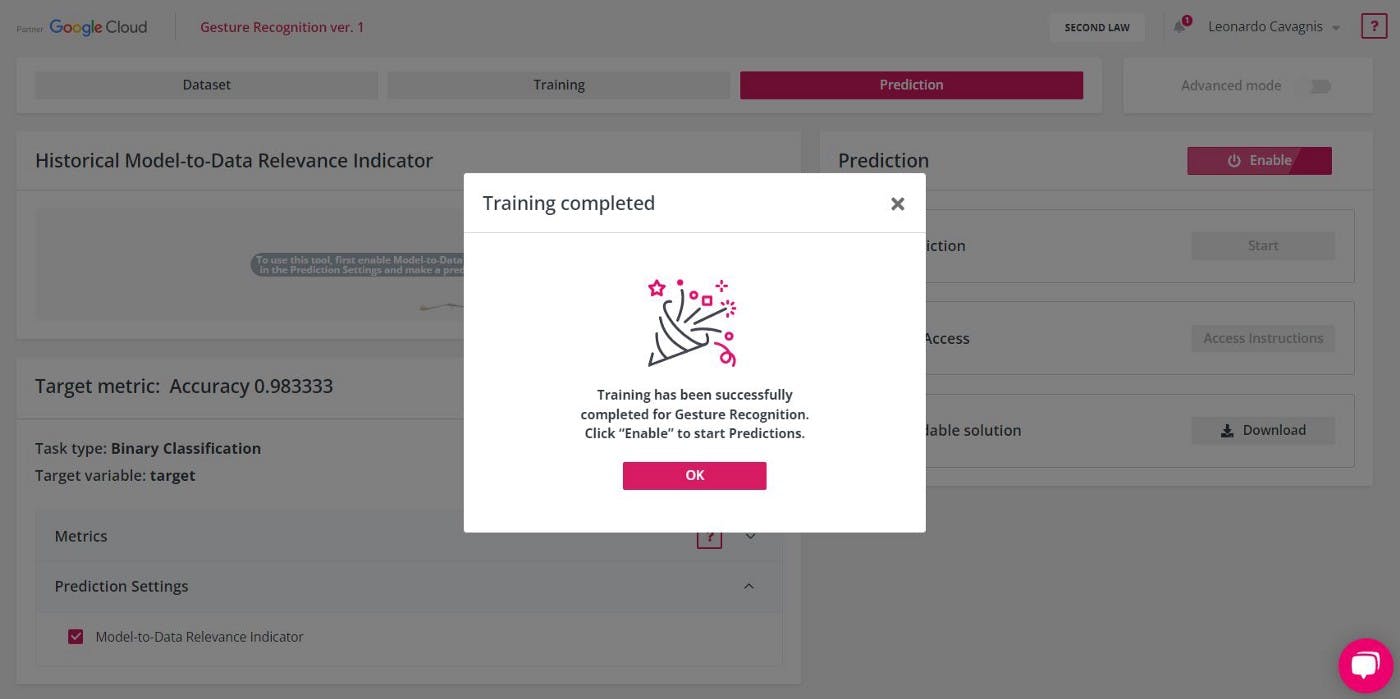
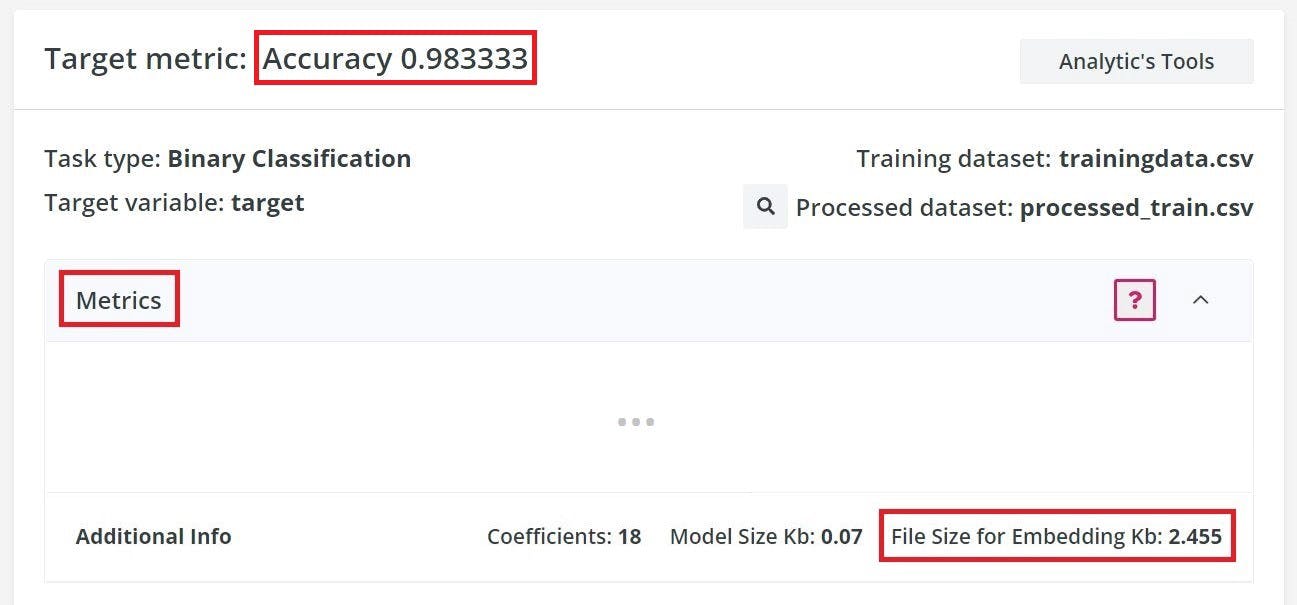
训练过程完成后,您将被重定向到«预测»部分。在本次实验中,模型的准确率达到了98% 。这意味着从 100 条预测记录中,有 98 条被分配到了正确的类别……这令人印象深刻!
此外,要嵌入的模型大小小于3KB 。这是一个非常小的尺寸,考虑到使用的Arduino板的内存大小为256KB ,而 8 位微控制器的典型内存大小为64KB÷256KB 。
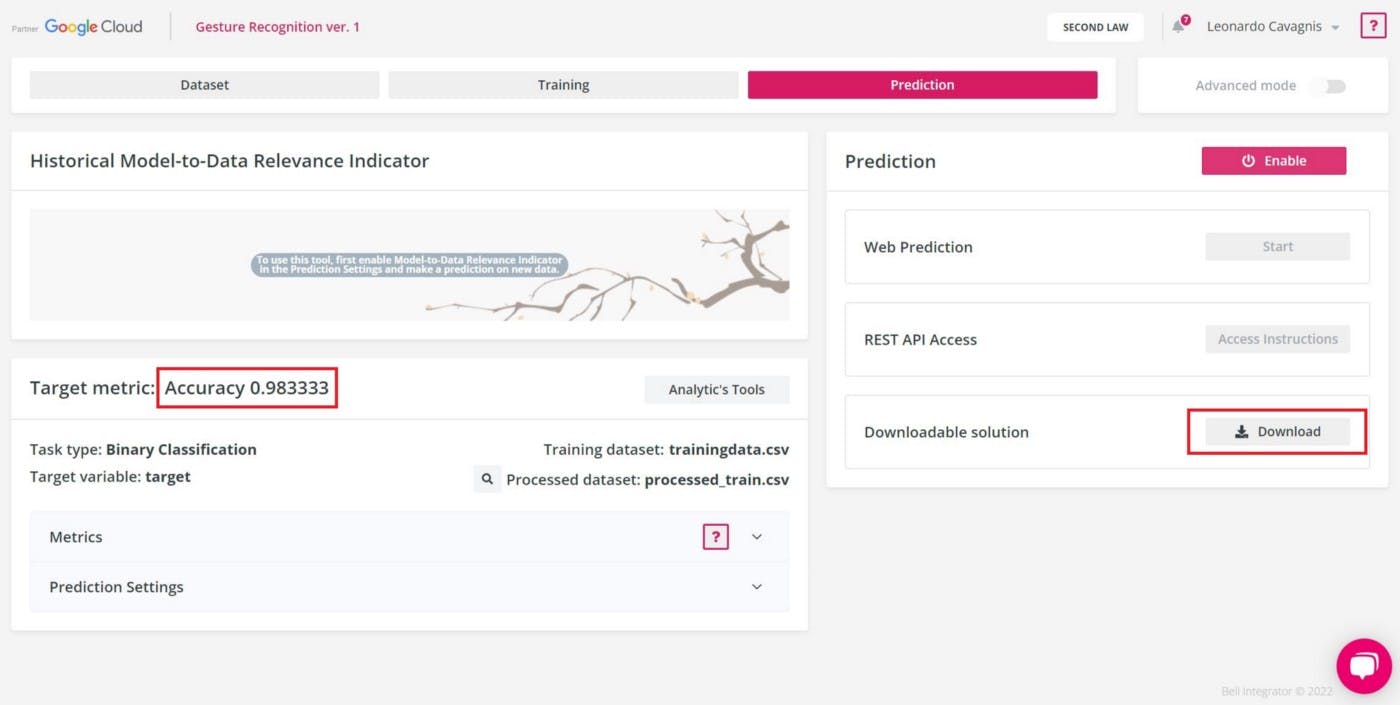
要下载模型存档,请单击“下载”按钮。
3.在Arduino上部署模型
从Neuton下载的模型存档包括以下文件和文件夹:
- /模型:紧凑形式(十六进制和二进制)的神经网络模型。
- / neuton :一组用于执行预测、计算、数据传输、结果管理等的函数。
- user_app.c :一个文件,您可以在其中设置应用程序的逻辑以管理预测。
首先,修改user_app.c文件,添加函数以初始化模型并运行推理。
/*
 * Function: model_init
 * ----------------------------
 *
 *   returns: result of initialization (bool)
 */
uint8_t model_init() {
   uint8_t res;

   res = CalculatorInit(&neuralNet, NULL);

   return (ERR_NO_ERROR == res);
}

/*
 * Function: model_run_inference
 * ----------------------------
 *
 *   sample: input array to make prediction
 *   size_in: size of input array
 *   size_out: size of result array
 *
 *   returns: result of prediction
 */
float* model_run_inference(float* sample,
                           uint32_t size_in,
                           uint32_t *size_out) {
   if (!sample || !size_out)
      return NULL;
   if (size_in != neuralNet.inputsDim)
      return NULL;

   *size_out = neuralNet.outputsDim;

   return CalculatorRunInference(&neuralNet, sample);
}
之后,您创建user_app.h头文件以允许主应用程序使用用户函数。
uint8_t model_init();
float*  model_run_inference(float* sample,
                            uint32_t size_in,
                            uint32_t* size_out);
下面是主要应用程序的Arduino草图:
- 模型初始化
#include "src/Gesture Recognition_v1/user_app.h"

void setup() {
   // init serial port and IMU sensor
   // [...]

   // init Neuton neural network model
   if (!model_init()) {
      Serial.print("Failed to initialize Neuton model!");
      while (1) {
        delay(10);
      }
   }
}
- 模型推断
#define GESTURE_ARRAY_SIZE  (6*NUM_SAMPLES+1)

void loop() {
   sensors_event_t a, g, temp;
   float gestureArray[GESTURE_ARRAY_SIZE]  = {0};

   // wait for significant motion
   // [...]

   // read samples of the detected motion
   while (samplesRead < NUM_SAMPLES) {
      // read the acceleration and gyroscope data
      mpu.getEvent(&a, &g, &temp);

      // fill gesture array (model input)
      gestureArray[samplesRead*6 + 0] = a.acceleration.x;
      gestureArray[samplesRead*6 + 1] = a.acceleration.y;
      gestureArray[samplesRead*6 + 2] = a.acceleration.z;
      gestureArray[samplesRead*6 + 3] = g.gyro.x;
      gestureArray[samplesRead*6 + 4] = g.gyro.y;
      gestureArray[samplesRead*6 + 5] = g.gyro.z;

      samplesRead++;

      delay(10);

      // check the end of gesture acquisition
      if (samplesRead == NUM_SAMPLES) {
         uint32_t size_out = 0;

         // run model inference
         float* result = model_run_inference(gestureArray,
                                             GESTURE_ARRAY_SIZE,
                                             &size_out);
         // check if model inference result is valid
         if (result && size_out) {
            // check if problem is binary classification
            if (size_out >= 2) {
               // check if one of the result has >50% of accuracy
               if (result[0] > 0.5) {
                  Serial.print("Detected gesture: 0");
                  // [...]
               } else if (result[1] > 0.5) {
                  Serial.print("Detected gesture: 1");
                  // [...]
               } else {
                  // solution is not reliable
                  Serial.println("Detected gesture: NONE");
               }
            }
         }
     }
   }
}
模型在行动!
/neuton_gesturerecognition
 |- /src
 | |- /Gesture Recognition_v1
 |   |- /model
 |   |- /neuton
 |   |- user_app.c
 |   |- user_app.h
 |- neuton_gesturerecognition.ino
现在,是时候看看预测模型的实际应用了!
- 验证硬件系统是否正确设置
- 打开主应用程序文件
- 单击“验证”按钮,然后单击“上传”一个
- 打开串行监视器
- 抓住你的硬件系统并执行一些动作。
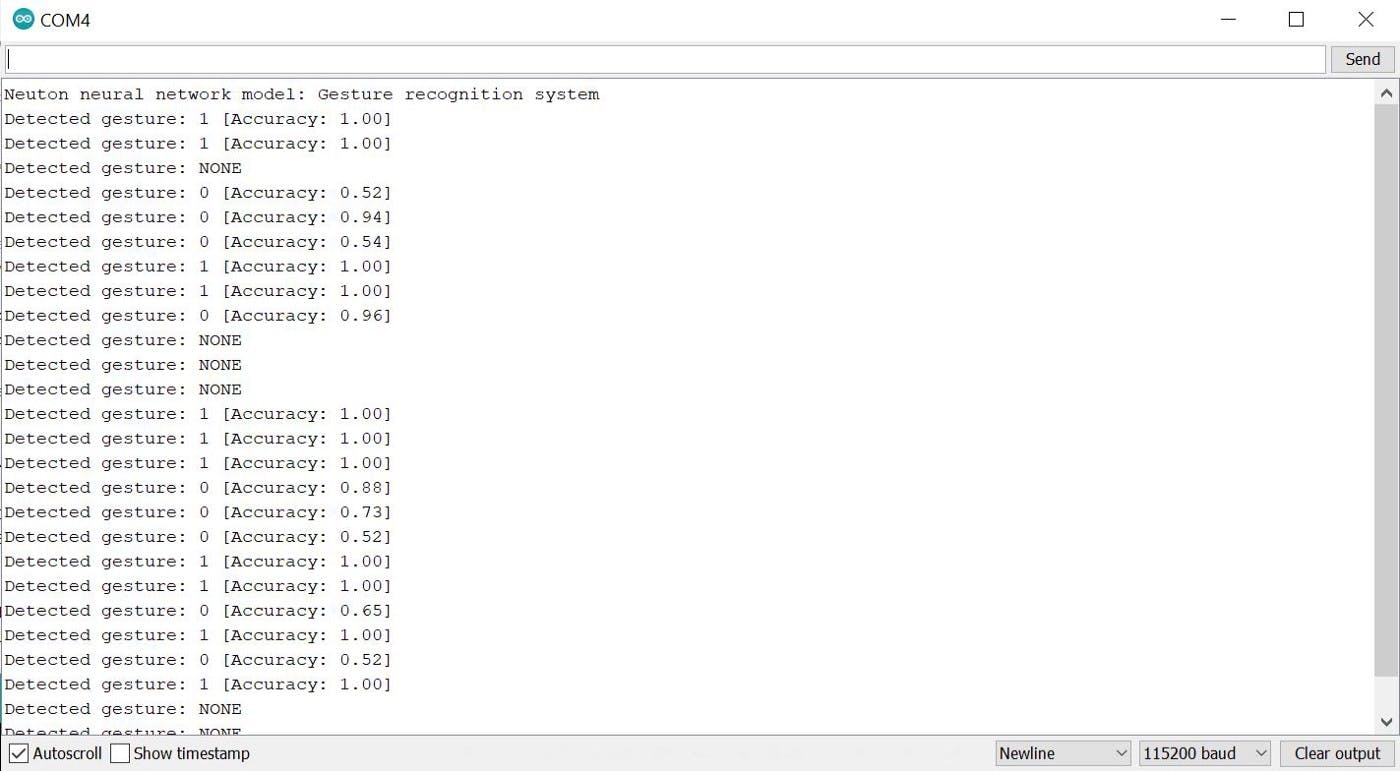
对于每个检测到的运动,模型将尝试猜测运动是什么类型(0 -punch或 1 -flex )以及预测的准确度。如果预测的准确度较低(0.5 ),则模型不会做出决定。
下面是模型推理执行的示例:
而且..仅此而已!
声明:本文内容及配图由入驻作者撰写或者入驻合作网站授权转载。文章观点仅代表作者本人,不代表电子发烧友网立场。文章及其配图仅供工程师学习之用,如有内容侵权或者其他违规问题,请联系本站处理。 举报投诉
- 相关下载
- 相关文章


