×

高速Arduino遥控车开源分享

消耗积分:0 | 格式:zip | 大小:0.26 MB | 2022-10-27

打马过草原

分享资料个

描述

几天前,我从童年时代发现了一辆漂亮的遥控车,但它的遥控器坏了,所以我想为什么不把这辆车改装成高速 Arduino 遥控车。

所以现在就在这里,我已经把它变成了一辆高速 Arduino 遥控车,今天我将与你分享我是如何做到的。我用于这个项目的应用程序可以从这里下载。

高速 Arduino 遥控车的功能

这款高速 Arduino 遥控车的功能如下

  • 前灯
  • 背光灯
  • 中心的 RGB 灯会让它看起来不错
  • 喇叭
  • 全方位旋转
  • 速度控制

所需组件

高速 Arduino 遥控车所需的组件如下

  • 带电机的旧车
  • 阿杜诺
  • HC-05 或 HC-06 蓝牙模块
  • L298N电机驱动器
  • 蜂鸣器
  • RGB LED
  • 2 个红色 LED
  • 2 个白色 LED
  • 2 X 3.7V 可充电电池
  • 9V电池
  • 7 X 220 欧姆电阻

硬件

我使用了两个 3.7V 的可充电电池来运行这些电机。这些电池可以反复使用,也可以快速运行电机。

如果您想了解更多关于 Arduino 与 RGB 模块接口的信息,请阅读本教程 | Arduino RGB LED 教程

如果您想了解更多关于蓝牙模块与 Arduino 接口的信息,请阅读本教程 | Arduino蓝牙模块教程

 
pYYBAGNYsJOAJOBaAAFpxL6q8pY124.png
 

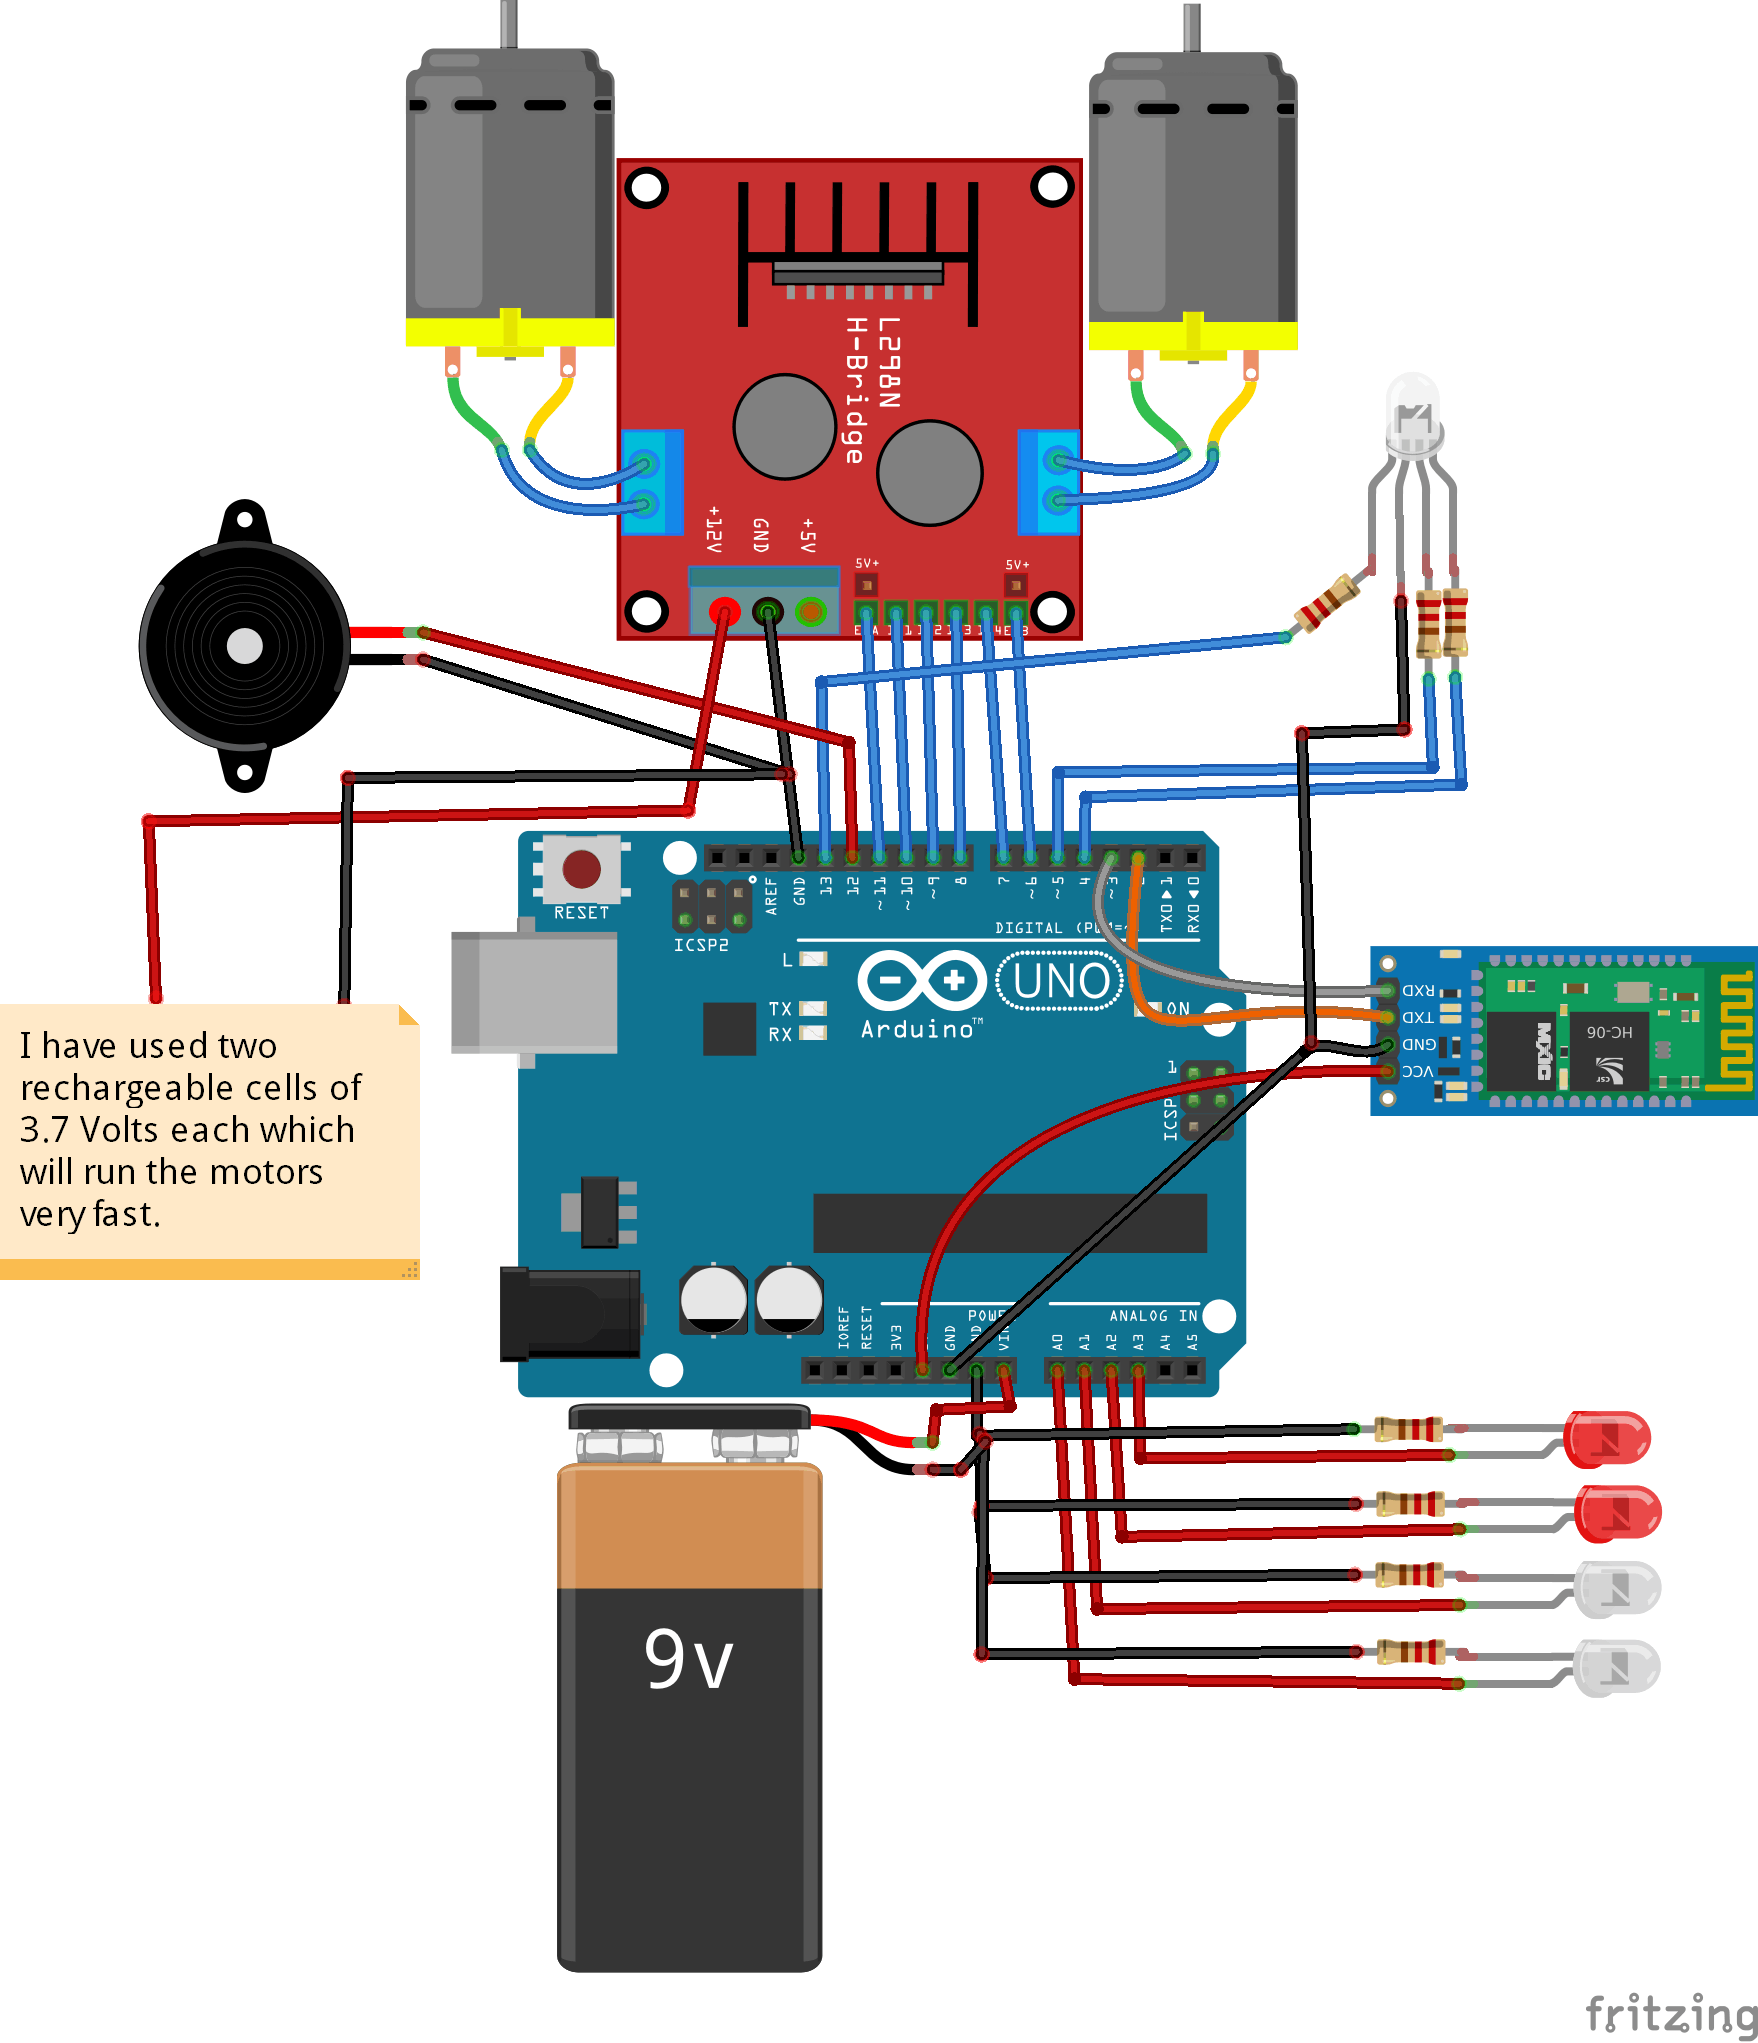
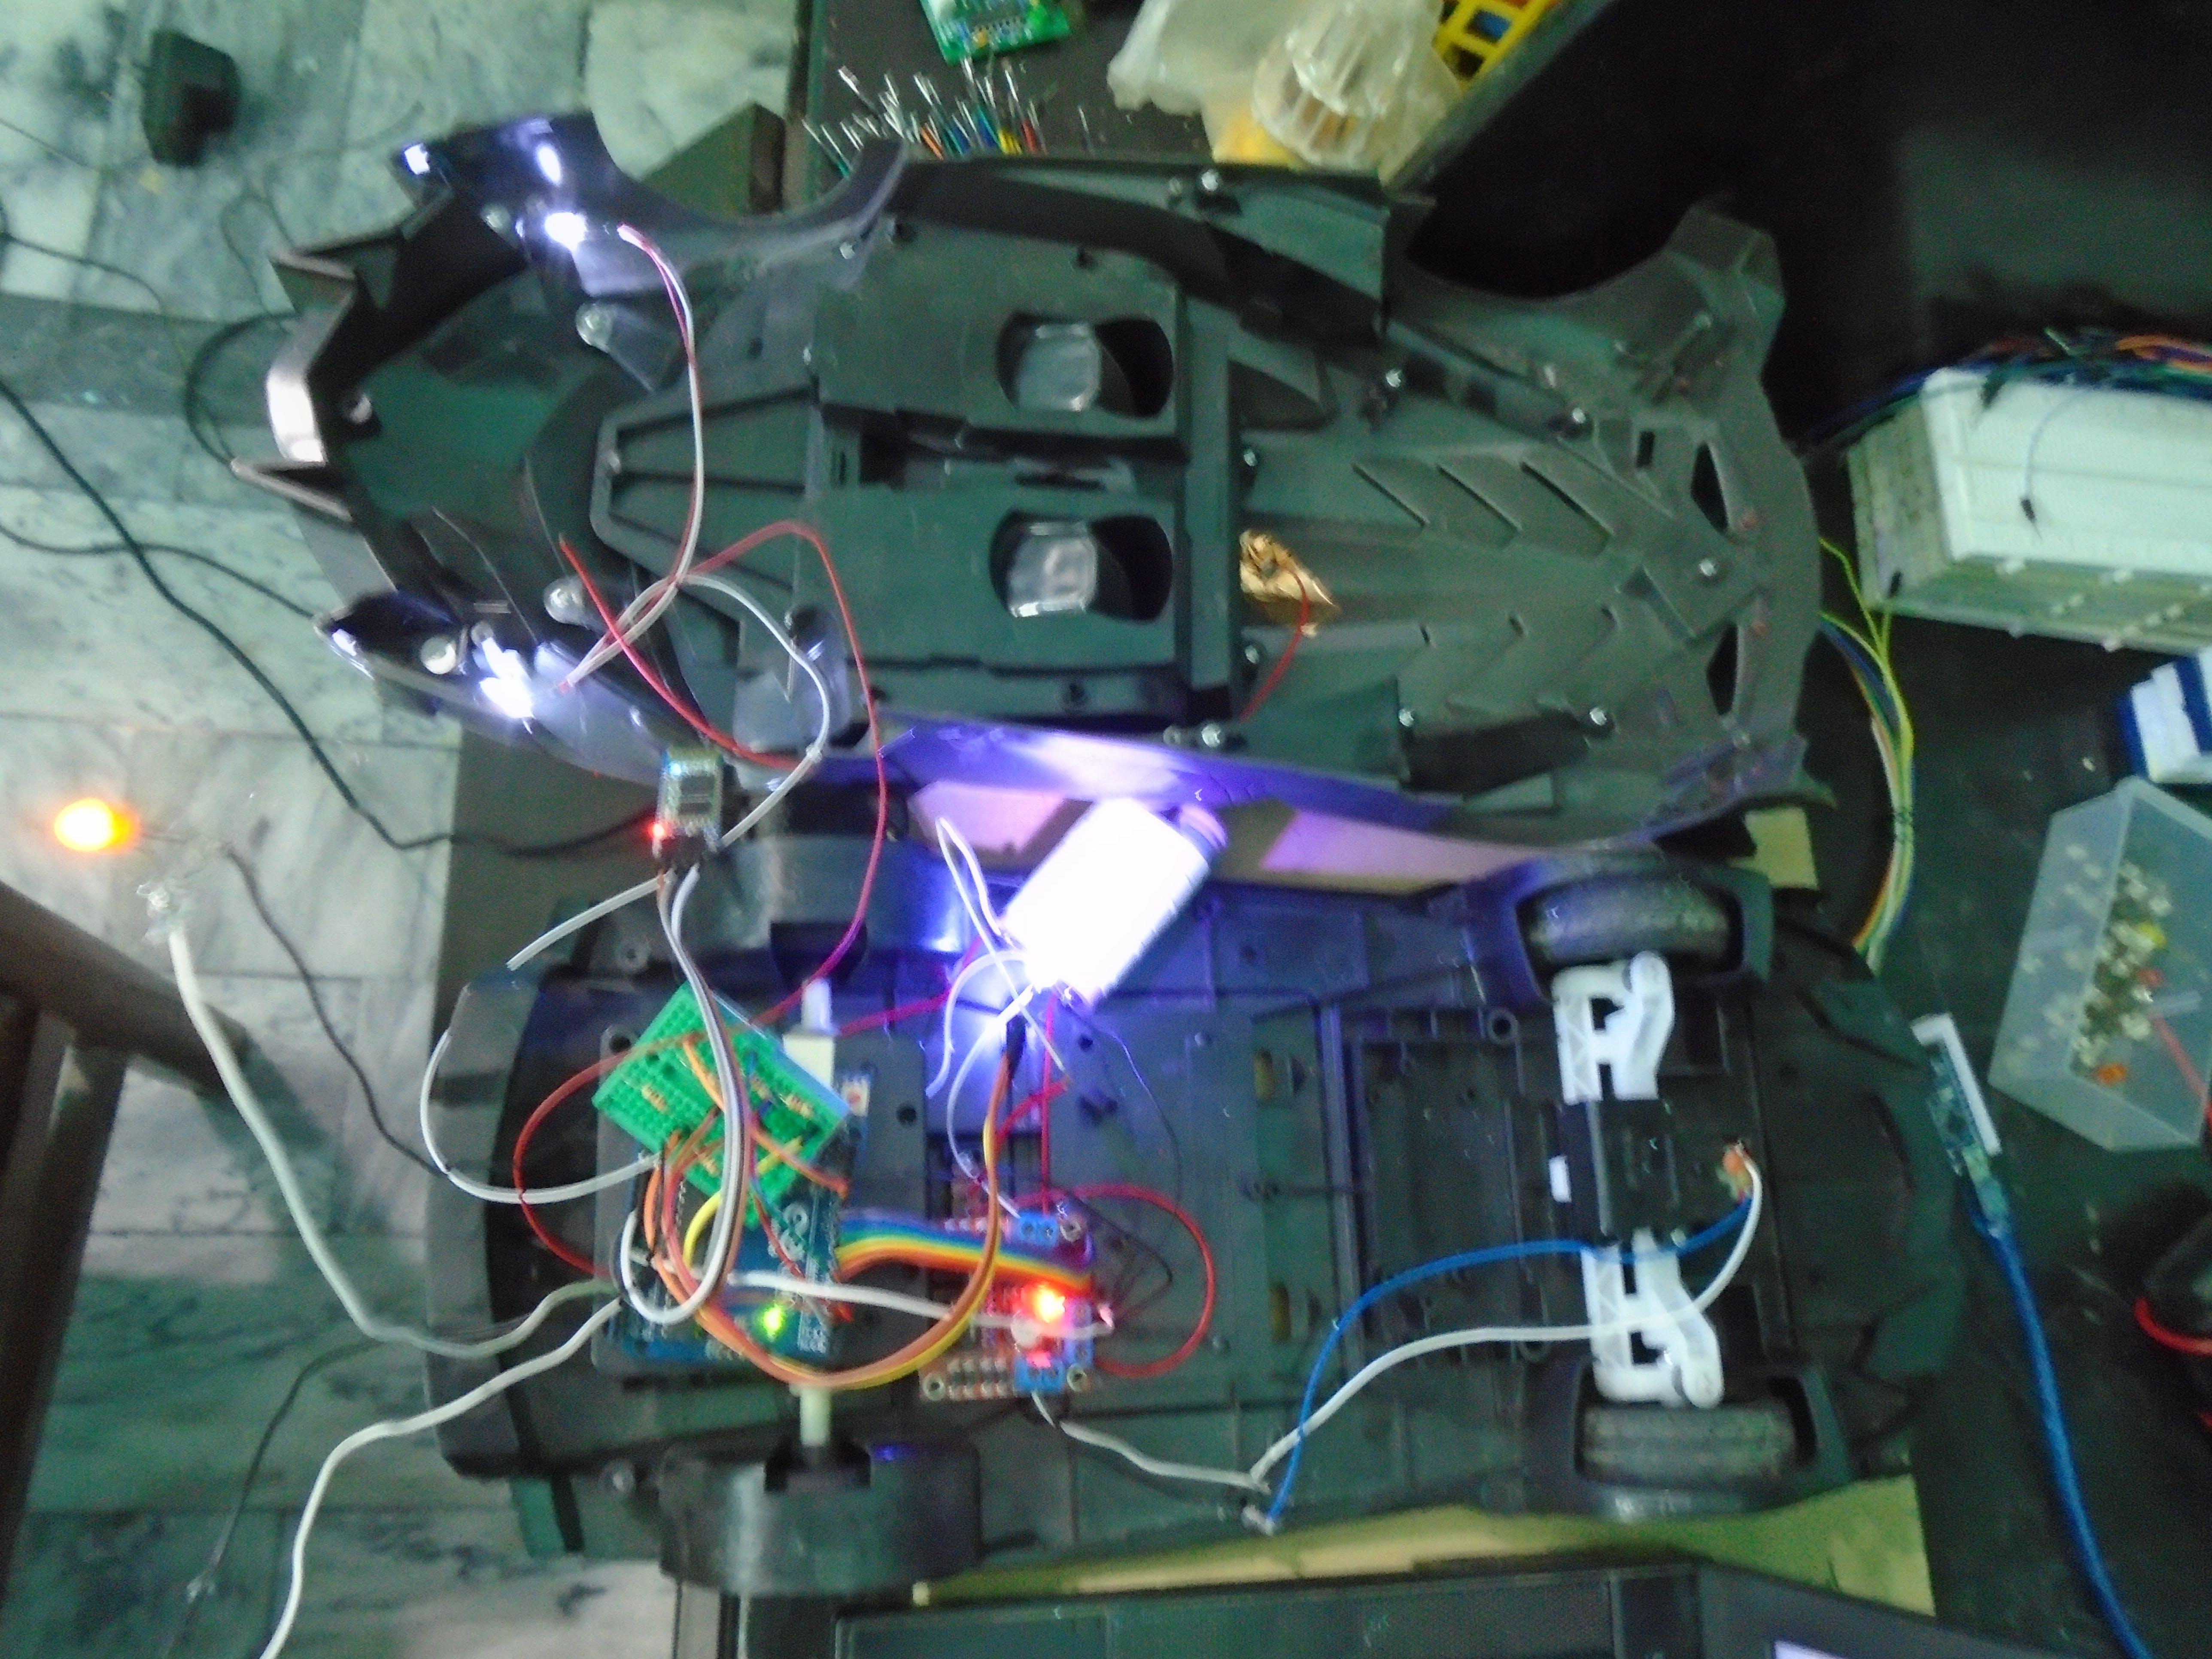
按照上面的电路图完成所有连接后,我的汽车连接电路如下图所示。

 
pYYBAGNYsJ6AAV8UABtfbPF59Aw063.jpg
 
 
pYYBAGNYsJ6AAV8UABtfbPF59Aw063.jpg
 

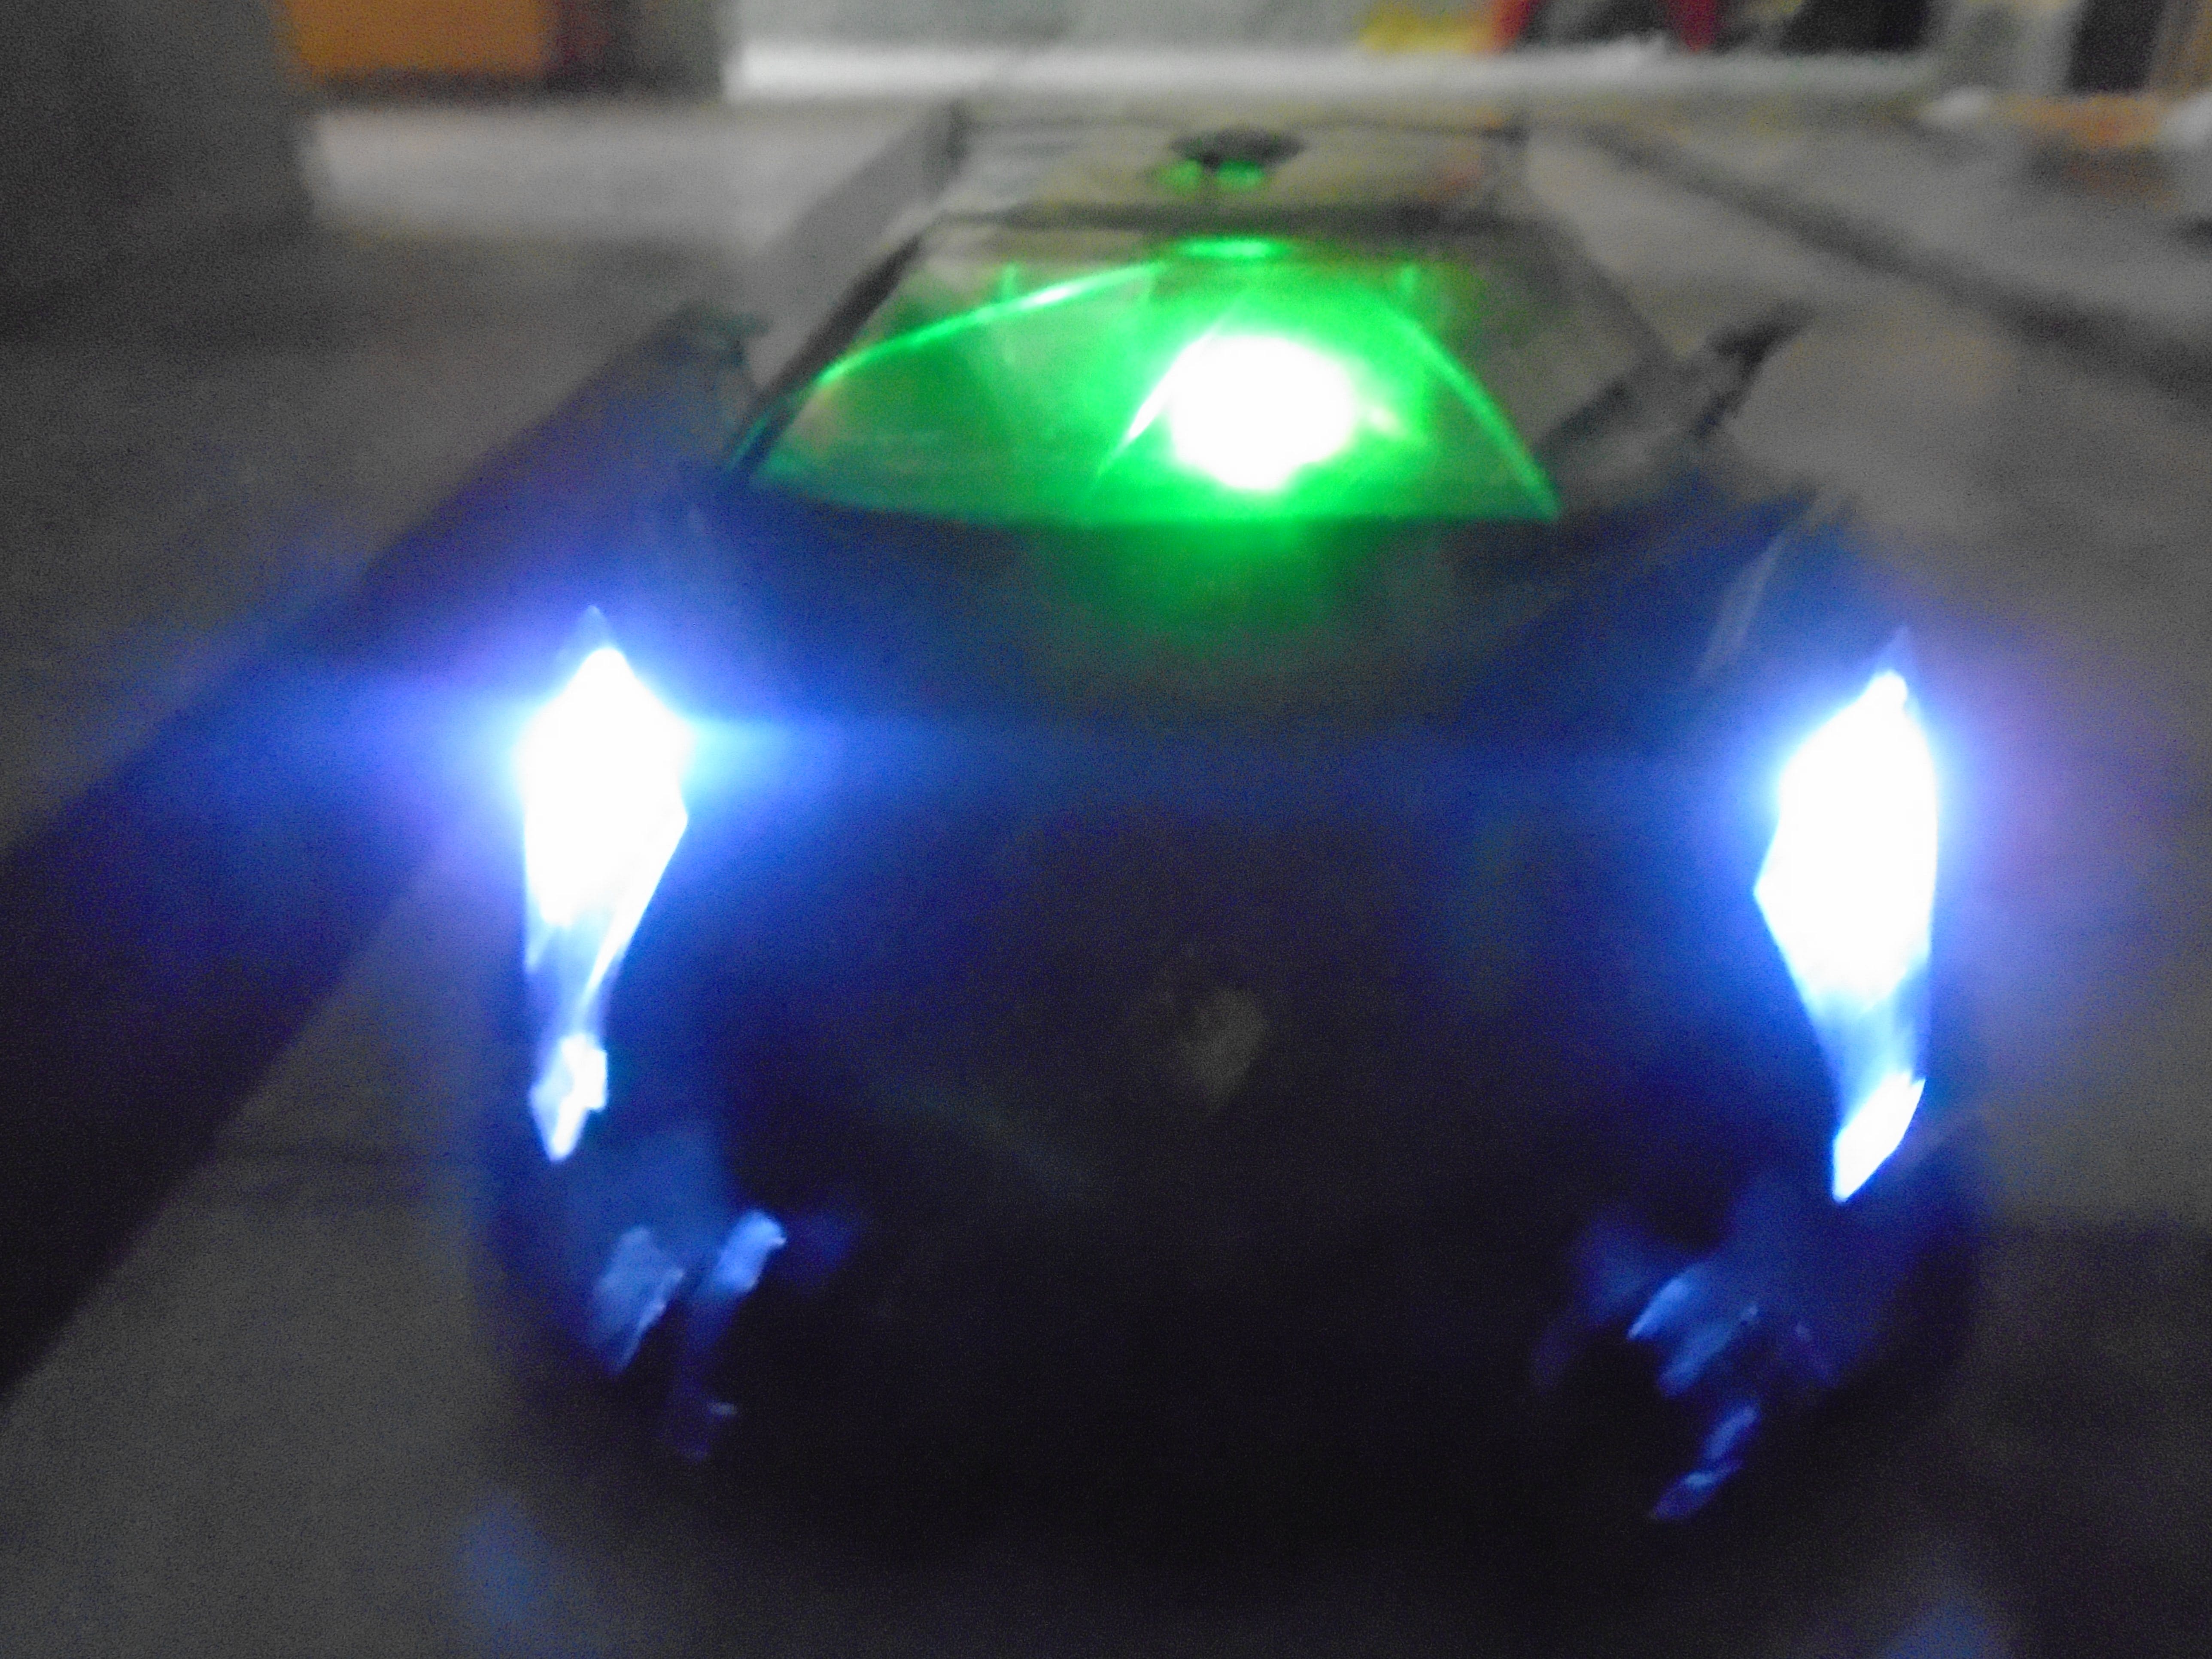
将顶部车身安装在其上后,这辆车看起来就像一辆原始的兰博基尼。中间连接的RGB让它看起来更漂亮,它的高速使它可以与市场上的遥控车竞争。

 
poYBAGNYsLOAK8PTABf8mB3vSOw376.jpg
 
 
poYBAGNYsLyAIcrCABTKBQ2DkjQ033.jpg
 
 
poYBAGNYsMWAXML1ABPZTz5olmE776.jpg
 

代码

//including the libraries
#include  // TX RX software library for bluetooth
#include 
//Defining pins for RGB led
#define GREEN 13
#define BLUE 5
#define RED 4
#define delayTime 3
#define LED_NUM 3
LEDFader leds[LED_NUM] = {
  LEDFader(4),
  LEDFader(5),
  LEDFader(13)
};
//Initializing pins for bluetooth Module
int bluetoothTx = 2; // bluetooth tx to 2 pin
int bluetoothRx = 3; // bluetooth rx to 3 pin
SoftwareSerial bluetooth(bluetoothTx, bluetoothRx);
//Front Motor Pins  
int Enable1 = 6;
int Motor1_Pin1 = 7;  
int Motor1_Pin2 = 8;  
//Back Motor Pins      
int Motor2_Pin1 = 9; 
int Motor2_Pin2 = 10;
int Enable2 = 11; 
//Front Light pins   
int front_light1 = A0;
int front_light2 = A1;
//Back light pins
int back_light1 = A2;
int back_light2 = A3;
int horn = 12;
char command ; //variable to store the data
int velocity = 0; //Variable to control the speed of motor
void setup() 
{       
  //Set the baud rate of serial communication and bluetooth module at same rate.
  Serial.begin(9600);  
  bluetooth.begin(9600);
  //Setting the L298N, LED and RGB LED pins as output pins.
  pinMode(Motor1_Pin1, OUTPUT);  
  pinMode(Motor1_Pin2, OUTPUT);
  pinMode(Enable1, OUTPUT);
  pinMode(Motor2_Pin1, OUTPUT);  
  pinMode(Motor2_Pin2, OUTPUT);
  pinMode(Enable2, OUTPUT); 
  pinMode(front_light1, OUTPUT);  
  pinMode(back_light1, OUTPUT);
  pinMode(front_light2, OUTPUT);  
  pinMode(back_light2, OUTPUT);
  pinMode(horn, OUTPUT);
  pinMode(GREEN, OUTPUT);
  pinMode(BLUE, OUTPUT);
  pinMode(RED, OUTPUT);
  //Setting the enable and RGB LED pins as HIGH.
  digitalWrite(Enable1, HIGH);
  digitalWrite(Enable2, HIGH);
  digitalWrite(GREEN, HIGH);
  digitalWrite(BLUE, HIGH);
  digitalWrite(RED, HIGH);
}
void loop(){
  if(bluetooth.available() > 0){  //Checking if there is some data available or not
    command = bluetooth.read();   //Storing the data in the 'command' variable
    Serial.println(command);      //Printing it on the serial monitor
    
    //Change pin mode only if new command is different from previous.   
    switch(command){
    case 'F':  //Moving the Car Forward
      digitalWrite(Motor2_Pin2, LOW);
      digitalWrite(Motor2_Pin1, HIGH);
      digitalWrite(Motor1_Pin1, LOW);
      digitalWrite(Motor1_Pin2, LOW);
      break;
    case 'B':  //Moving the Car Backward
      digitalWrite(Motor2_Pin1, LOW);
      digitalWrite(Motor2_Pin2, HIGH);
      digitalWrite(Motor1_Pin1, LOW);
      digitalWrite(Motor1_Pin2, LOW);
      break;
    case 'L':  //Moving the Car Left
      digitalWrite(Motor1_Pin1, LOW);
      digitalWrite(Motor1_Pin2, HIGH);
      digitalWrite(Motor2_Pin1, LOW);
      digitalWrite(Motor2_Pin2, LOW);
      break;
    case 'R':   //Moving the Car Right
      digitalWrite(Motor1_Pin2, LOW);
      digitalWrite(Motor1_Pin1, HIGH);  
      digitalWrite(Motor2_Pin1, LOW);
      digitalWrite(Motor2_Pin2, LOW);
      break;
    case 'S':   //Stop
      digitalWrite(Motor2_Pin2, LOW);
      digitalWrite(Motor2_Pin1, LOW);
      digitalWrite(Motor1_Pin2, LOW);
      digitalWrite(Motor1_Pin1, LOW);
      break; 
    case 'I':  //Moving the Car Forward right
      digitalWrite(Motor2_Pin2, LOW);
      digitalWrite(Motor2_Pin1, HIGH);
      digitalWrite(Motor1_Pin2, LOW);
      digitalWrite(Motor1_Pin1, HIGH);
      break; 
    case 'J':  //Moving the Car backward right
      digitalWrite(Motor1_Pin2, LOW);
      digitalWrite(Motor1_Pin1, HIGH);
      digitalWrite(Motor2_Pin1, LOW);
      digitalWrite(Motor2_Pin2, HIGH);
      break;        
    case 'G':  //Moving the Car Forward left
      digitalWrite(Motor2_Pin2, LOW);
      digitalWrite(Motor2_Pin1, HIGH);
      digitalWrite(Motor1_Pin1, LOW);
      digitalWrite(Motor1_Pin2, HIGH);
      break; 
    case 'H':  //Moving the Car backward left
      digitalWrite(Motor2_Pin1, LOW);
      digitalWrite(Motor2_Pin2, HIGH);
      digitalWrite(Motor1_Pin1, LOW);
      digitalWrite(Motor1_Pin2, HIGH);
      break;
    case 'W':  //Front light ON 
      digitalWrite(front_light1, HIGH);
      digitalWrite(front_light2, HIGH);
      break;
    case 'w':  //Front light OFF
      digitalWrite(front_light1, LOW);
      digitalWrite(front_light2, LOW);
      break;
    case 'U':  //Back light ON 
      digitalWrite(back_light1, HIGH);
      digitalWrite(back_light2, HIGH);
      break;
    case 'u':  //Back light OFF 
      digitalWrite(back_light1, LOW);
      digitalWrite(back_light2, LOW);
      break; 
    case 'V':  //Horn On
      tone(horn,494);
      break; 
    case 'v':  //Horn OFF 
       noTone(horn);
      break;   
    case 'x': //Turn ON Everything
    break;
    case 'X': //Turn OFF Everything
      
    break;
    //Controlling the Speed of Car  
    default:  //Get velocity
      if(command=='q'){
        velocity = 255;  //Full velocity
        analogWrite(Enable2, velocity);
      }
      else{ 
        //Chars '0' - '9' have an integer equivalence of 48 - 57, accordingly.
        if((command >= 48) && (command <= 57)){ 
          //Subtracting 48 changes the range from 48-57 to 0-9.
          //Multiplying by 25 changes the range from 0-9 to 0-225.
          velocity = (command - 48)*25;       
          analogWrite(Enable2, velocity);
        }
      }
      }
    }
     RGB();
  } 
  void RGB()
{
    // Update all LEDs and start new fades if any are done
  for (byte i = 0; i < LED_NUM; i++) 
  {
    LEDFader *led = &leds[i];
    led->update();
    // This LED is not fading, start a new fade
    if (led->is_fading() == false) 
    {
      int duration = random(1000, 3000); // between 1 - 3 seconds
      // Fade Up
      if (led->get_value() == 0) 
      {
        byte intensity = random(100, 255);
        led->fade(intensity, duration);
      }
      // Fade Down
      else 
      {
        led->fade(0, duration);
      }
    }
  }
 }


声明:本文内容及配图由入驻作者撰写或者入驻合作网站授权转载。文章观点仅代表作者本人,不代表电子发烧友网立场。文章及其配图仅供工程师学习之用,如有内容侵权或者其他违规问题,请联系本站处理。 举报投诉

评论(0)
发评论

下载排行榜

全部0条评论

快来发表一下你的评论吧 !