
资料下载

×
Arduino遥控宠物喂食器
消耗积分:2 |
格式:zip |
大小:0.16 MB |
2022-10-24
描述
通过这个简单的 Arduino 项目,您可以使用遥控器喂养您的宠物。您只需要一个 Arduino Uno 板(或类似的)、一个塑料瓶、一个伺服电机(不必非常强大)、一个电视遥控器、红外接收器 (TS0P1738) 和一小块纸板。
让我们开始吧!
安装 IR 库:
我们需要与 arduino 关联的第一件事是下载 IR 库。
从以下链接下载 IR 库并安装它:https ://github.com/z3t0/Arduino-IRremote
解码红外信号:
首先,您需要根据给定的电路图连接部件:
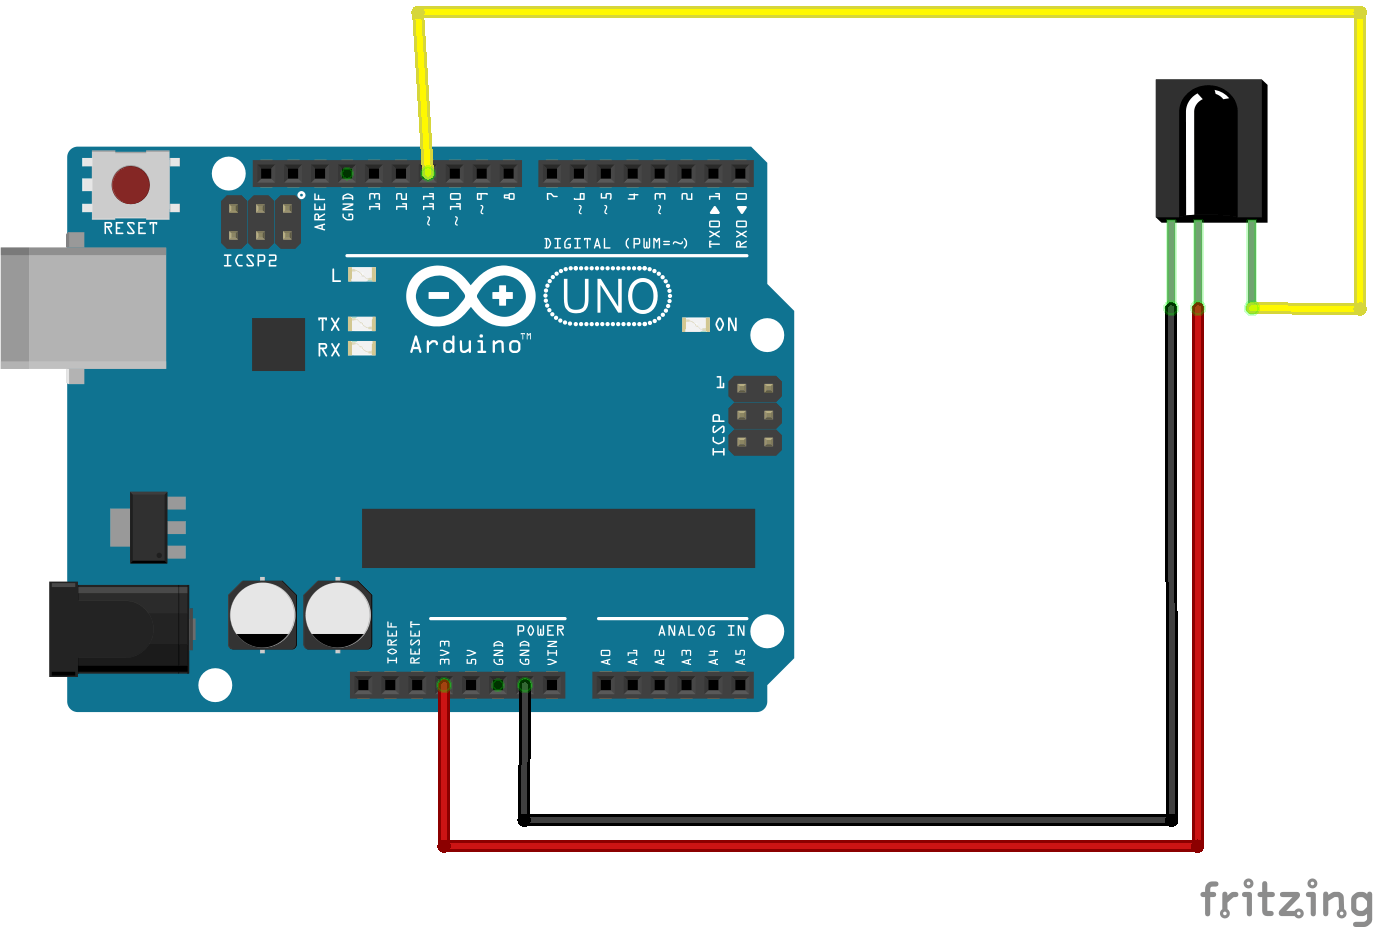
您可以在下面检查 TSOP1738 的引脚:
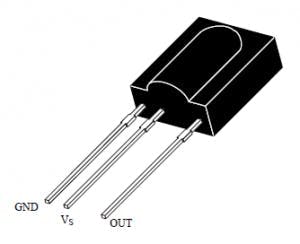
TSOP1738的管脚
使用以下代码解码红外遥控器:
/*
The IR sensor's pins are attached to Arduino as so:
Pin 1 to Vout (pin 11 on Arduino)
Pin 2 to GND
Pin 3 to Vcc (+5v from Arduino)
*/
#include
- 打开 Arduino IDE 并上传代码
- 打开串行监视器
- 将遥控器对准传感器并按下每个按钮
- 您可以看到每个按钮的不同数字
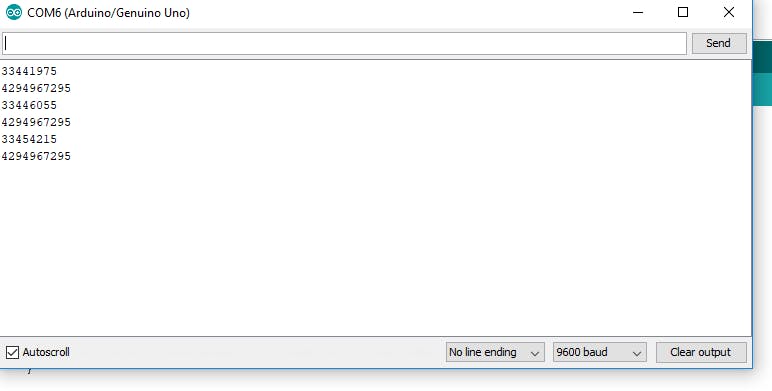
考虑任意两个按钮,并记下解码值。在我的情况下,我选择了电源按钮和模式按钮。
我得到以下值:
- 电源键=33441975
- 模式按钮=33446055
我们将使用这两个值来控制伺服电机的旋转。您需要在下一步给出的程序中添加这两个值:
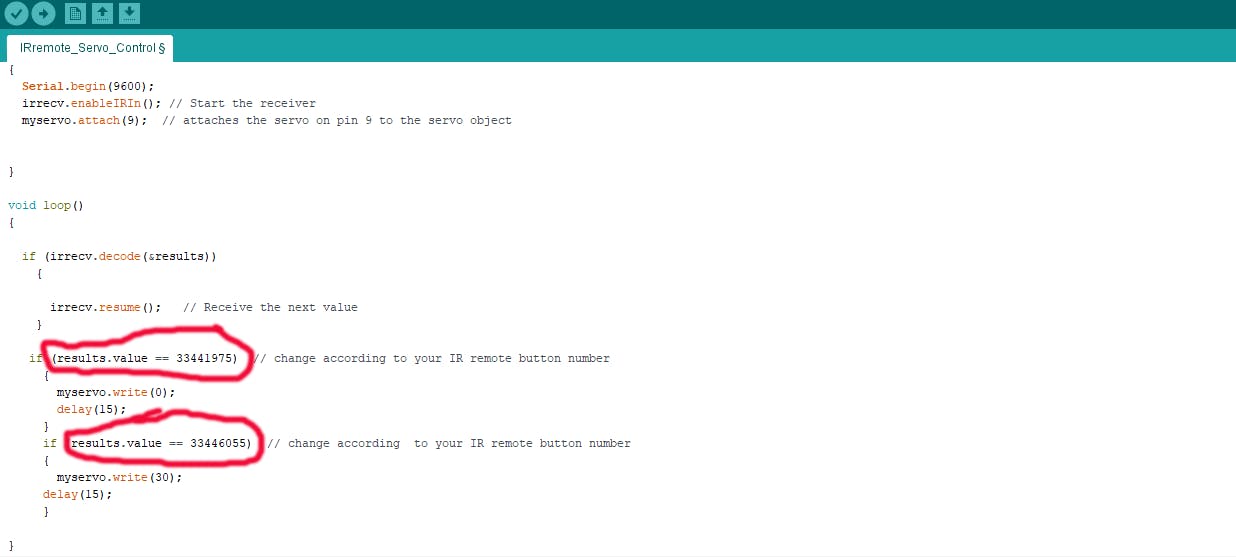
让我们设置最终的硬件!
最终巡回赛!
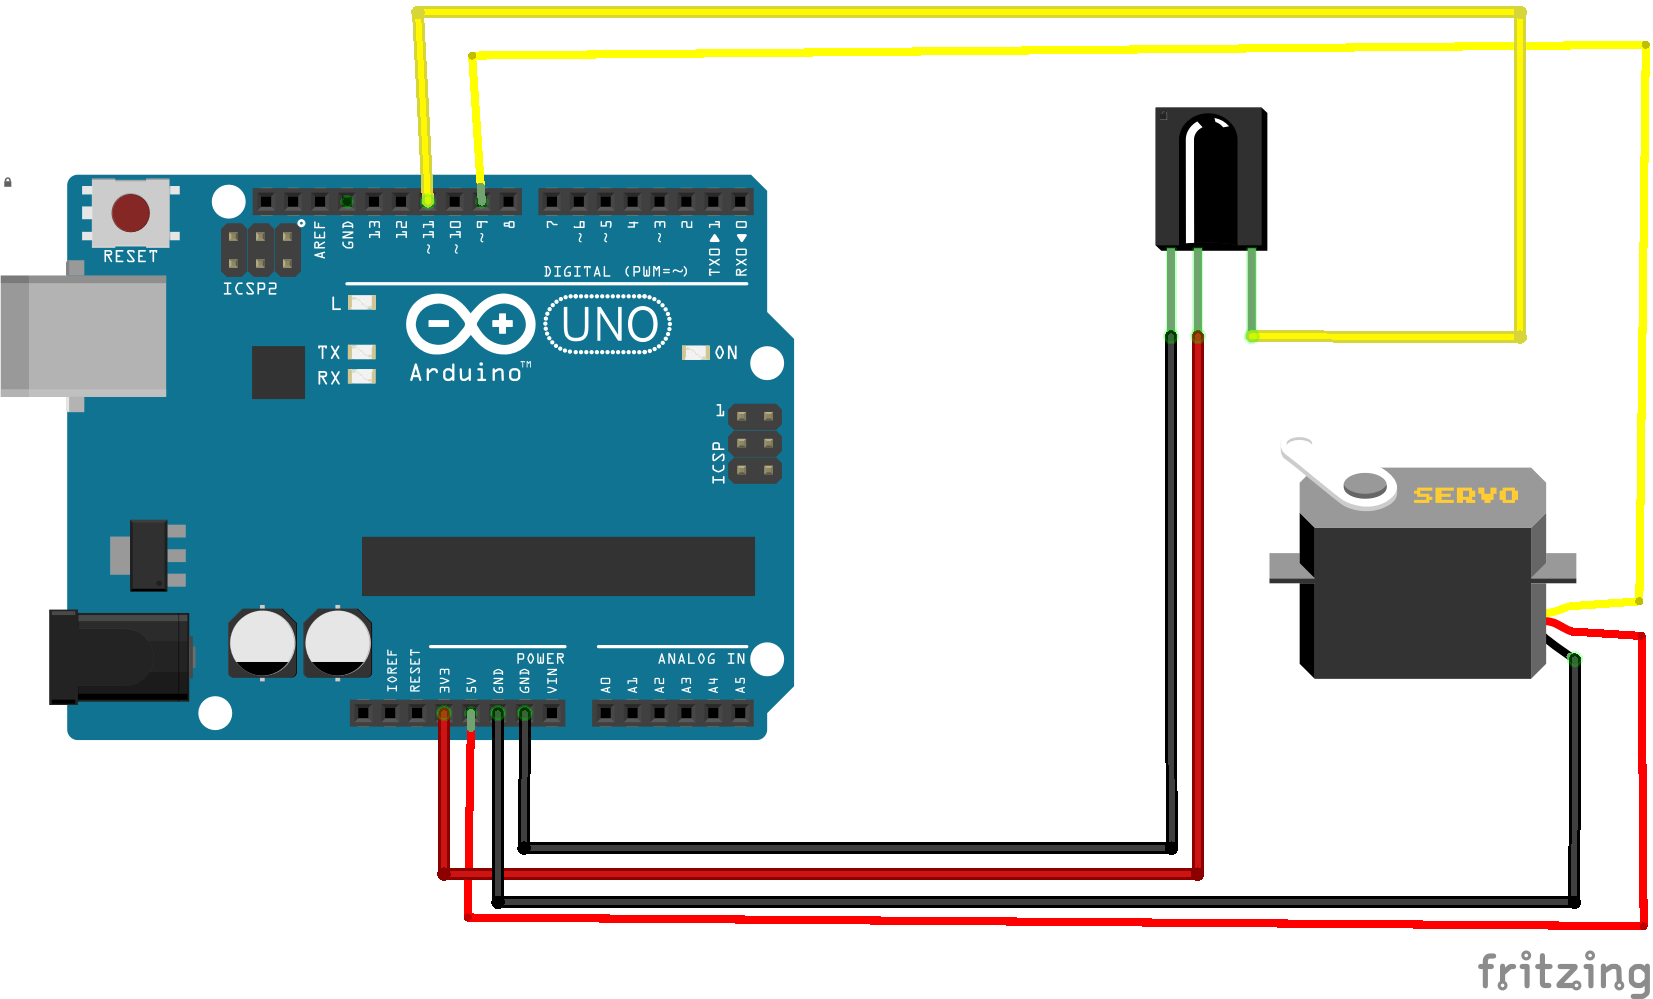
- 将伺服的信号引脚连接到 arduino 上的引脚#9
- 将伺服的 VCC 和 GND 引脚连接到 arduino 上的 5V VCC 和 GND
- 伺服器将粘在塑料瓶的一端,并旋转一块足够小的纸板以关闭瓶子的开口,从而阻止食物。
- 如果所有硬件设置都正确连接,您可以简单地编译并将以下草图上传到板上。
#include
现在,您可以通过这个简单的项目使用遥控器控制宠物喂食器分配器的打开。:-)
制作愉快!
声明:本文内容及配图由入驻作者撰写或者入驻合作网站授权转载。文章观点仅代表作者本人,不代表电子发烧友网立场。文章及其配图仅供工程师学习之用,如有内容侵权或者其他违规问题,请联系本站处理。 举报投诉
评论(0)
发评论
- 相关下载
- 相关文章


