
资料下载

带有MKR WiFi 1010的植物通讯器
介绍
正如英国诗人威廉·华兹华斯曾经说过的:
“你的思想是花园,你的思想是种子,收获可以是花朵或杂草。
“让你的植物保持活力可能是一个相当大的挑战,因为它们非常不善于沟通。让它们开心的一种方法是把你的植物带在身边,但也许你不想带着那个大仙人掌到处走走,或者蕨类植物从你的冬季夹克口袋里伸出来。
此外,大多数植物不喜欢寒冷。在花了几个月的时间尝试与我们的蜘蛛植物进行通信后,我们放弃并使用 MKR IoT Bundle 组件创建了一个可以远程调查任何植物健康状况的设备。
简而言之
在这个实验中,您将学习如何保护您的植物并确保它们能够生存以及如何使用 Arduino 魔法。
通过监测湿度、温度和光照,您可以确保您的植物生长良好。
它可以每天发送电子邮件和图表,并通知您它的需求。
成分
- TMP36温度传感器
- 光电晶体管
- DIY湿度传感器
学习目标
- 介绍 Zapier 互联网服务
- 发送 HTTP 请求
- 管理实时时钟和闹钟
- 构建一个 DIY 湿度传感器
- 使用 thingSpeak #ProTips绘制值
- 使用 HTML 和 CSS #ProTips为您的电子邮件设置样式
- 使用 PostMan #ProTips测试 API
想知道更多?
本教程是让您熟悉 MKR WiFI 1010 和 IoT 的一系列实验的一部分。所有实验都可以使用 MKR IoT Bundle 中包含的组件构建。
- 带有 MKR WiFi 1010 的植物通讯器
设置 Zapier
Zapier是一款在线自动化工具,可以方便地为我们管理其他应用的 API。它是组合多个任务的好工具,或者如果我们要使用的应用程序具有无法由 Arduino 管理的复杂 API。
在我们的例子中,我们将使用它发送一封电子邮件,其中包含从 Arduino 检索到的数据。
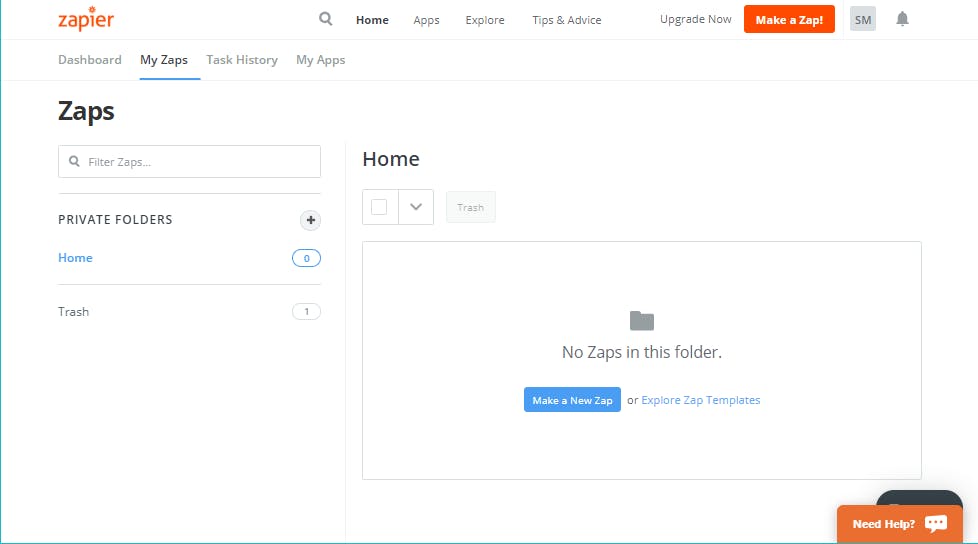
按照这几个简单的步骤来创建自己的 zap!
为了继续,我们需要先复制给定的 URL 来测试我们的钩子,然后选择按下 Continue 时出现的 Test and Review 按钮。将这些参数添加到 URL:
Custom_Webhook_URL?temperature=0&moisture=0&light=0&warning=0
现在只需将此 URL 复制并粘贴到新的浏览器页面上。您应该会看到如下响应:
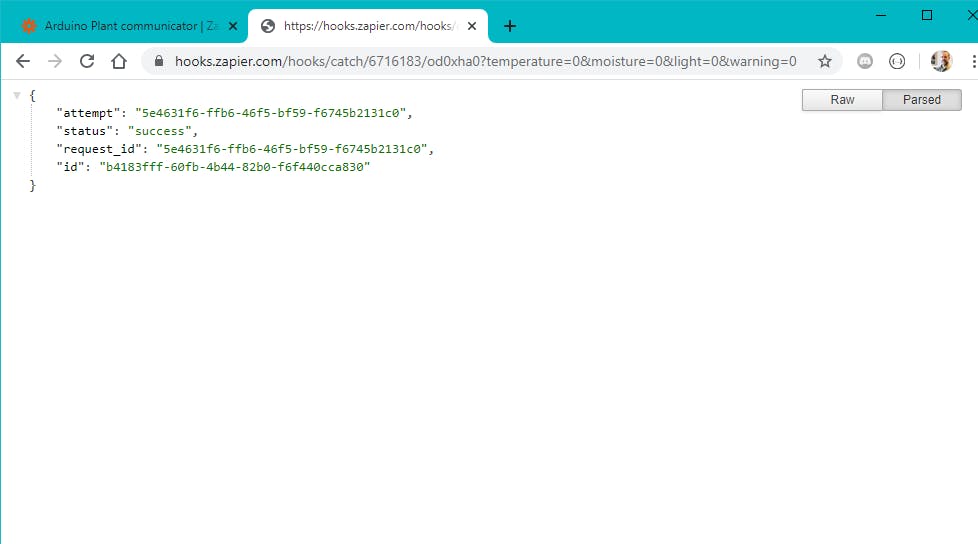
恭喜!您刚刚发送了一个http 请求!
这正是我们将使用我们的 Arduino 板做的事情。但是,我们不会将该 URL 粘贴到浏览器页面中,而是将其直接发送到 Zapier 服务器。此外,我们将使用我们的传感器值修改现在设置为零的参数值。
有关测试和使用 API 的更高级方法,请查看页面底部的#ProTip 。
测试您的请求后,您可以继续创建 Zap。
继续编辑执行此操作...
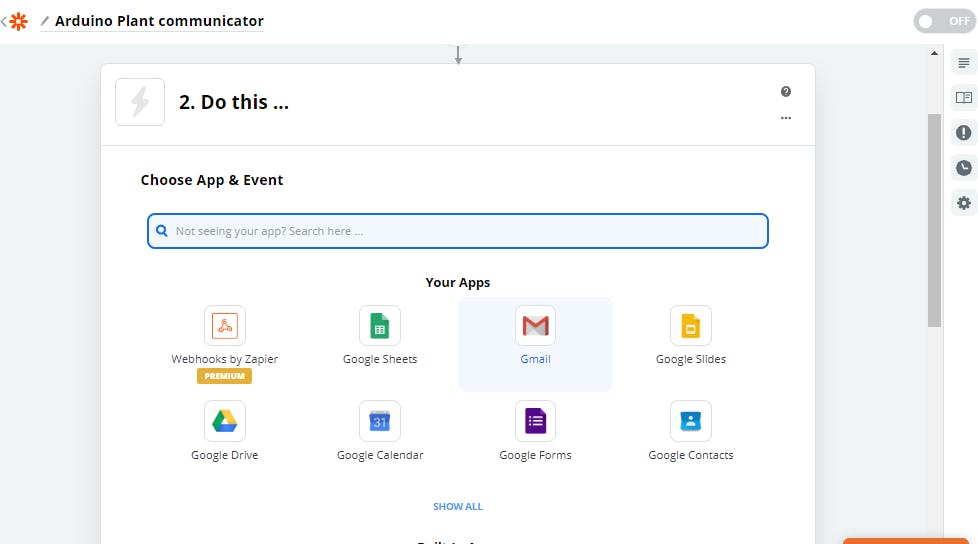
检查您的邮箱以查看 Zapier 生成的电子邮件。它将来自您在 gmail 配置的第一步中使用的帐户。
设立董事会
为了实现所有功能,我们将使用以下库:
- WiFiNINA // 连接到互联网并扫描网络
- RTCZero // 管理时间触发事件
您可以按照本指南中的说明从库管理器下载它们。
发送 HTTP 请求
我们现在准备从 Arduino 板发送 HTTP 请求。现在我们将为我们的参数设置一个任意值,稍后将用真实的传感器值替换。
float temperature = 22;
int moisture = 150;
int light = 40;
String warning = "This is a warning message";
warning.replace(" ", "%20");
请注意,必须对字符串进行编码,因为不能在 HTTP 请求中发送空格。所有空格都替换为编码的等价物%20
设置好参数后,我们将调用该send_email()函数,它将所有参数转换为字符串,并重建我们之前使用的相同 URL,然后将其发布到 Zapier 服务器。
使用您的 WiFi 凭据和您从 Zapier 收到并上传的 URL 填写此草图。
#include
它会每 20 秒向您选择的地址发送一封电子邮件。
请注意请求,Zapier 每月只允许您 100 个免费请求。
RTC 和警报
我们可以使用 MKR WiFi 1010 的实时时钟在每天的某个时间发送一封电子邮件。
此草图将时间和日期设置为 2017 年 12 月 4 日 16:00,然后在每天 16:01 触发警报。
请注意,由于警报附加到中断函数,我们不能包含任何延迟,但我们可以使用布尔变量来触发循环()中的动作
#include
DIY土壤湿度传感器
放置在土壤盆中的两根电线形成一个可变电阻器,其电阻根据土壤湿度而变化。该可变电阻器以分压器配置连接,Arduino 收集与 2 根导线之间的电阻成比例的电压。这意味着土壤越潮湿,Arduino 测量的电压越小。使用1 兆欧电阻和两根电线,我们可以创建自己的 DIY 土壤湿度传感器!
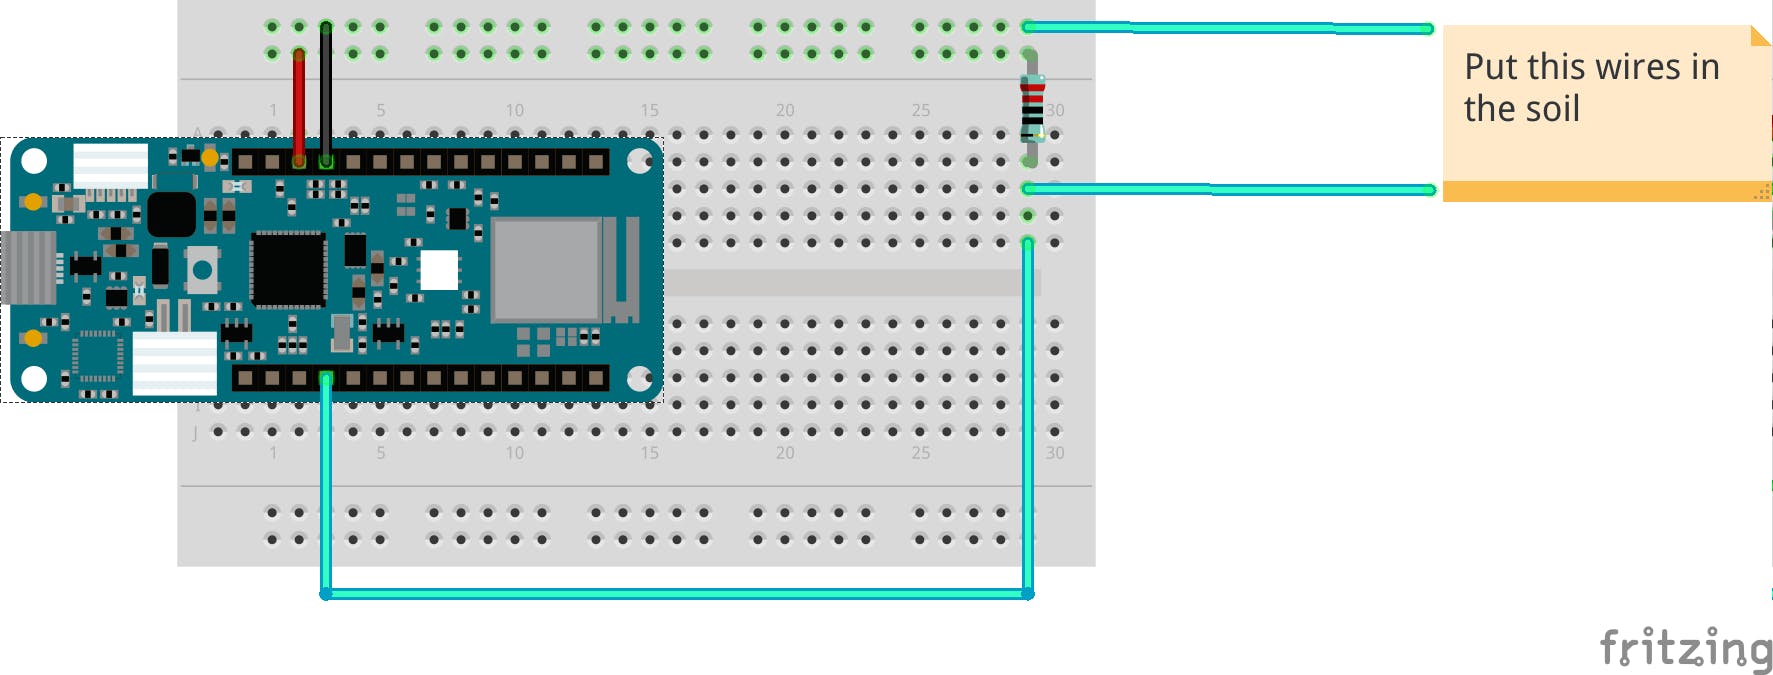
上传以下草图,您可以开始读取传感器的值,我们建议您先在干燥的土壤中开始测试,并记下您读取的值。
该值将用于设置阈值,以便 Arduino 知道您的植物何时需要水并向您发送紧急电子邮件。
int moisturePin = A2;
// Set this threeshold accordingly to the resistance you used
// The easiest way to calibrate this value is to test the sensor in both dry and wet soil
int threeshold = 800;
void setup() {
 Serial.begin(9600);
 while (!Serial);
 delay(2000);
}
void loop() {
 Serial.println(get_average_moisture());
 delay(5000);
}
int get_average_moisture() { // make an average of 10 values to be more accurate
 int tempValue = 0; // variable to temporarly store moisture value
 for (int a = 0; a < 10; a++) {
   tempValue += analogRead(moisturePin);
   delay(100);
 }
 return tempValue / 10;
}
添加温度和光传感器
请参阅下面的示意图来连接两个传感器。我们将使用这两个函数从传感器读取值:
float get_temperature() {
 int reading = analogRead(A1);
 float voltage = reading * 3.3;
 voltage /= 1024.0;
 // Print tempeature in Celsius
 float temperatureC = (voltage - 0.5) * 100 ; //converting from 10 mv per degree wit 500 mV offset
 // Convert to Fahrenheit
 float temperatureF = (temperatureC * 9.0 / 5.0) + 32.0;
 return temperatureC;
}
int get_light() {
 int light_value = analogRead(A0);
 return light_value;
}
请注意,您可以通过返回temperatureF而不是使用华氏单位temperatureC
#ProTip:使用 ThingSpeak 绘制值
对于你们所有的控制狂来说,这里是把收集到的所有数据绘制成一个漂亮的图表的说明,如下所示:
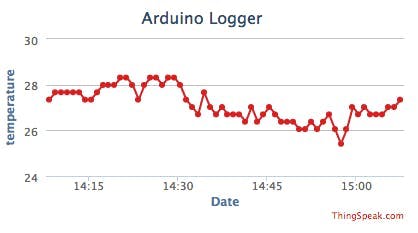
我们将使用 ThingSpeak 平台绘制图表,按照以下步骤开始。

下载ThingSpeak库,让我们开始吧。下面的这个草图将每分钟将传感器值上传到云端,只需填写您的 WiFi 凭据和您的频道的 API 密钥并上传。
#include
在下面的完整 Pro 草图中,您可以看到如何将此上传附加到每分钟触发的 RTC 警报。
不幸的是,Gmail 不允许我们在电子邮件正文中嵌入图表和iframe,但我们可以通过电子邮件以漂亮的按钮发送链接,请参阅下面的提示。
我们选择了 ThingSpeak,但还有很多选择!以Dweet.io和freeboard.io为例。
#ProTip:样式化您的电子邮件
Zapier 允许我们在电子邮件正文中嵌入一些 html 和 css 代码。我们可以使用它来发送非常风格化的电子邮件,如下所示:
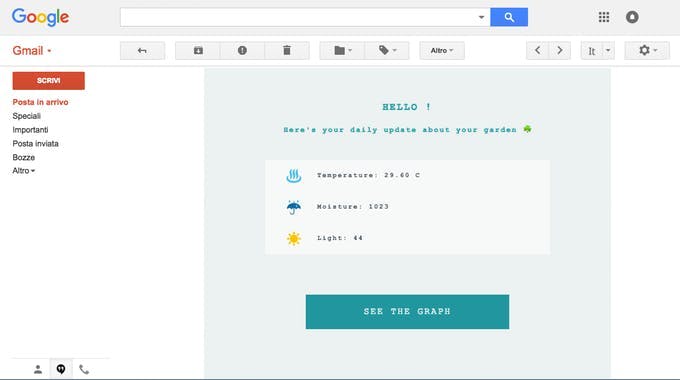
要实现这个结果,只需在 Zapier 界面上将正文类型更改为 html并添加您的自定义 HTML 和 CSS。
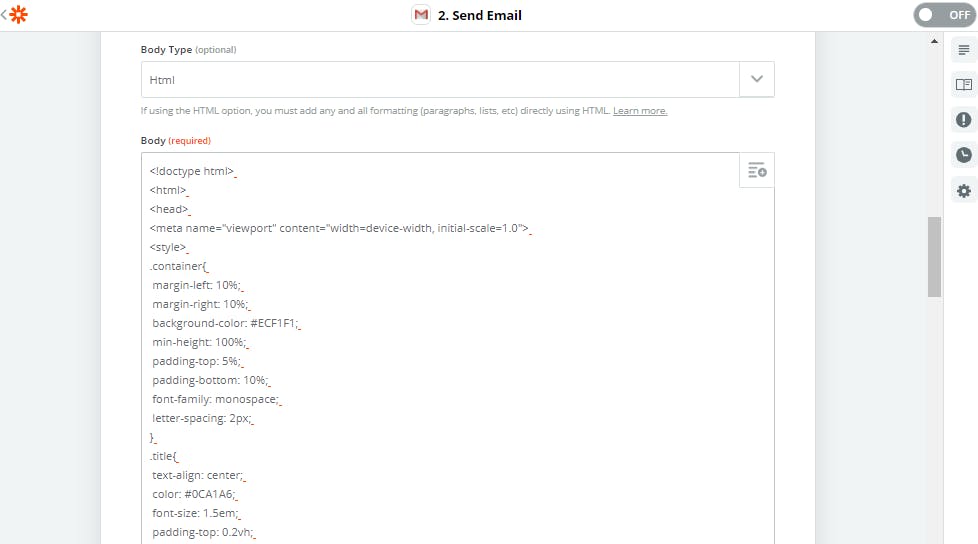
复制并粘贴此模板:
html>
<html>
<head>
<meta name="viewport" content="width=device-width, initial-scale=1.0">
<style>
.container{
margin-left: 10%;
margin-right: 10%;
background-color: #ECF1F1;
min-height: 100%;
padding-top: 5%;
padding-bottom: 10%;
font-family: monospace;
letter-spacing: 2px;
}
.title{
text-align: center;
color: #0CA1A6;
font-size: 1.5em;
padding-top: 0.2vh;
}
.subtitle{
text-align: center;
color: #0CA1A6;
font-size: 1.1em;
padding-bottom: 4%;
padding-left: 4%;
padding-right: 4%;
}
.data{
padding-bottom: 2%;
padding-top: 2%;
padding-left: 5%;
margin-left: 15%;
margin-right: 15%;
background-color: #F7F9F9;
text-align: left;
color: #4E5B61;
font-size: 1em;
font-weight: bold;
}
.bttn{
padding-bottom: 3%;
padding-top: 3%;
margin-left: 25%;
margin-right: 25%;
margin-top: 10%;
background-color: #00979D;
text-align: center;
color: #F7F9F9;
font-size: 1.4em;
}
.disclaimer{
text-align:center;
color:#DA5B4A;
font-size: 1.1em;
font-weight: bold;
margin-top: 10%;
}
.bttn:hover{
background-color: #008184;
}
a{
text-decoration: none;
}
style>
head>
<body>
<div class="container">
<h2 class="title">HELLO !h2>
<h4 class="subtitle">Here's your daily update about your garden ☘h4>
<div class="data">  ♨    Temperature: {{querystring__temperature}} C div>
<div id="humidity" class="data"> ☔    Moisture: {{_querystring__moisture}}div>
<div  class="data"> ☀    Light: {{querystring__light}}div>
<div  class="disclaimer">{{querystring__warning}}div>
<a href="your_link_to_thingSpeak">
<div class="bttn">SEE THE GRAPHdiv>
a>
div>
body>
html>
#ProTip:使用 PostMan 测试 API
处理 HTTP 请求可能很困难,幸运的是有很多工具可以帮助我们构建所需的 URL。Postman 就是一个很好的例子:
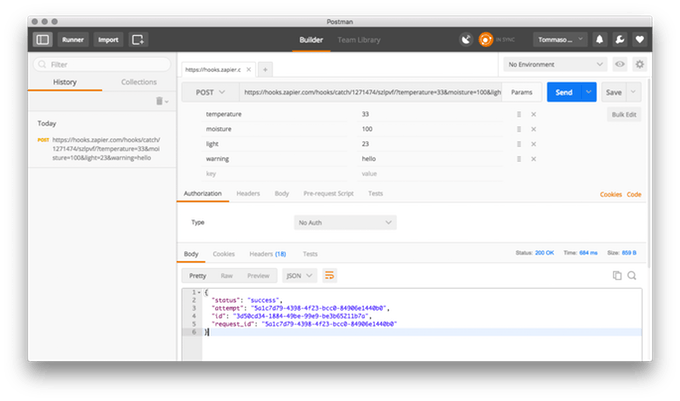
只需粘贴 Zapier 给出的初始 URL,添加参数并发送即可。它将打印出服务器的响应并为您编写 URL。
声明:本文内容及配图由入驻作者撰写或者入驻合作网站授权转载。文章观点仅代表作者本人,不代表电子发烧友网立场。文章及其配图仅供工程师学习之用,如有内容侵权或者其他违规问题,请联系本站处理。 举报投诉
- 相关下载
- 相关文章


