资料下载

×
带有ESP8266的电报机器人
消耗积分:0 |
格式:zip |
大小:0.11 MB |
2022-11-21
描述
嗨编码员,
使用电报机器人 API 和 ESP8266 开始我的 Hackster 职业生涯真是太棒了。通过这个项目,我试图描述如何用电报机器人控制 ESP8266,它打开了物联网的伟大世界。
1.安装电报机器人库
首先下载 Telegram Bot 库(下载)并将其添加到 Arduino IDE。
2.配置电报机器人
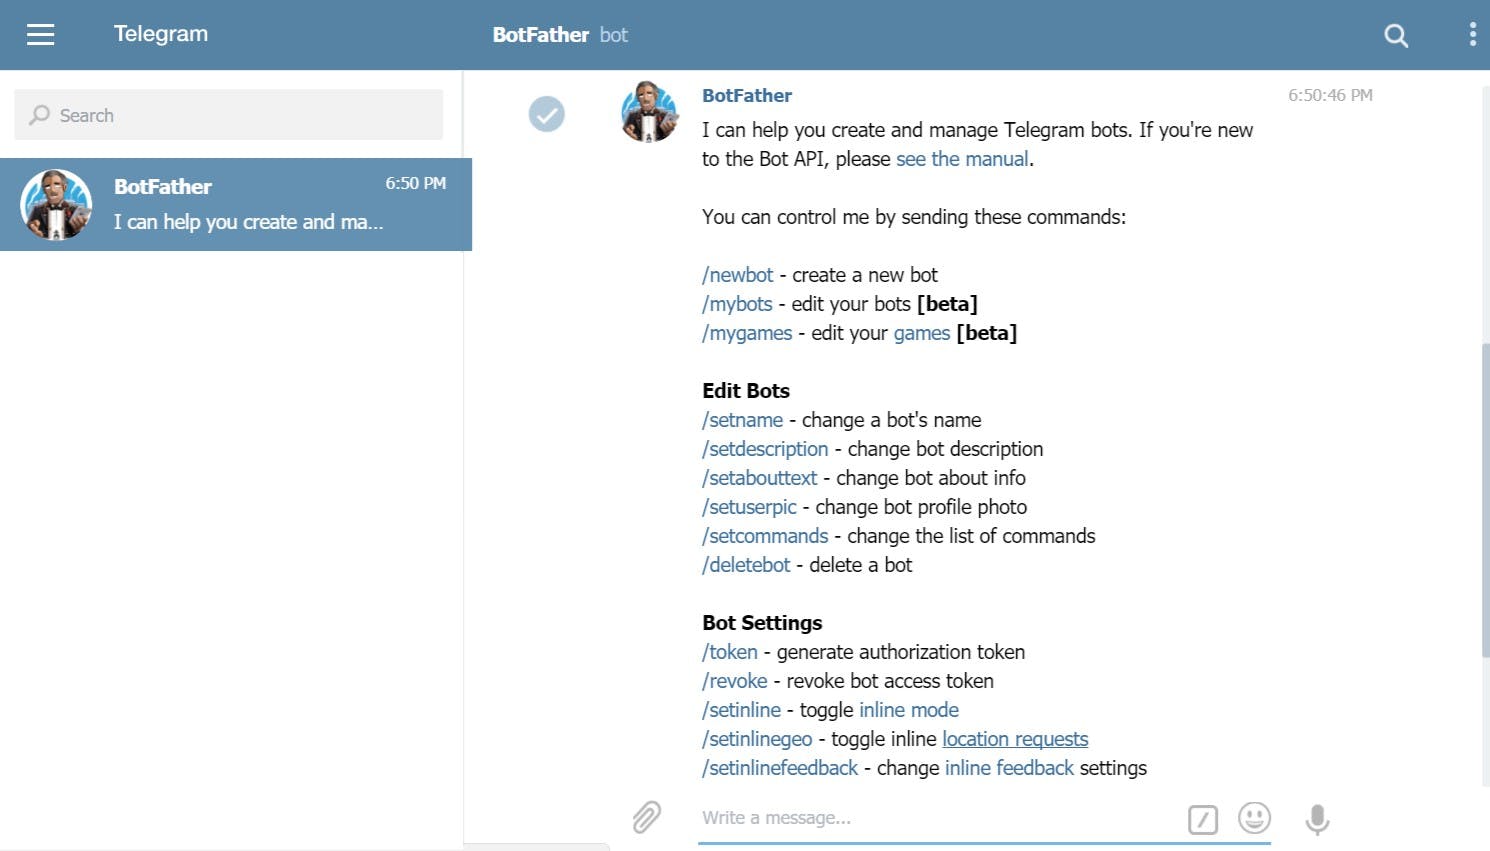
在您的笔记本电脑或手机上安装 Telegram 并搜索 Botfather。通过 Botfather 创建您的新机器人。

博父
从 Botfather 你可以拿走令牌。
3. 设置设备
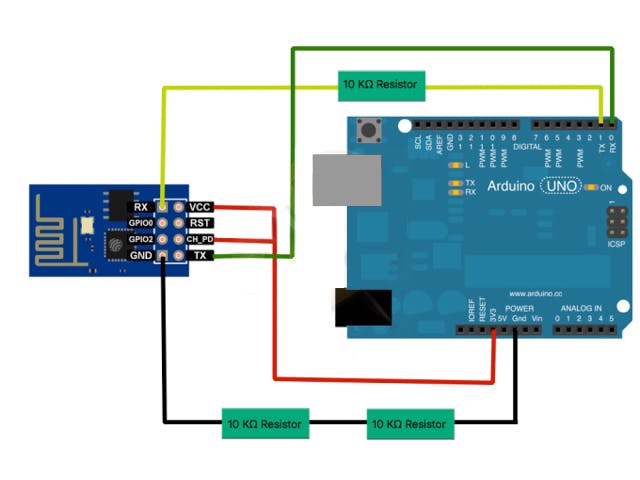
如图所示,将 ESP8266 连接到 Arduino。将 GPIO0 接地并重置以重置 Arduino 并上传代码。

4. 守则
#include
#include
#include
#define LED 1 //led pin number
// Initialize Wifi connection to the router
const char* ssid     = "xxxxx";
const char* password = "yyyyy";
// Initialize Telegram BOT
const char BotToken[] = "xxxxxxxxx";
WiFiClientSecure net_ssl;
TelegramBot bot (BotToken, net_ssl);
// the number of the LED pin
void setup()
{
Serial.begin(115200);
while (!Serial) {}  //Start running when the serial is open
delay(3000);
// attempt to connect to Wifi network:
Serial.print("Connecting Wifi: ");
Serial.println(ssid);
while (WiFi.begin(ssid, password) != WL_CONNECTED)
      {
  Serial.print(".");
  delay(500);
}
Serial.println("");
Serial.println("WiFi connected");
bot.begin();
pinMode(LED, OUTPUT);
}
void loop()
{
message m = bot.getUpdates(); // Read new messages
if (m.text.equals("on"))
      {
  digitalWrite(LED, 1);
  bot.sendMessage(m.chat_id, "The Led is now ON");
}
else if (m.text.equals("off"))
      {
  digitalWrite(LED, 0);
  bot.sendMessage(m.chat_id, "The Led is now OFF");
}
}
输入您的 wifi 凭据和机器人令牌并上传代码。
5. 测试工作
我在这里包括我的项目的制作和工作。
声明:本文内容及配图由入驻作者撰写或者入驻合作网站授权转载。文章观点仅代表作者本人,不代表电子发烧友网立场。文章及其配图仅供工程师学习之用,如有内容侵权或者其他违规问题,请联系本站处理。 举报投诉
评论(0)
发评论
- 相关下载
- 相关文章


