
资料下载


使用气压传感器读取温度、压力和高度的项目
马占云
分享资料个
描述
在这个项目中,我们将使用适用于 Windows 10 IoT Core on Raspberry Pi 2套件组件的 Adafruit 入门包来创建一个使用气压传感器读取温度、压力和高度的项目。
注意:该套件有两个版本,一个包含 BMP280 传感器,另一个包含 BME280。如果你有 BME280,
硬件
根据下面“原理图”部分中的 Fritzing 图,将 Raspberry Pi2 连接到面包板和其他组件。
软件
您可以从https://github.com/ms-iot/adafruitsample下载代码启动项目,我们将引导您完成添加与 Web 服务对话并在地图上获取您的 pin 所需的代码。什么地图?
打开“Lesson_203\StartSolution\lesson_203.sln ”并打开 mainpage.xaml.cs 文件。
我们已经填写了一些方法作为您在此解决方案中的起点。如果你想跳到前面,你可以在以下位置找到所有代码已完成的解决方案:“Lesson_203\FullSolution\lesson_203.sln”
MainPage.xaml.cs
打开 MainPage.xaml.cs 文件。
添加对气压传感器 (BMP280) 类的引用。
 public sealed partial class MainPage : Page
    {
        //A class which wraps the barometric sensor
        BMP280 BMP280;
现在我们在 OnNavigatedTo 方法中添加代码,该方法将为气压传感器创建一个新的 BMP280 对象并初始化该对象。
如果您不想在地图上添加图钉,请删除 MakePinWebAPICall();
 //This method will be called by the application framework when the page is first loaded
        protected override async void OnNavigatedTo(NavigationEventArgs navArgs)
        {
Debug.WriteLine("MainPage::OnNavigatedTo");
            MakePinWebAPICall();
            try
            {
                //Create a new object for our barometric sensor class                BMP280 = new BMP280();
                //Initialize the sensor
                await BMP280.Initialize();
接下来我们添加代码来执行以下操作:
- 创建变量来存储温度、压力和高度。将它们设置为 0。
- 为海平面压力创建一个变量。默认值为 1013.25 hPa。
- 读取温度、压力和高度 10 次并将值输出到调试控制台。
//Create variables to store the sensor data: temperature, pressure and altitude.
//Initialize them to 0.
float temp = 0;
float pressure = 0;
float altitude = 0;
//Create a constant for pressure at sea level.
//This is based on your local sea level pressure (Unit: Hectopascal)
const float seaLevelPressure = 1013.25f;
//Read 10 samples of the data
for(int i = 0; i < 10; i++)
{
temp = await BMP280.ReadTemperature();
pressure = await BMP280.ReadPreasure();
altitude = await BMP280.ReadAltitude(seaLevelPressure);
//Write the values to your debug console
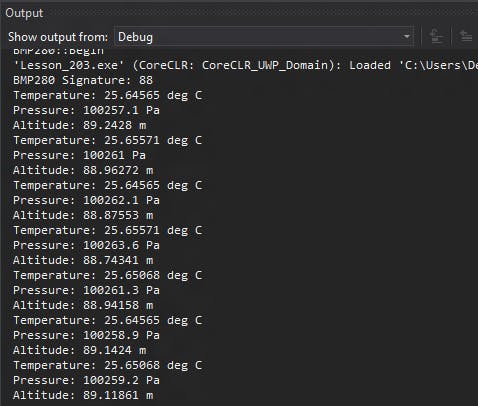
Debug.WriteLine("Temperature: " + temp.ToString() + " deg C");
Debug.WriteLine("Pressure: " + pressure.ToString() + " Pa");
Debug.WriteLine("Altitude: " + altitude.ToString() + " m");
}
}
catch (Exception ex)
{
Debug.WriteLine(ex.Message);
}
BMP280.cs
打开 BMP280.cs 文件。
代码的第一部分是列出 BMP280 中不同寄存器的地址。这些值可以在BMP280 数据表中找到。
在 BMP280 类中,在寄存器地址枚举之后添加以下内容。
 //String for the friendly name of the I2C bus
         const string I2CControllerName = "I2C1";
        //Create an I2C device
        private I2cDevice bmp280 = null;
        //Create new calibration data for the sensor
        BMP280_CalibrationData CalibrationData;
        //Variable to check if device is initialized
        bool init = false;
接下来在Initialize函数中添加如下代码:
 //Method to initialize the BMP280 sensor
        public async Task Initialize()
        {
            Debug.WriteLine("BMP280::Initialize");
            try
            {
                //Instantiate the I2CConnectionSettings using the device address of the BMP280
                I2cConnectionSettings settings = new I2cConnectionSettings(BMP280_Address);
                //Set the I2C bus speed of connection to fast mode                settings.BusSpeed = I2cBusSpeed.FastMode;
                //Use the I2CBus device selector to create an advanced query syntax string
                string aqs = I2cDevice.GetDeviceSelector(I2CControllerName);                //Use the Windows.Devices.Enumeration.DeviceInformation class to create a collection using the advanced query syntax string
                DeviceInformationCollection dis = await DeviceInformation.FindAllAsync(aqs);
                //Instantiate the the BMP280 I2C device using the device id of the I2CBus and the I2CConnectionSettings
                bmp280 = await I2cDevice.FromIdAsync(dis[0].Id, settings);
                //Check if device was found
                if (bmp280 == null)
                {
                    Debug.WriteLine("Device not found");
                }
            }
            catch (Exception e)
            {
                Debug.WriteLine("Exception: " + e.Message + "\n" + e.StackTrace);
                throw;
            }
        }
在Begin函数中添加如下代码:
 private async Task Begin()
        {
            Debug.WriteLine("BMP280::Begin");
            byte[] WriteBuffer = new byte[] { (byte)eRegisters.BMP280_REGISTER_CHIPID };
            byte[] ReadBuffer = new byte[] { 0xFF };
            //Read the device signature
            bmp280.WriteRead(WriteBuffer, ReadBuffer);
            Debug.WriteLine("BMP280 Signature: " + ReadBuffer[0].ToString());            //Verify the device signature
            if (ReadBuffer[0] != BMP280_Signature)
            {
                Debug.WriteLine("BMP280::Begin Signature Mismatch.");
                return;
            }
            //Set the initalize variable to true
            init = true;
            //Read the coefficients table
            CalibrationData = await ReadCoefficeints();
            //Write control register
            await WriteControlRegister();
            //Write humidity control register
            await WriteControlRegisterHumidity();
        }
将以下代码添加到接下来的 2 个函数中以写入控制寄存器。
 //Method to write 0x03 to the humidity control register
        private async Task WriteControlRegisterHumidity()
        {
            byte[] WriteBuffer = new byte[] { (byte)eRegisters.BMP280_REGISTER_CONTROLHUMID, 0x03 };
            bmp280.Write(WriteBuffer);
            await Task.Delay(1);
            return;
        }
        //Method to write 0x3F to the control register
        private async Task WriteControlRegister()
        {
            byte[] WriteBuffer = new byte[] { (byte)eRegisters.BMP280_REGISTER_CONTROL, 0x3F };
            bmp280.Write(WriteBuffer);
            await Task.Delay(1);
            return;
        }
将以下代码添加到 ReadUInt16_LittleEndian 函数中即可:
 //Method to read a 16-bit value from a register and return it in little endian format
        private UInt16 ReadUInt16_LittleEndian(byte register)
        {
            UInt16 value = 0;
            byte[] writeBuffer = new byte[] { 0x00 };
            byte[] readBuffer = new byte[] { 0x00, 0x00 };
            writeBuffer[0] = register;
            bmp280.WriteRead(writeBuffer, readBuffer);
            int h = readBuffer[1] << 8;
            int l = readBuffer[0];
            value = (UInt16)(h + l);
            return value;
        }
将以下代码添加到 ReadByte 函数以从寄存器中读取 8 位数据。
 //Method to read an 8-bit value from a register
        private byte ReadByte(byte register)
        {
            byte value = 0;
            byte[] writeBuffer = new byte[] { 0x00 };
            byte[] readBuffer = new byte[] { 0x00 };
            writeBuffer[0] = register;
            bmp280.WriteRead(writeBuffer, readBuffer);
            value = readBuffer[0];
            return value;
        }
接下来的 3 个功能已为您完成。可以在数据表中找到编写这些函数所需的信息。
- ReadCoefficeints:这是从寄存器地址读取所有校准数据的函数。
- BMP280_compensate_T_double:在此函数中,使用 BMP280 数据表中的补偿公式计算以 ºC 为单位的温度。
- BMP280_compensate_P_Int64:在此函数中,使用 BMP280 数据表中的补偿公式计算以 Pa 为单位的压力。
添加如下代码完成ReadTemperature功能。
 public async Task<float> ReadTemperature()
        {
            //Make sure the I2C device is initialized
            if (!init) await Begin();
            //Read the MSB, LSB and bits 7:4 (XLSB) of the temperature from the BMP280 registers
            byte tmsb = ReadByte((byte)eRegisters.BMP280_REGISTER_TEMPDATA_MSB);
            byte tlsb = ReadByte((byte)eRegisters.BMP280_REGISTER_TEMPDATA_LSB);
            byte txlsb = ReadByte((byte)eRegisters.BMP280_REGISTER_TEMPDATA_XLSB); // bits 7:4
            //Combine the values into a 32-bit integer
            Int32 t = (tmsb << 12) + (tlsb << 4) + (txlsb >> 4);
            //Convert the raw value to the temperature in degC
            double temp = BMP280_compensate_T_double(t);
            //Return the temperature as a float value
            return (float)temp;
        }
重复相同的步骤以完成 ReadPressure 函数。
 public async Task<float> ReadPreasure()
        {
            //Make sure the I2C device is initialized
            if (!init) await Begin();
            //Read the temperature first to load the t_fine value for compensation
            if (t_fine == Int32.MinValue)
            {
                               await ReadTemperature();
            }
            //Read the MSB, LSB and bits 7:4 (XLSB) of the pressure from the BMP280 registers
            byte tmsb = ReadByte((byte)eRegisters.BMP280_REGISTER_PRESSUREDATA_MSB);
            byte tlsb = ReadByte((byte)eRegisters.BMP280_REGISTER_PRESSUREDATA_LSB);
            byte txlsb = ReadByte((byte)eRegisters.BMP280_REGISTER_PRESSUREDATA_XLSB); // bits 7:4
            //Combine the values into a 32-bit integer
            Int32 t = (tmsb << 12) + (tlsb << 4) + (txlsb >> 4);
            //Convert the raw value to the pressure in Pa
            Int64 pres = BMP280_compensate_P_Int64(t);
            //Return the temperature as a float value
            return ((float)pres) / 256;
        }
最后完成ReadAltitude函数:
 //Method to take the sea level pressure in Hectopascals(hPa) as a parameter and calculate the altitude using current pressure.
        public async Task<float> ReadAltitude(float seaLevel)
        {
            //Make sure the I2C device is initialized
            if (!init) await Begin();
            //Read the pressure first
            float pressure = await ReadPreasure();
            //Convert the pressure to Hectopascals(hPa)
            pressure /= 100;
            //Calculate and return the altitude using the international barometric formula
            return 44330.0f * (1.0f - (float)Math.Pow((pressure / seaLevel), 0.1903f));
        }
您的项目现在可以部署了!
预期产出
在这里查看下一课。
声明:本文内容及配图由入驻作者撰写或者入驻合作网站授权转载。文章观点仅代表作者本人,不代表电子发烧友网立场。文章及其配图仅供工程师学习之用,如有内容侵权或者其他违规问题,请联系本站处理。 举报投诉
- 相关下载
- 相关文章


