资料下载

魔术8球灵感答案盒开源硬件
描述
灵感
我对这个项目的最初想法是让我的团队在度过艰难的一天时可以使用一些有趣的东西,或者只是需要减轻心情。当我环顾办公室时,我注意到了旧的 Magic 8ball。
我想我可以做类似的事情并大大扩展可能的答案数量。把它放在你可以提供你自己的答案和大量答案的地方。
我还注意到一个谷歌语音工具包,我几乎是白手起家的。我还没有用那个工具包做任何事情,这似乎是一个绝好的机会。
连接一切
连接一切都非常简单。
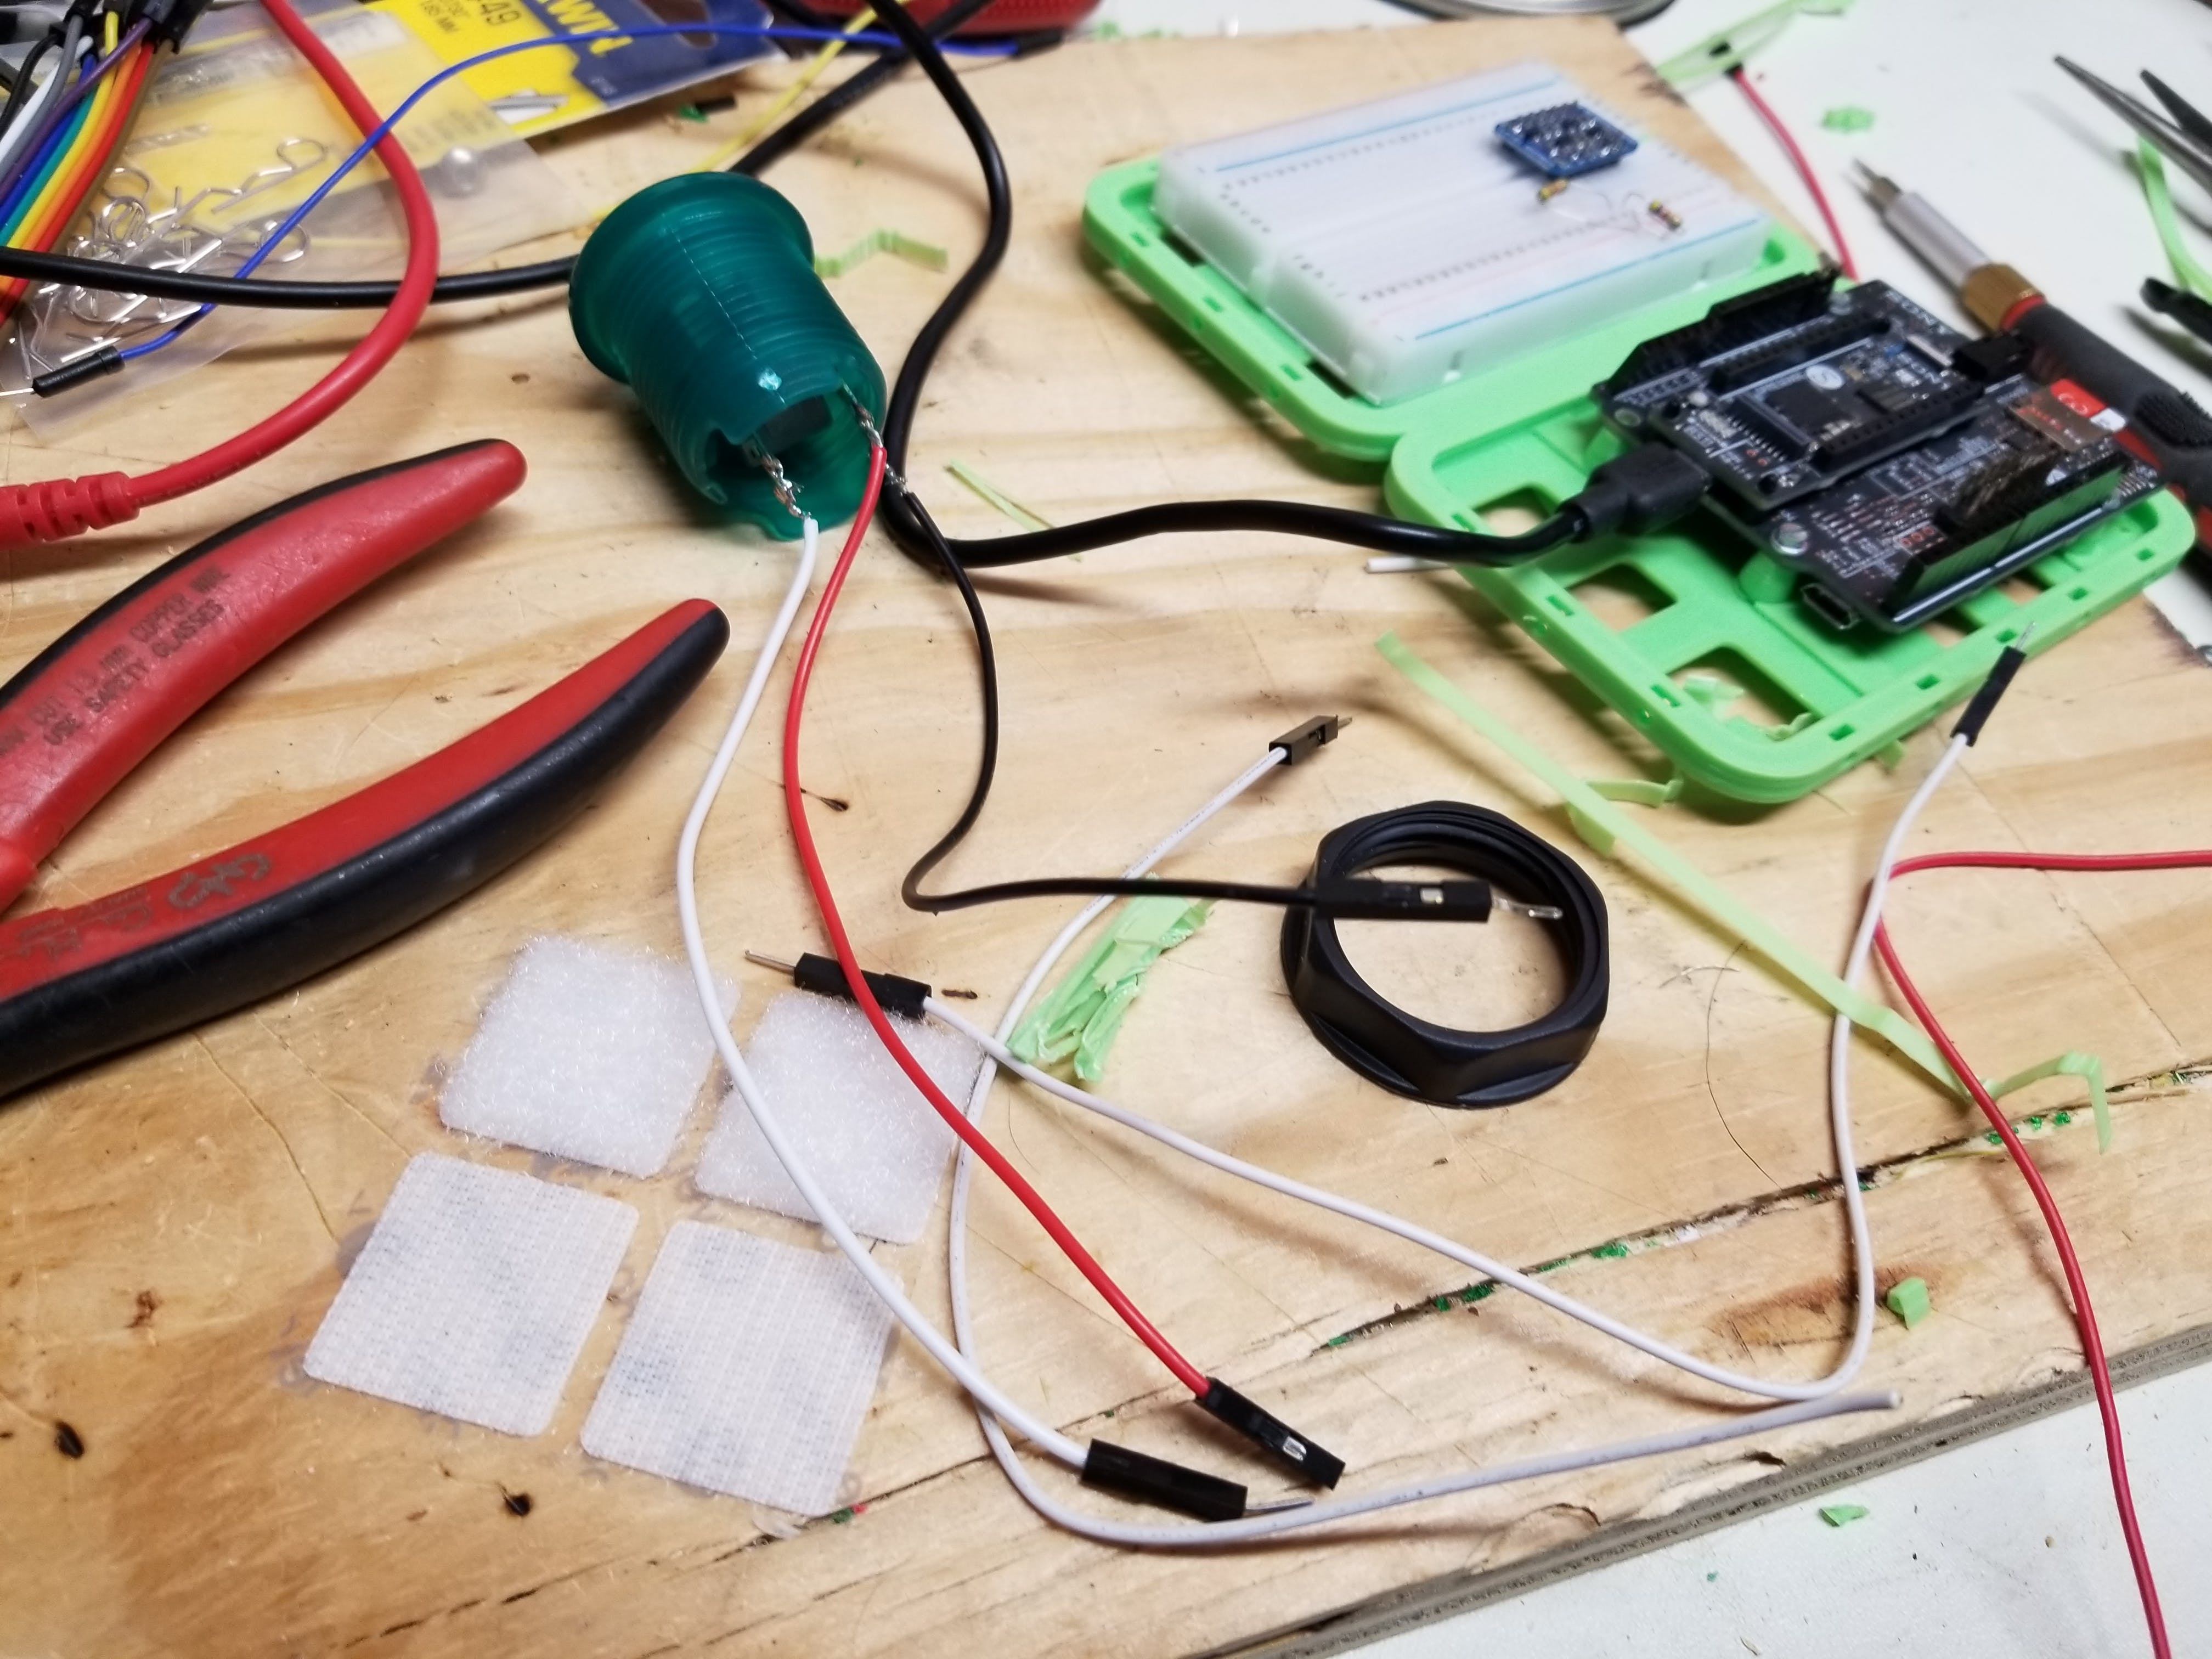
- 确定街机按钮上的 LED 和开关连接。
- 将一些跳线焊接到连接上。
- 将阴极(负)引线插入 LED 上,并将开关的一侧插入扩展板中的接地(GND)引脚。
- 将开关的另一端插入扩展板上的 D2。
- 将 LED 上的阳极(正极)引线插入扩展板上的 D13。
- 将扬声器线焊接到 1/8 音频插头上。使黑色成为外部(地面),红色成为最中间的连接。应该无关紧要,因为此项目的所有音频输出都设置为单声道。
- 按照有关组装 Google 外壳的说明进行操作。
- 将 Spresense 安装在外壳底部。我用了一些维可牢尼龙搭扣来防止它四处移动。
- 插入USB线
您现在应该准备好开始编写草图了

让按钮工作
定义按钮及其 LED 将使用的引脚:
const int buttonPin = 2;      // Pin used to detect a button press
const int ledPin    = 13;     // Pin for the highside of the button LED
设置一个变量来跟踪按钮的状态:
// Variables used in interrupt service routines and other parts of the program should be volatile
// 2 is used to indicate there has not been an interrupt yet
// 1 is button released
// 0 is button pressed
volatile int buttonState = 2;
初始化引脚和中断以处理按钮状态更改:
// setup the button and LED
pinMode(ledPin, OUTPUT);      // will raise and lower this output to toggle the LED.
pinMode(buttonPin, INPUT);    // will watch this pin to detect the button press.

// attaching and interrupt to the pin
attachInterrupt(buttonPin, pinIsr, CHANGE);
编写中断处理例程:
void pinIsr()
{
  buttonState = digitalRead(buttonPin);
  digitalWrite(ledPin, buttonState);

  if (buttonState == 1)
    canPlayQuip = true;

  delayMicroseconds(200);
}
记录俏皮话
我使用开源工具 Audacity 录制了这个项目中的所有音频。我这样做有两个原因:
- 这些是我自己的录音,所以不会出现版权问题。
- 我喜欢使用 Audacity,一有机会就大声疾呼
在录音中要记住的是,当您保存它们时,它们需要采用以下格式:
- 恒定比特率
- 192kbps 比特率
- 几秒长
应该有办法不具备这些要求。我相信您应该能够拥有大量的比特率。我尝试了很多选项,但这些是唯一适用于 Spresense 播放器初始化设置的选项。
这是执行该初始化的行:
/*
 * Set main player to decode stereo mp3. Stream sample rate is set to "auto detect"
 * Search for MP3 decoder in "/mnt/sd0/BIN" directory
*/
err = theAudio->initPlayer(AudioClass::Player0, AS_CODECTYPE_MP3, "/mnt/sd0/BIN", AS_SAMPLINGRATE_AUTO, AS_CHANNEL_MONO);
我为采样率或通道类型设置了什么似乎并不重要,除非使用上述比特率,否则 MP3 无法正确播放。
从 SD 卡读取
设置一个变量来了解如何访问 SD 卡:
SDClass theSD;
设置一个变量来保存文件信息:
File myDir;
打开SD卡根目录》
Serial.println("Reading available quips from the SD card...");
myDir = theSD.open("/");
读入文件并将它们放入一个数组中,以便稍后处理:
void getQuips(File dir, int numTabs)
{
  String endTest = ".mp3";

  while (true)
  {
     File entry =  dir.openNextFile();

     if (!entry || numQuips >= MAX_QUIPS)
     {
        // no more files
        break;
     }

     String entryName = entry.name();
     entryName.remove(0,1);

     if (!entry.isDirectory() && entryName.endsWith(endTest) && !entryName.equals("init.mp3"))
     {
        foundQuips[numQuips] = entryName;
        numQuips++;
     }

     entry.close();
  }
}
关闭目录:
myDir.close();
您一次只能打开一个文件。在这种情况下,与大多数文件系统一样,目录只是磁盘上的一个特殊文件。
让声音播放
设置一个变量来保存音频实例:
AudioClass *theAudio;
设置音频的基础:
void setupAudio()
{
  puts("checking audio initialization");

  // make sure we are not calling this if there is nothing to call
  if(audioInitialized)
  {
     puts("shutting down the audio subsystem");
     theAudio->end();
     sleep(1);
     audioInitialized = false;
   }

   // start audio system
   theAudio = AudioClass::getInstance();
   theAudio->begin(audio_attention_cb);

   puts("initialization Audio Library");

   /* Set clock mode to normal */
   theAudio->setRenderingClockMode(AS_CLKMODE_NORMAL);

   puts("setting player mode");

   /* Verify player initialize */
   if (err != AUDIOLIB_ECODE_OK)
   {
      printf("Player0 initialize error\n");
      exit(1);
    }

   /* Main volume set to -16.0 dB */
   theAudio->setVolume(60);

   audioInitialized = true;
}
找出要玩的俏皮话:
if (canPlayQuip)
{
   playQuip(foundQuips[(int)random(numQuips)]);
   currentQuip++;
   Serial.print("currentQuip: ");
   Serial.println(currentQuip);
}
设置播放器播放俏皮话并播放:
void playQuip(String fileName)
{
    canPlayQuip = false;
    Serial.print("Playing: ");
    Serial.println(fileName);

    /* Open file placed on SD card */
    File myFile = theSD.open(fileName);

    /* Verify file open */
    if (!myFile)
    {
        printf("File open error\n");
        exit(1);
    }

    printf("Open! %s\n", myFile.name());
    theAudio->setPlayerMode(AS_SETPLAYER_OUTPUTDEVICE_SPHP, AS_SP_DRV_MODE_LINEOUT);

    puts("player initialization");

    /*
     * Set main player to decode stereo mp3. Stream sample rate is set to "auto detect"
     * Search for MP3 decoder in "/mnt/sd0/BIN" directory
    */
    err = theAudio->initPlayer(AudioClass::Player0, AS_CODECTYPE_MP3, "/mnt/sd0/BIN", AS_SAMPLINGRATE_AUTO, AS_CHANNEL_MONO);

    /* Send first frames to be decoded */
    err = theAudio->writeFrames(AudioClass::Player0, myFile);

    printf("Error: %d\n", err);

    if ((err != AUDIOLIB_ECODE_OK) && (err != AUDIOLIB_ECODE_FILEEND))
    {
        printf("File Read Error! =%d\n",err);
        myFile.close();
        exit(1);
    }

    puts("Play!");

    theAudio->startPlayer(AudioClass::Player0);
    delay(100);

    puts("Stop!");
    sleep(1);

    theAudio->stopPlayer(AudioClass::Player0);

    puts("closing file");

    myFile.close();

    puts("returning to ready mode");
    theAudio->setReadyMode();
}
确保在完成后关闭文件,因为您只能打开一个文件。此外,将播放器返回到“就绪模式”,以便再次播放。
进一步的想法
我认为这是一个非常整洁的董事会,有很多可能性。我有点惊讶,板上没有内置无线连接。有附加板可以解决这个问题,本节中的其他项目已经展示了如何做到这一点。我确实希望有一种方法可以通过 Arduino IDE 使用多个内核。这是一次很棒的学习经历。
我开始考虑可以使用与我对这个项目所做的类似的方法来完成的其他项目。以下是其中的一些想法:
基于位置的答案
连接到传感器并能够通过读取传感器级别给出更有创意的答案。
把这个放在狗项圈里,这样他们就可以和你说话了。
做一些鼓舞人心的俏皮话,让它因团队房间里的一些事件而消失,以激励团队走向伟大!
声明:本文内容及配图由入驻作者撰写或者入驻合作网站授权转载。文章观点仅代表作者本人,不代表电子发烧友网立场。文章及其配图仅供工程师学习之用,如有内容侵权或者其他违规问题,请联系本站处理。 举报投诉
- 相关下载
- 相关文章


