
资料下载

单像素温度计开源分享
描述
一像素温度计
欢迎大家,今天我们正在创建一个单像素温度计。
零件清单
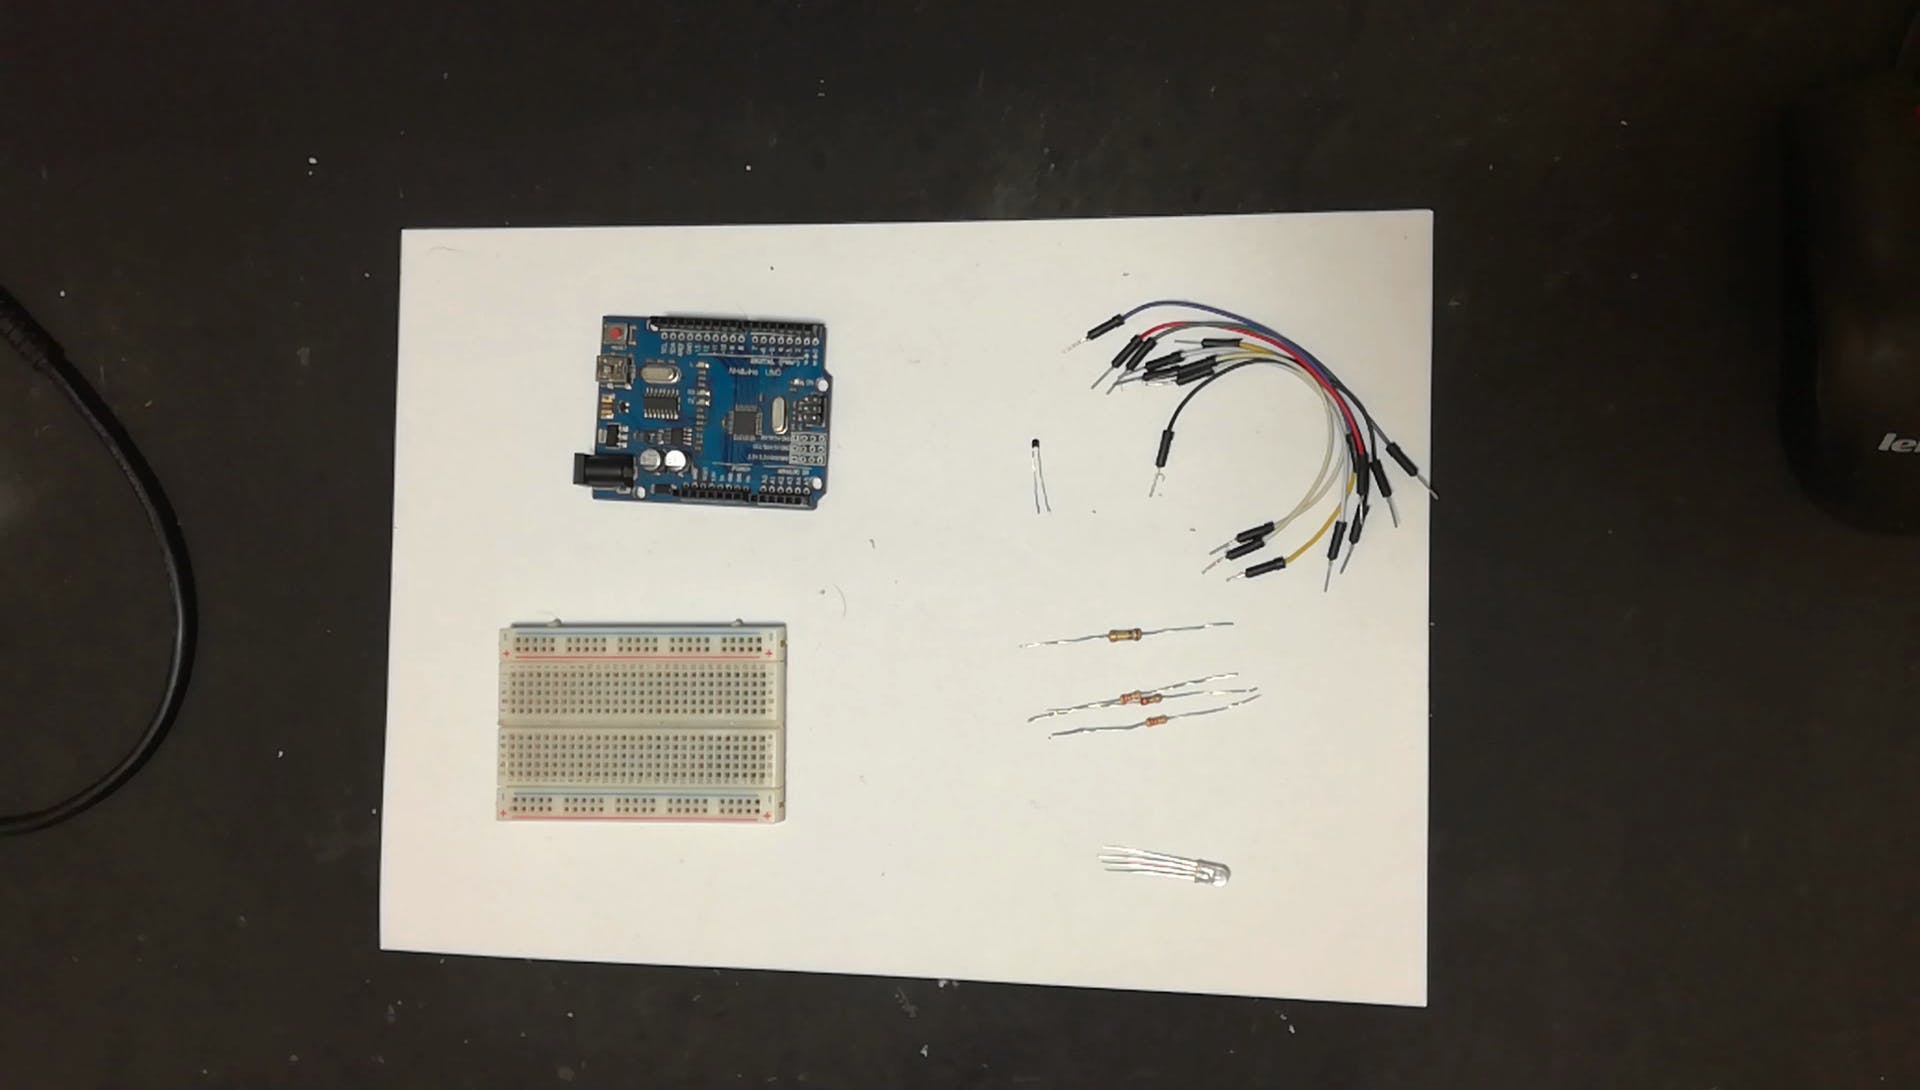
我们将需要以下内容:
- 1 x 共阳极 RGB LED
- 3 个 220 欧姆电阻器
- 1 x 100K 电阻
- 1 x NTK100 热敏电阻
- 一些跳线
- 一个阿杜诺
- 和一个面包板
编码
在我们构建电路之前,让我们快速浏览一下代码。
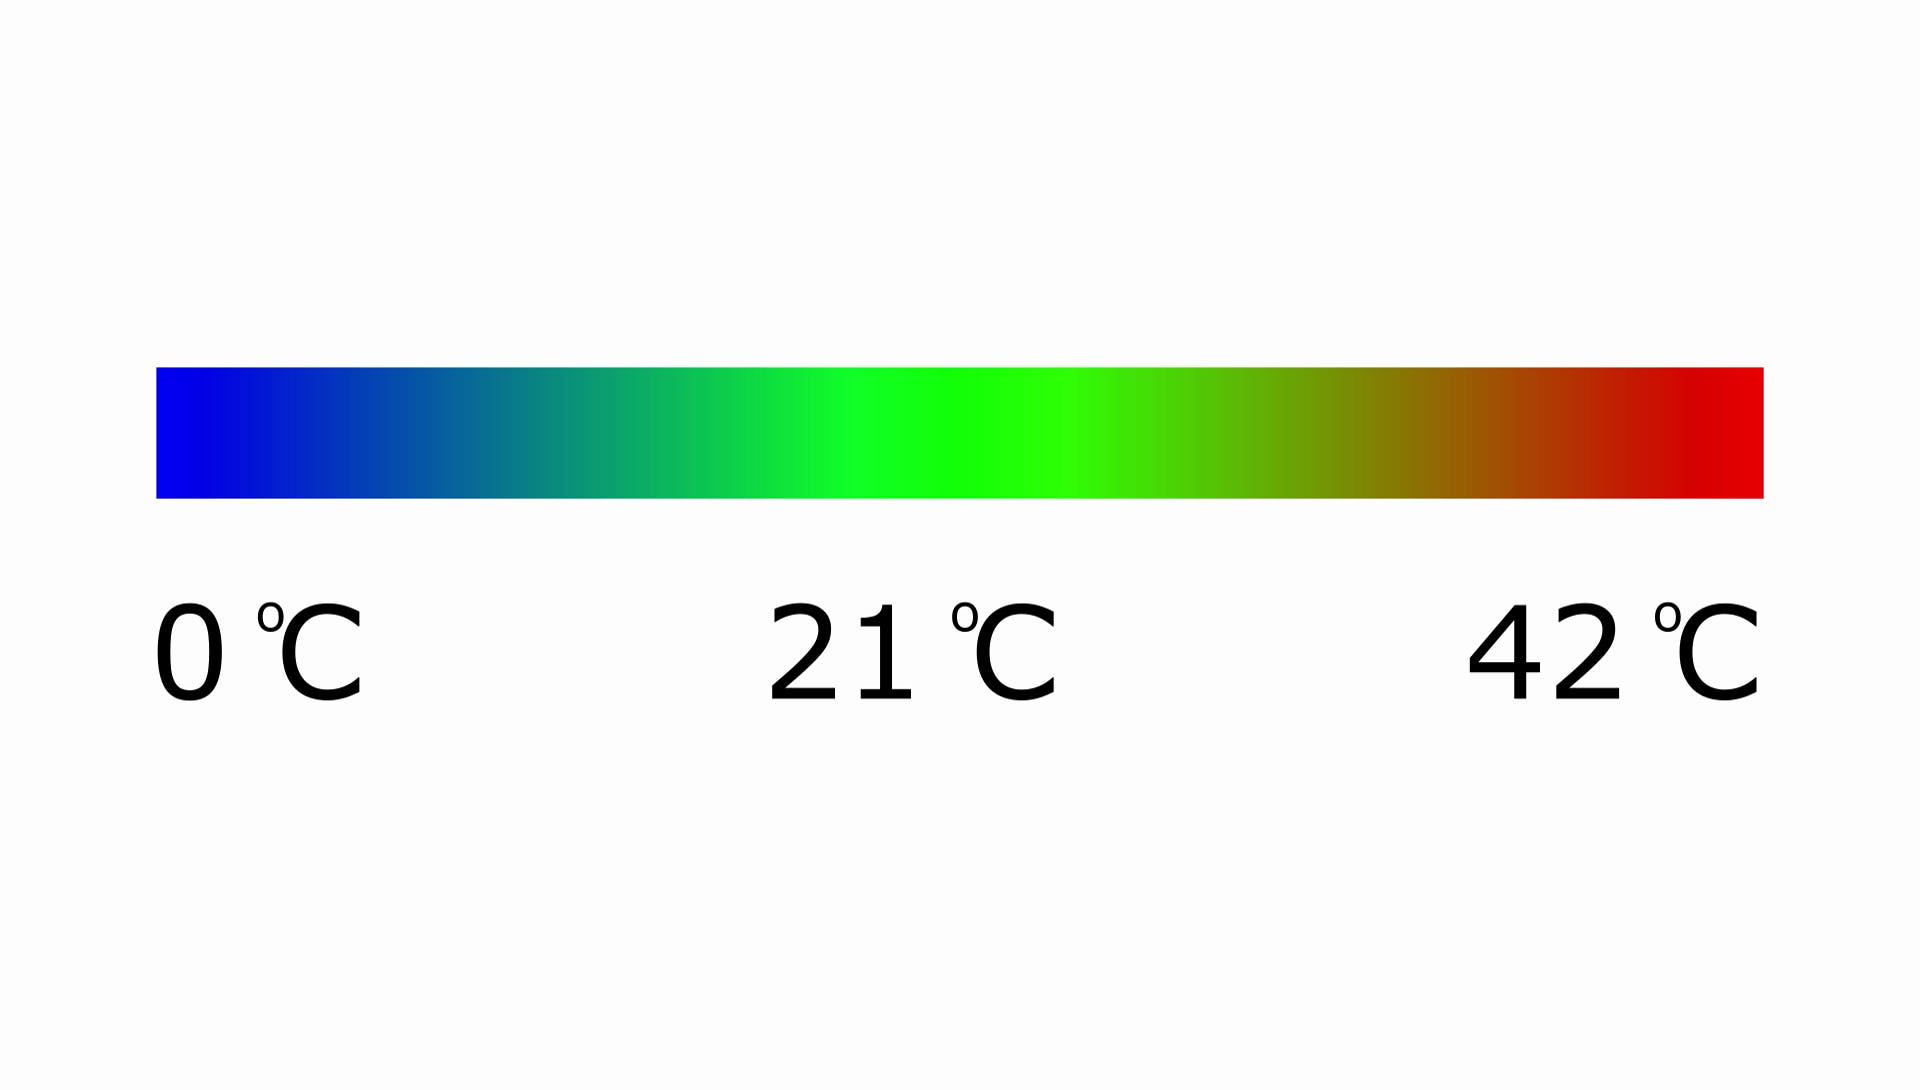
我的 LED 将从 0 摄氏度变为蓝色,42 摄氏度变为红色,在舒适的 21 摄氏度变为绿色。
代码中的“定义”允许程序具有一定的灵活性,我将最高温度设置为 42 摄氏度,将最低温度设置为 0。我将使用 3 个 PWM 引脚 3、5 和 6 来控制“一个像素”。
#define minTemp 0
#define maxTemp 42
#define pinR 4     // Red PWM Pin       use 0 on ATTINY85 (pin 5)
#define pinG 0     // Green PWM Pin     use 1 on ATTINY85 (pin 6)
#define pinB 1     // Blue PWM Pin      use 4 on ATTINY85 (pin 3)
#define pinT A1    // Thermistor Pin    use A1 on ATTINY85 (pin 7)
声明一些将在主循环中使用的全局变量。
// Variables to calculate Centigrade from the Thermistor Pin input value
int Vo;
float R1 = 10000, logR2, R2, T, c1 = 1.009249522e-03,
c2 = 2.378405444e-04, c3 = 2.019202697e-07; // <<<---- Magic numbers apparently
在 Setup 函数中,我设置了每个 in 将做什么。三个 PWM 引脚是 OUTPUT 引脚。热敏电阻引脚为INPUT。
void setup() {
// Init Serial
//  Serial.begin(115200);
// Init Pins
 pinMode(pinR, OUTPUT);
 pinMode(pinG, OUTPUT);
 pinMode(pinB, OUTPUT);
//Dont really need to do this for the UNO but I'm doing it anyway
 pinMode(pinT, INPUT);
}
在我程序的主循环中,我根据热敏电阻值计算摄氏度,然后将该数字转换为 0 到 512 的范围。然后我使用一些数学来获得我的 LED 的红色、绿色和蓝色值。LED 的颜色每 100 毫秒更新一次。如果您希望它以较慢的速度更新,请将值更改得更高。
void loop() {
// Calculate Centigrade : Got function from http://www.circuitbasics.com/arduino-thermistor-temperature-sensor-tutorial/
 Vo = analogRead(pinT);
 R2 = R1 * (1023.0 / (float)Vo - 1.0);
 logR2 = log(R2);
 T = (1.0 / (c1 + c2*logR2 + c3*logR2*logR2*logR2));
 T = T - 273.15;
// Map to the range outlined in minTemp and maxTemp
 int temp = map(T,minTemp,maxTemp,0,512);
// Assign a RGB value to the range 0 to 512 found in temp
 int r = constrain(temp-256,0,255);
 int g = constrain(256-abs(temp-256),0,255);
 int b = constrain(256-temp,0,255);
// PWM Write to get "faded colours"
// Remove "255 -" if LED's are common Cathode
 analogWrite(pinR,255 - r);
 analogWrite(pinG,255 - g);
 analogWrite(pinB,255 - b);
// Print Temperature to Serial
//  Serial.println(T);
 delay(100);
}
将此草图上传到 Arduino,拔下它并从电路开始。
一个像素
我从 RGB LED 或 Pixel 开始
在最常见的阳极 RGB LED 上,长引脚是阳极。以阳极为 2nd pin 看 LED 时,第一个 Pin 为红色;第三个是绿色,最后一个是蓝色。
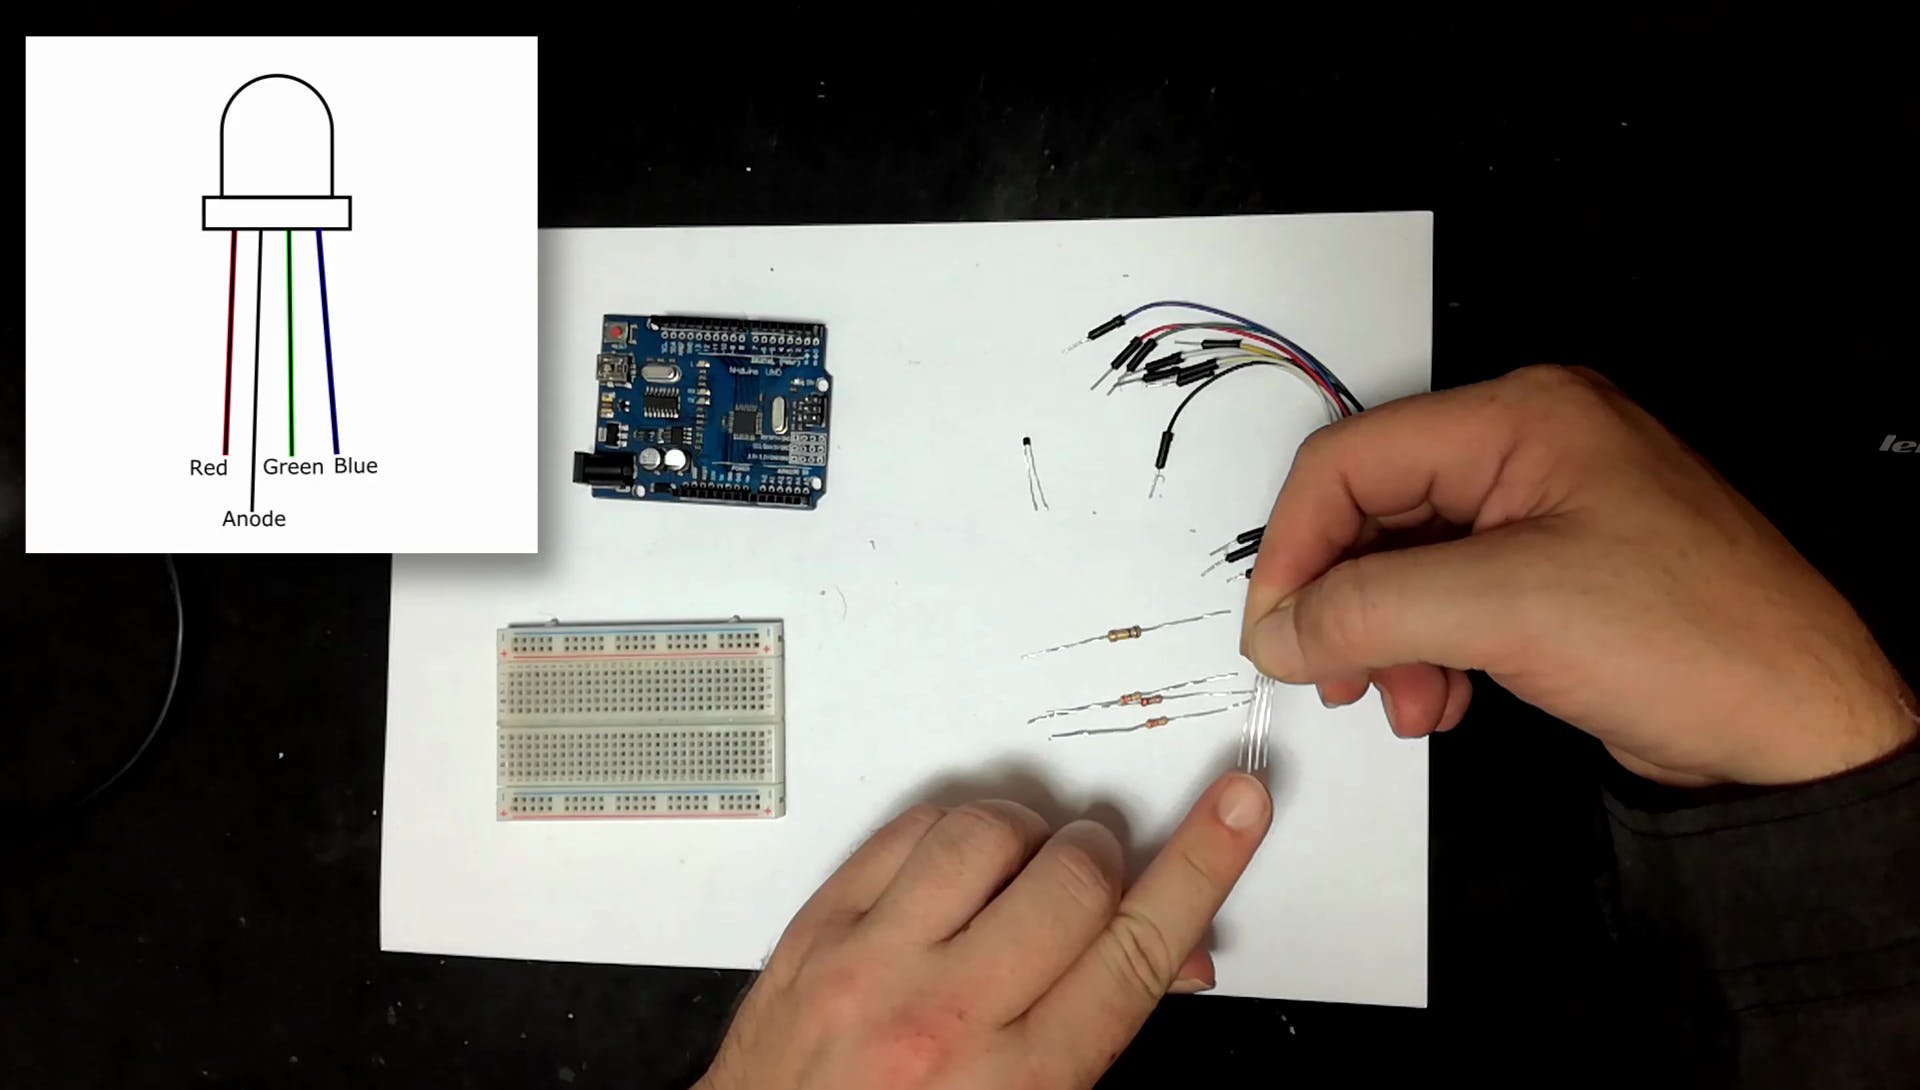
- 我把 LED 放在面包板上
- 连接红色、绿色和蓝色引脚和 3 个其他端子排上的三个 220 欧姆限流电阻。
- 将一根引线连接到 LED 的阳极和 220 欧姆电阻器的 3 根引线。
我用红色、绿色和蓝色引线来表示,嗯,红色绿色和蓝色。我用白色做阳极
温度感应器
移动到温度传感器部分
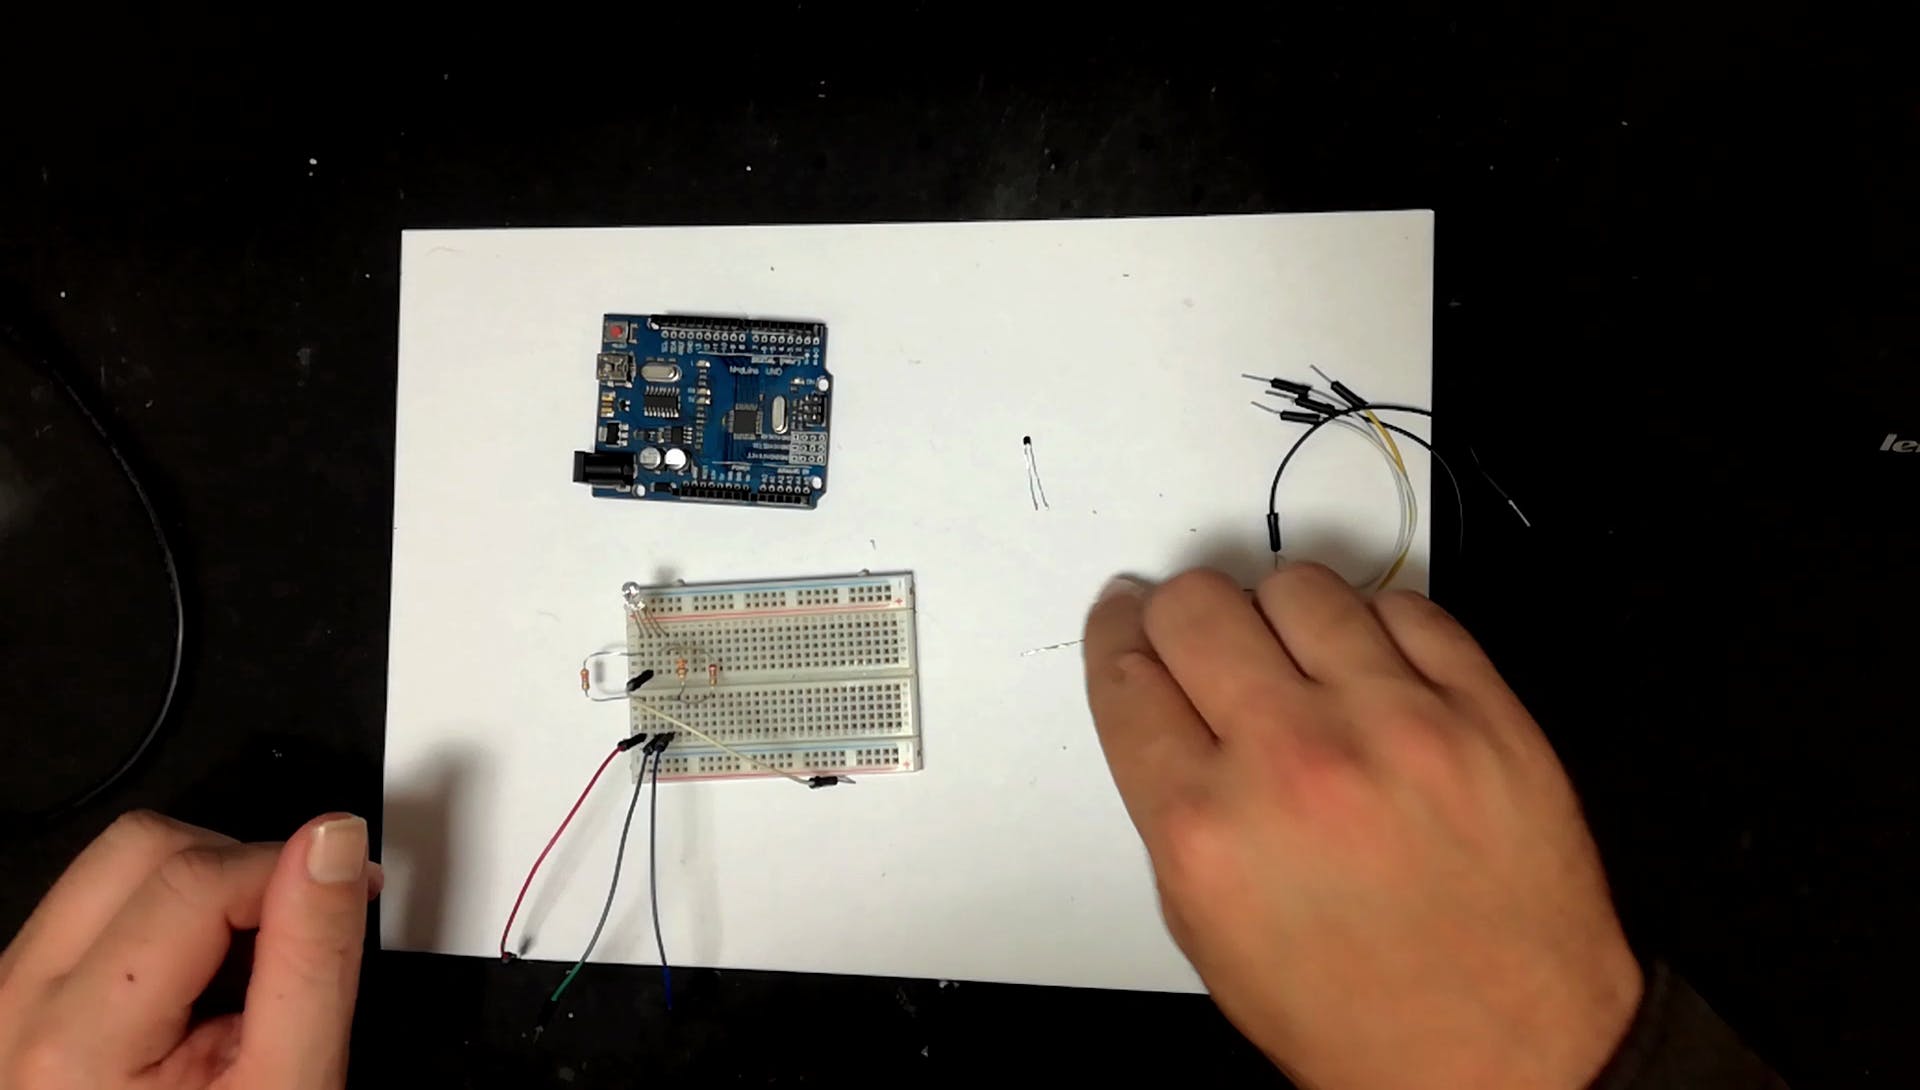
- 将热敏电阻放在 2 个端子条之间
- 然后是热敏电阻一端和另一个接线板的 100k 电阻。
- 连接热敏电阻未连接端的引线和正轨。
当我在做正极引线时,我也会将阳极连接到正极轨,并准备 2 根正极和接地引线连接到 Arduino。我用白色表示正极,黑色表示接地
- 将接地轨的引线连接到 100K 电阻器的另一端
- 然后在两部分相遇的地方连接一根引线,我用黄色表示输入。
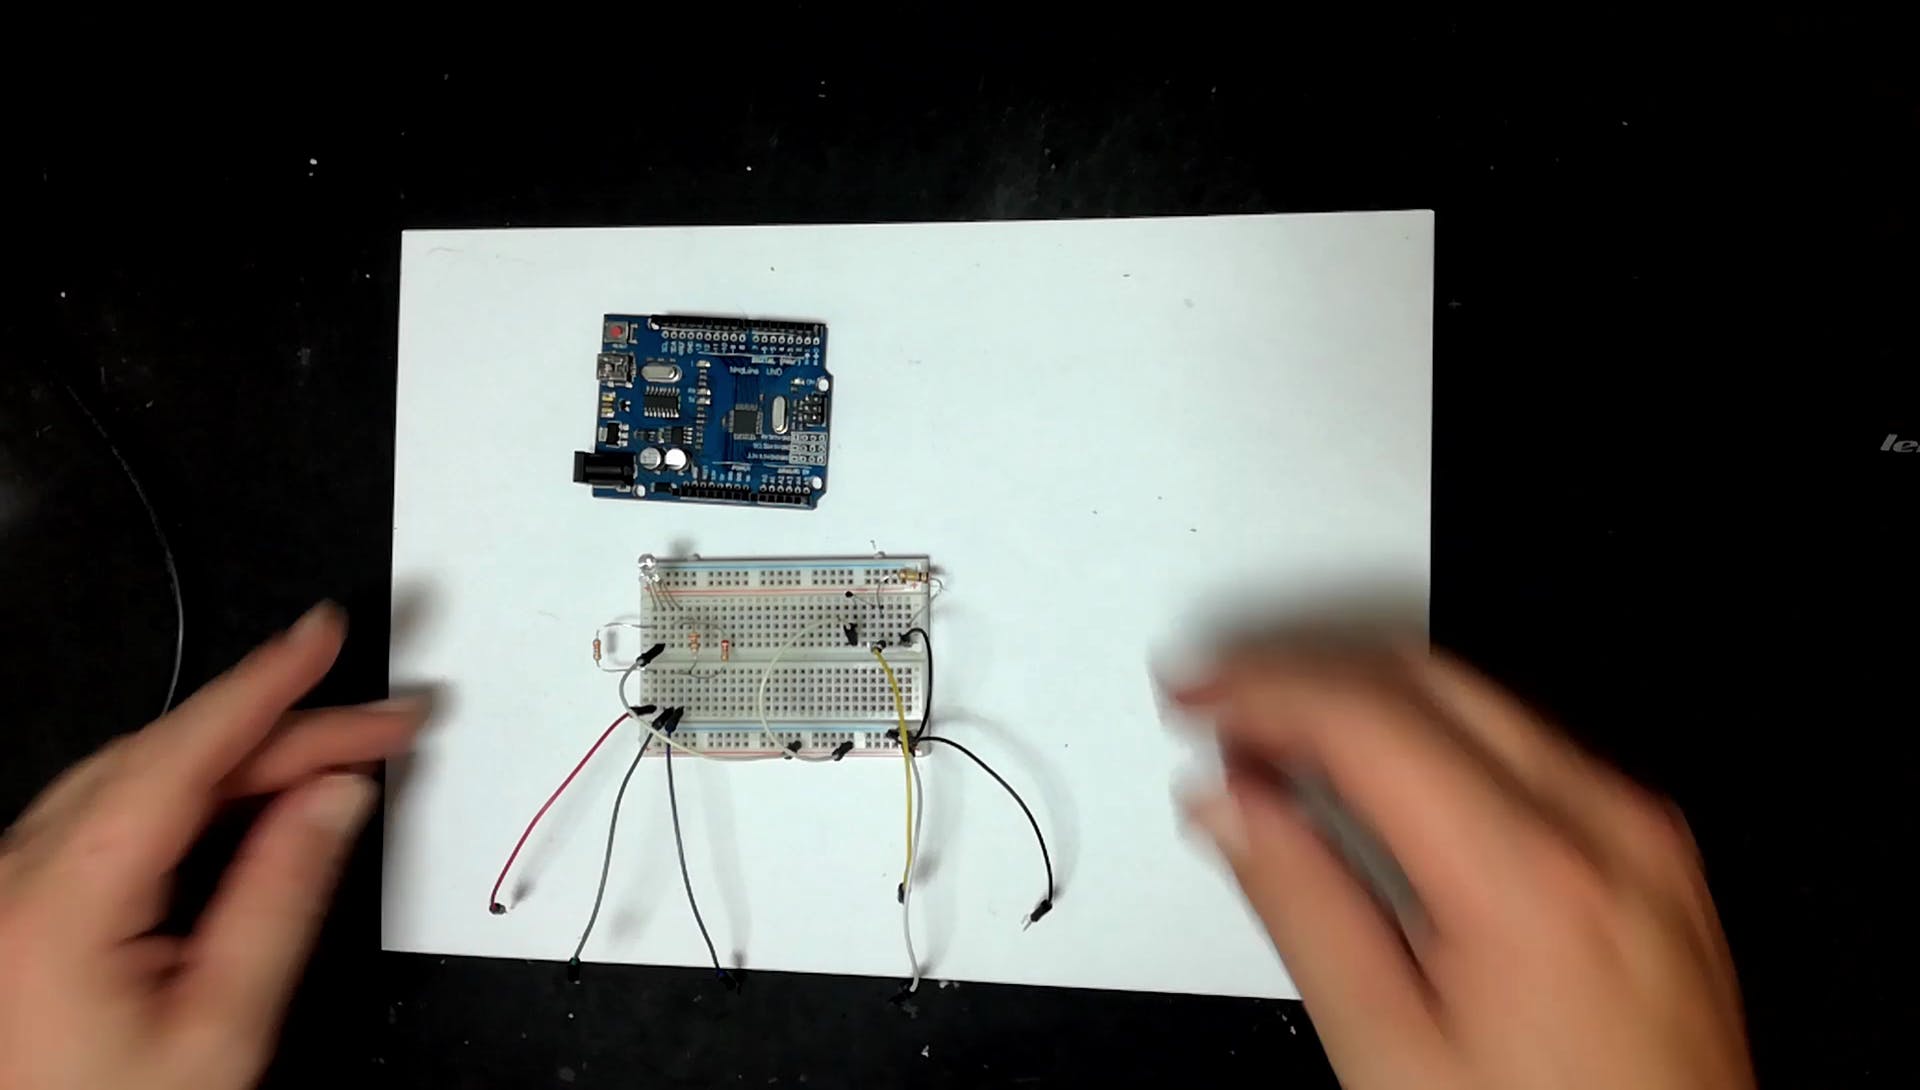
Arduino联播
现在可以快速轻松地将所有松散的引线连接到 Arduino
- 白到5v
- 黑去地
- 黄色到 A0
- 红到 3
- 绿色到 5 和
- 蓝色到 6
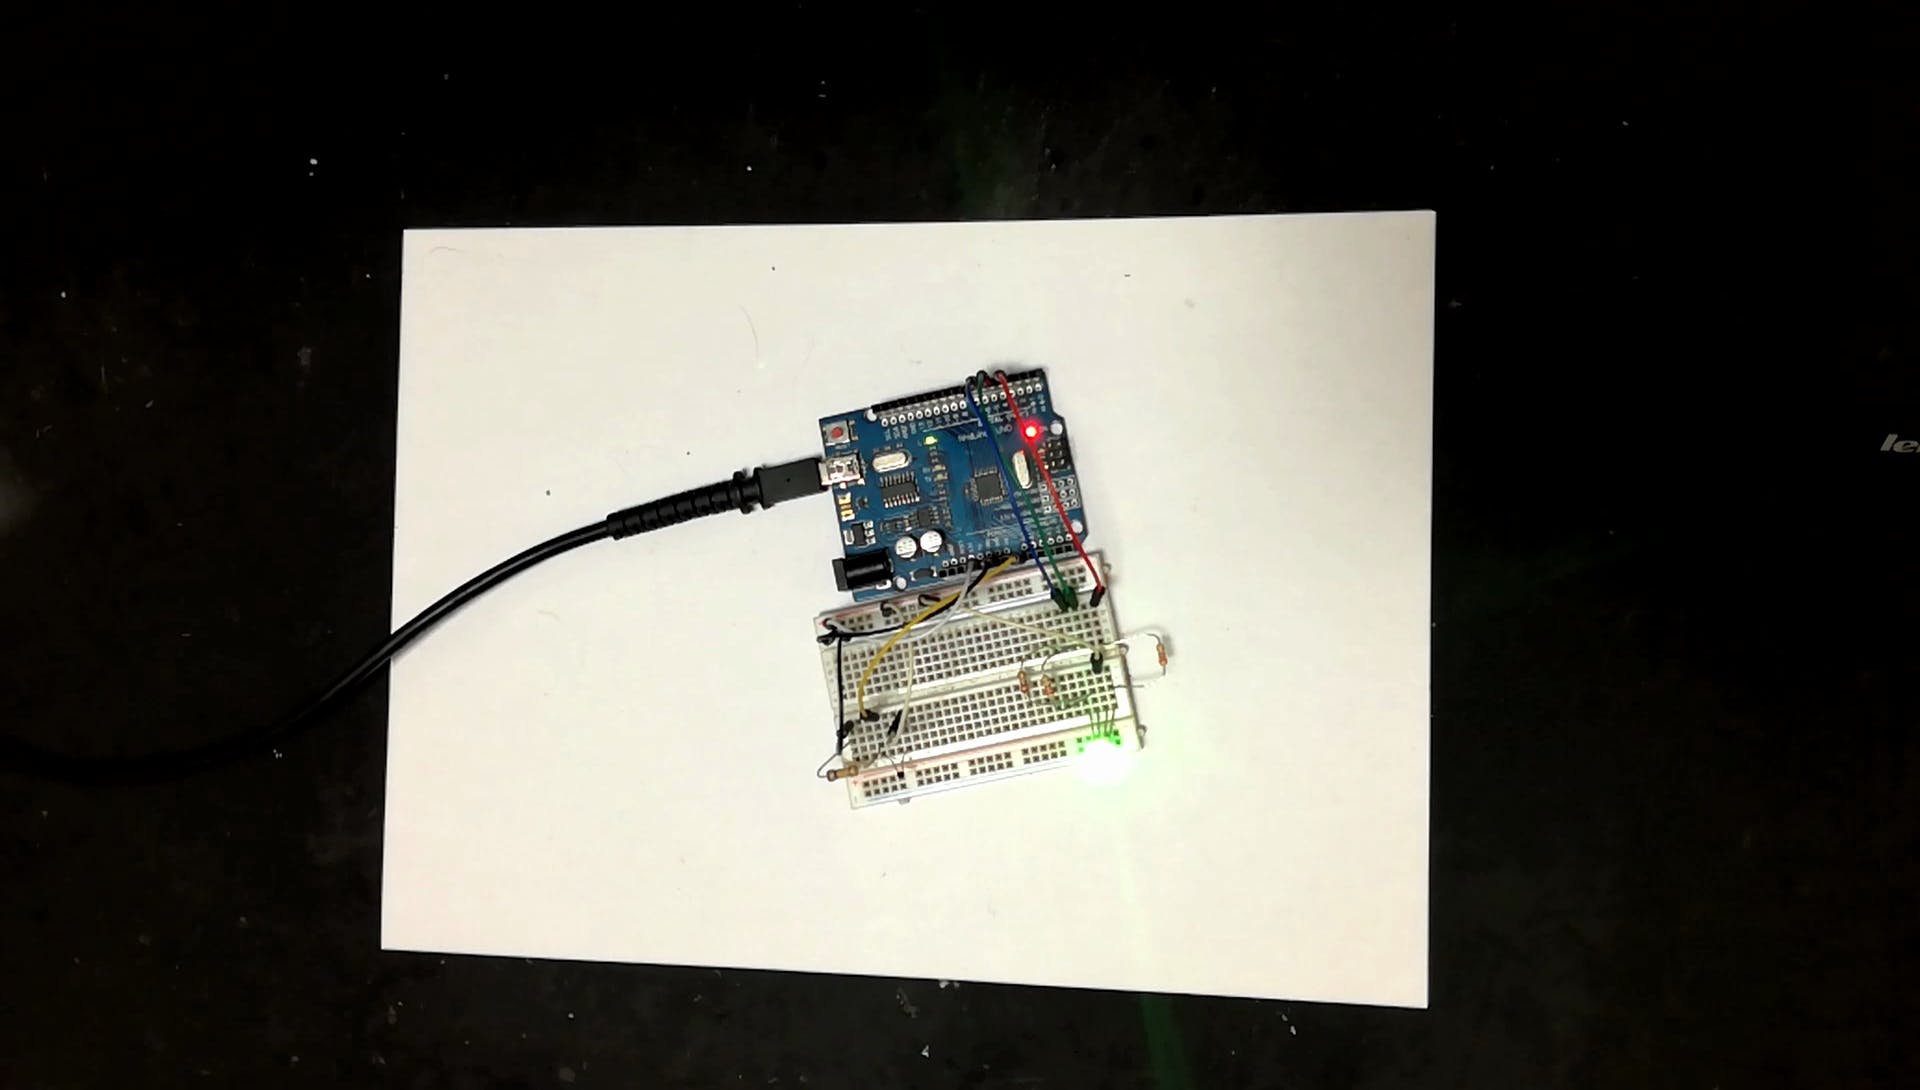
插入 Arduino
我们有一个 1 像素的温度计
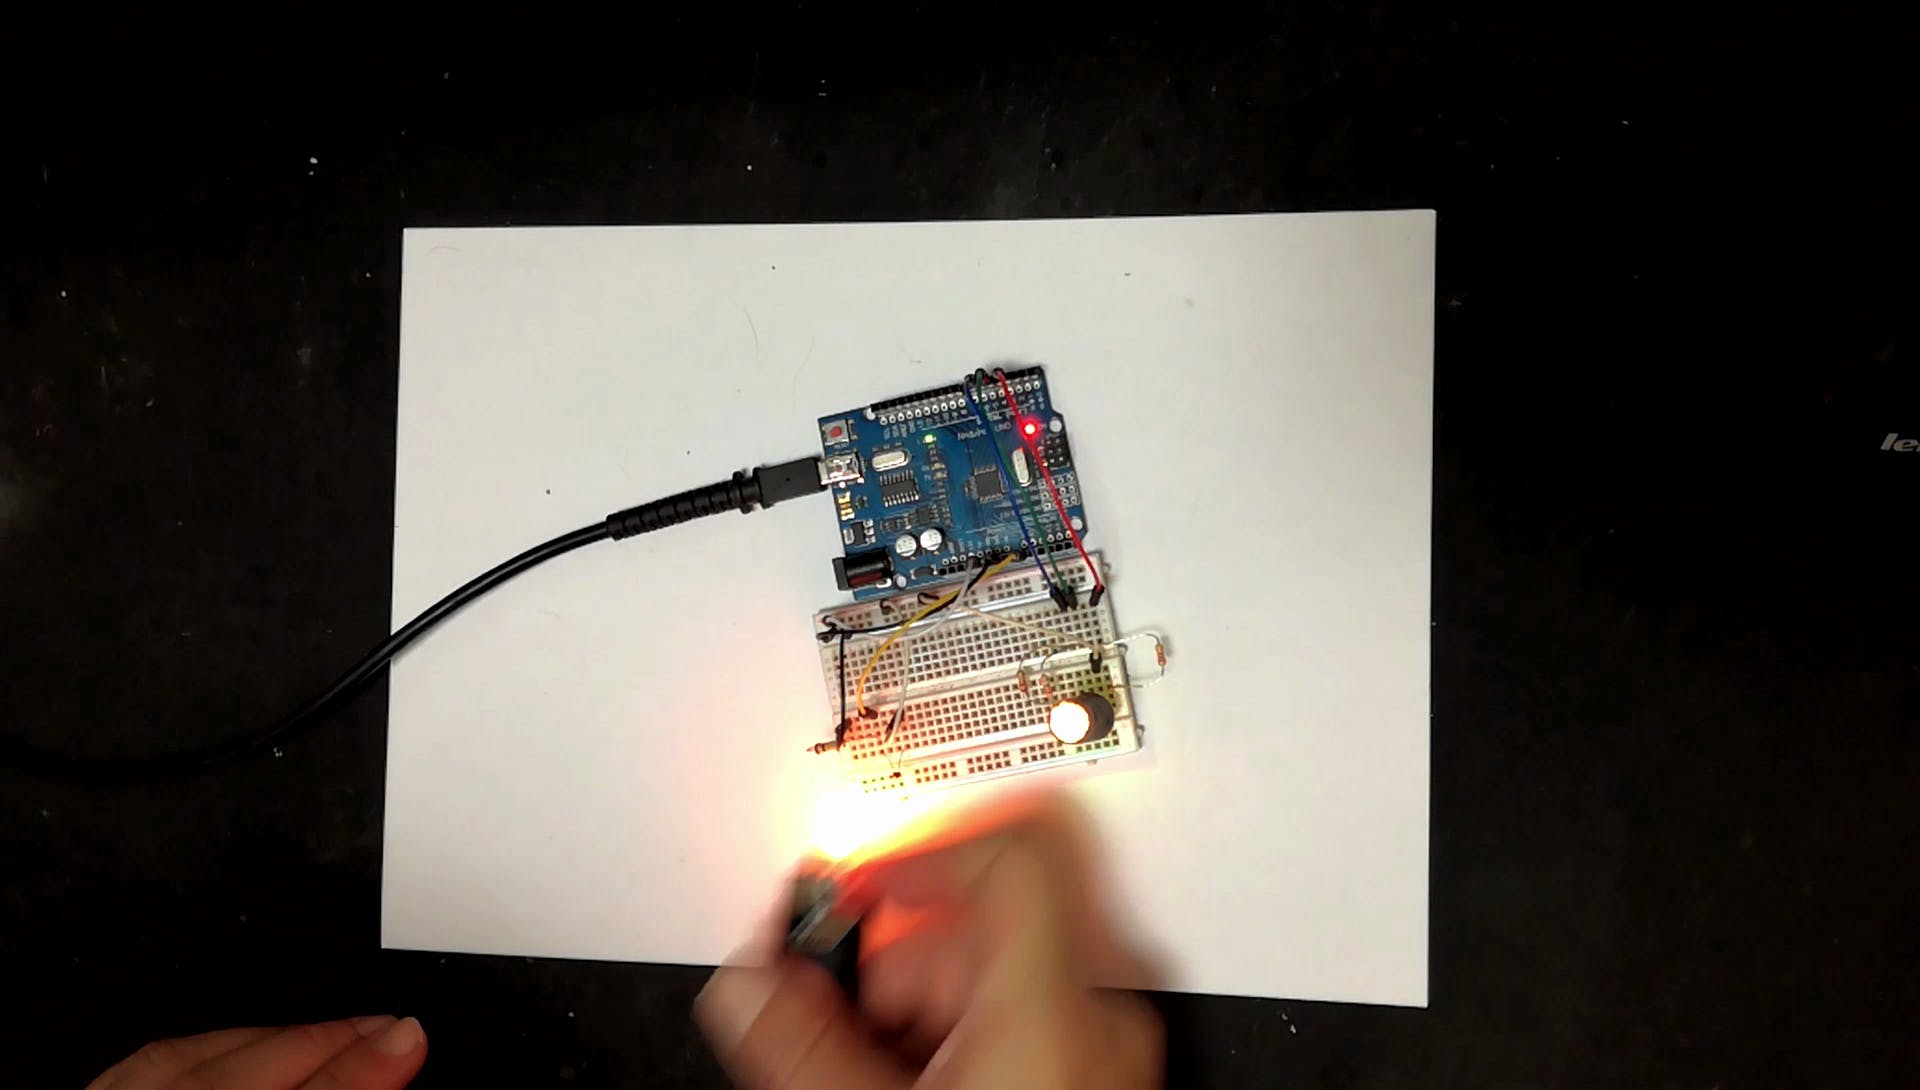
我用一个由热胶和一管银纸制成的扩散器覆盖了 LED。
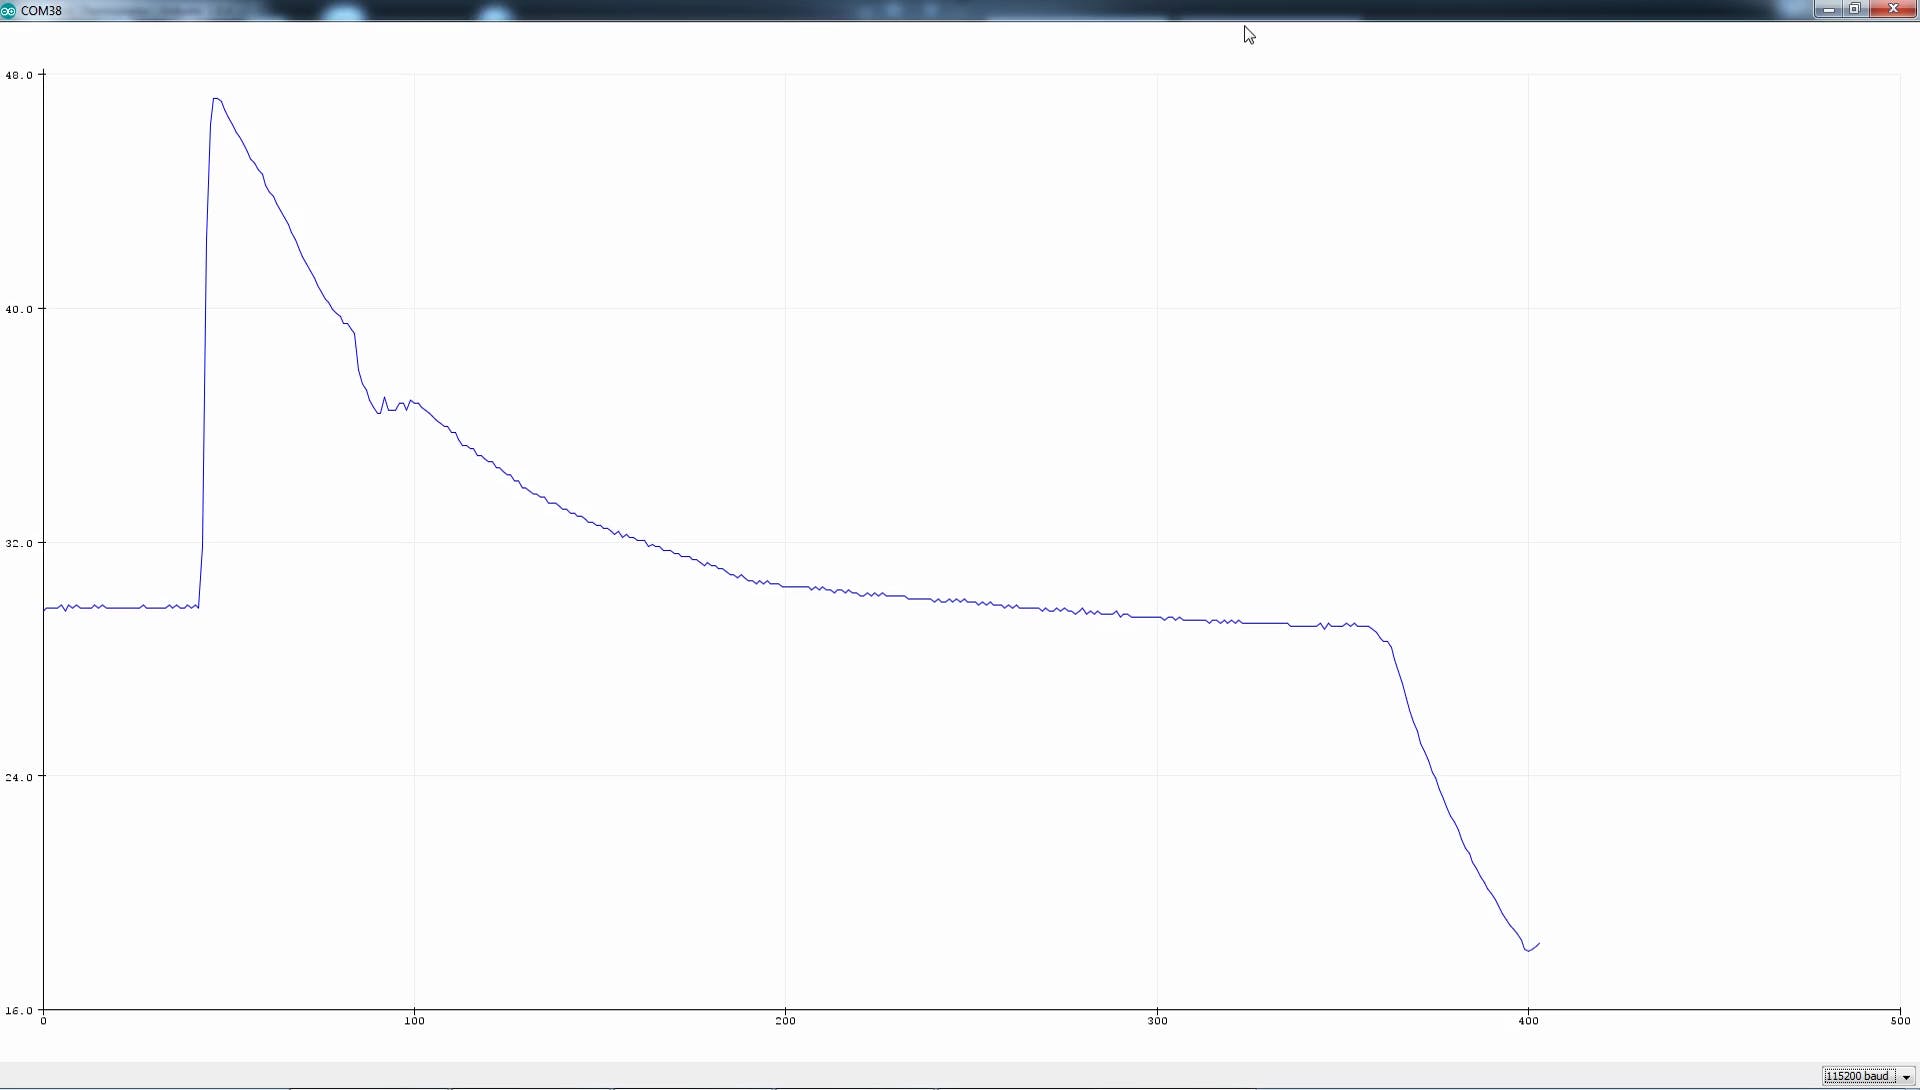
如果我在热敏电阻上点燃火焰,您将看到 LED 变为红色,表示温度为 42 或更高。
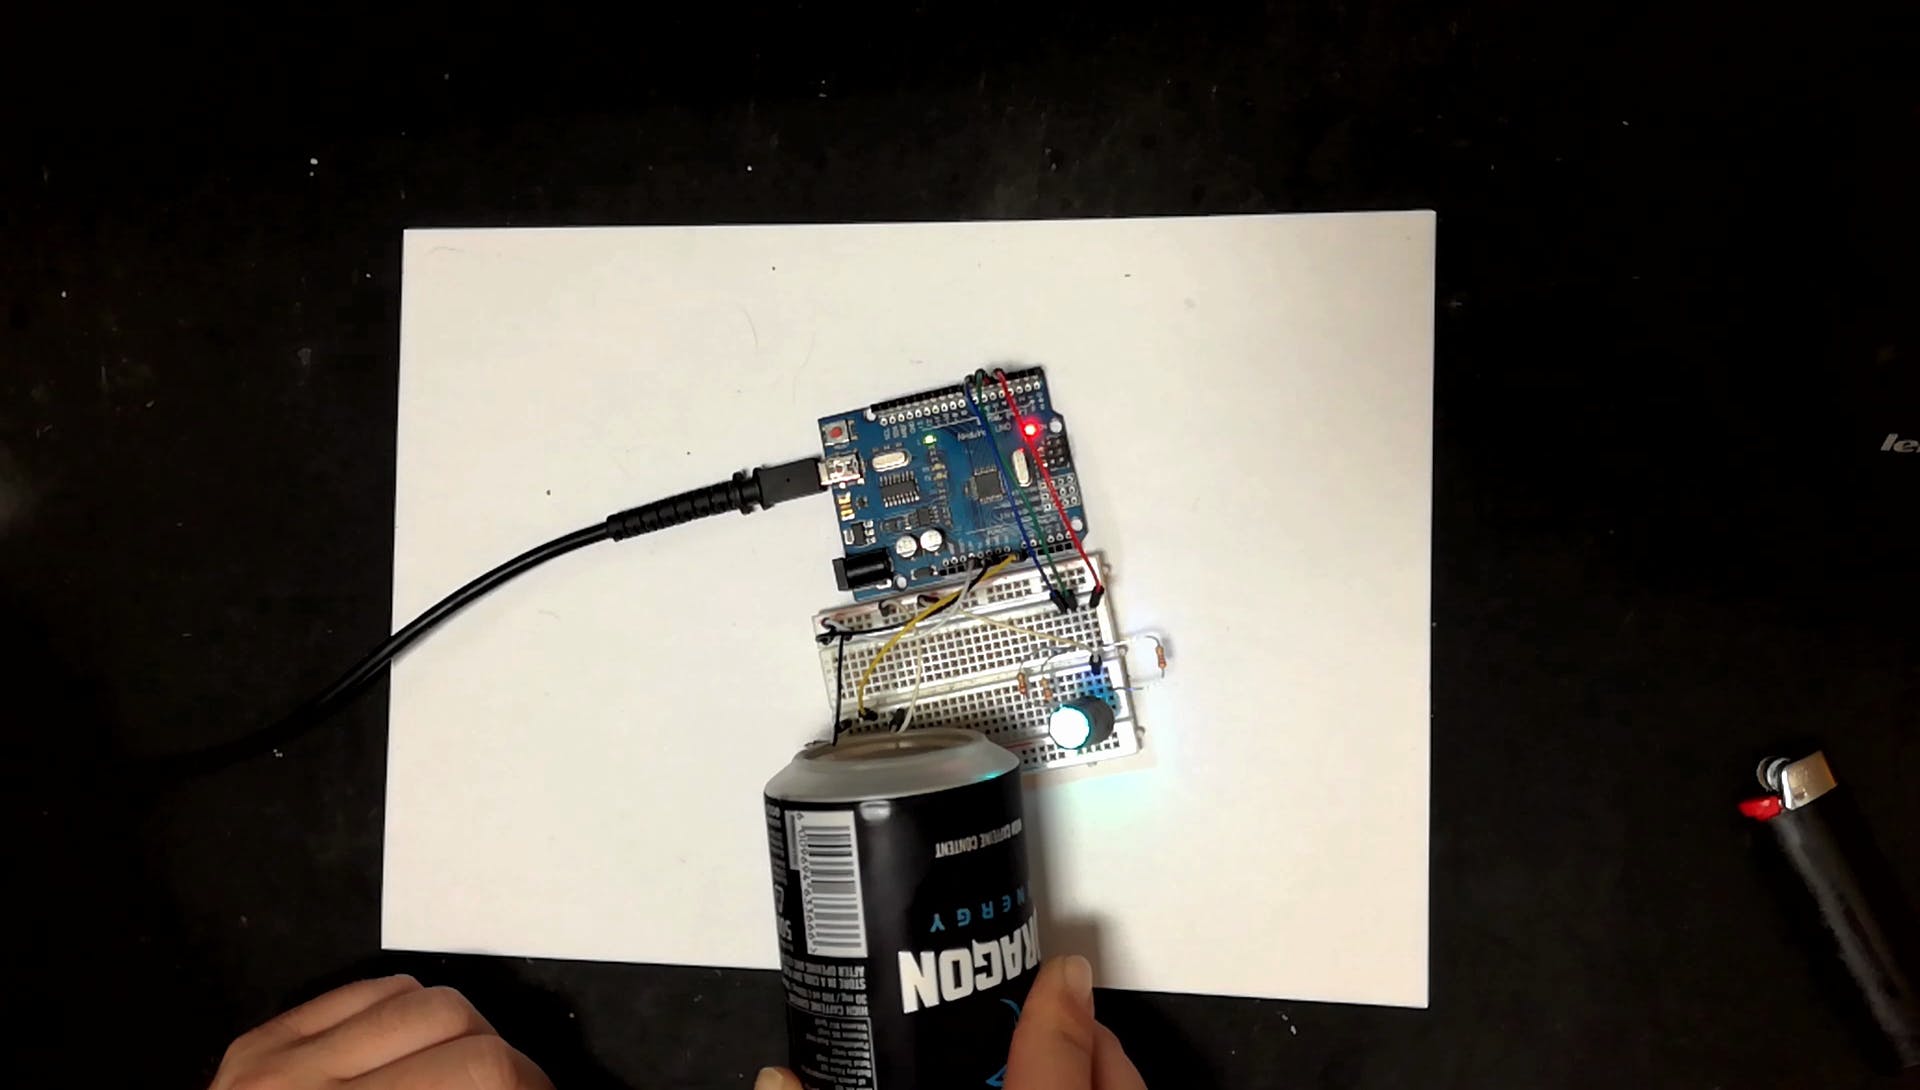
如果我在热敏电阻上放一个冷罐,LED 会变蓝
该程序还将温度输出到串行。
使用串行绘图仪,当触摸传感器时,我可以看到火焰的闪烁和“冷罐”。
这就是今天的内容。
声明:本文内容及配图由入驻作者撰写或者入驻合作网站授权转载。文章观点仅代表作者本人,不代表电子发烧友网立场。文章及其配图仅供工程师学习之用,如有内容侵权或者其他违规问题,请联系本站处理。 举报投诉
- 相关下载
- 相关文章


