
资料下载

使用REST框架控制您的MKR1000
描述
通过 RESTFUL 接口与 Arduino 通信会很好,我发现了这个 aREST 框架。如其网站 ( arest.io )所述,aREST 框架是一个完整的解决方案,可基于 Arduino 和 Raspberry Pi 平台构建强大的 RESTful 应用程序。它可以通过串行、WiFi、以太网等处理所有类型的通信。
在此项目中,我将展示如何使用 2 个 LED 设置 MKR1000,您可以通过 REST API 控制 LED。
设置开发环境的步骤
1. 使用本入门指南设置 MKR100 。
2. 使用Sketch > Include Library > Manage Libraries ...菜单 安装 Wifi101 库。(注:我使用的是Wifi101 0.9.0版本)
3. 安装一个 REST 库。(注意:我使用的是 aREST 版本 2.1.1)
4 对aREST.h进行以下更改:
-
改为
WiFi_h_WIFI_H - 更改以下内容
void addToBuffer(float toAdd) {
  char number[10];
  dtostrf(toAdd, 5, 2, number);
  addToBuffer(number);
}
至
void addToBuffer(float toAdd) {
  char number[10];
  sprintf(number, "%5.2f", toAdd);
  addToBuffer(number);
}
5. 从下面的代码部分复制草图。
6. 设置电路板和 LED。
7. 编译并上传草图。
关于素描
创建一个监听80端口的WiFiServer实例:
WiFiServer restServer(80);
设置设备 ID 和名称:
// Give name and ID to device
rest.set_id("008");
rest.set_name("mighty_cat");
这loop()很简单,只需监听端口 80 并处理传入连接:
void loop() {
  // Handle REST calls
  WiFiClient client = restServer.available();
  rest.handle(client);
}
ledControl(String) 在 中公开自定义函数setup():
// Function to be exposed
rest.function("led",ledControl);
这是ledControl(String)功能:
// Custom function accessible by the API
int ledControl(String command) {
  Serial.println(command);
  // Get state from command
  int state = command.toInt();
  digitalWrite(5,state);
  return 1;
}
最后是printWifiStatus()函数:
void printWifiStatus() {
  // print the SSID of the network you're attached to:
  Serial.print("SSID: ");
  Serial.println(WiFi.SSID());
  // print your WiFi shield's IP address:
  IPAddress ip = WiFi.localIP();
  Serial.print("IP Address: ");
  Serial.println(ip);
  IPAddress subnet = WiFi.subnetMask();
  Serial.print("Netmask: ");
  Serial.println(subnet);
  IPAddress gateway = WiFi.gatewayIP();
  Serial.print("Gateway: ");
  Serial.println(gateway);
  // print the received signal strength:
  long rssi = WiFi.RSSI();
  Serial.print("signal strength (RSSI):");
  Serial.print(rssi);
  Serial.println(" dBm");
}
运行草图
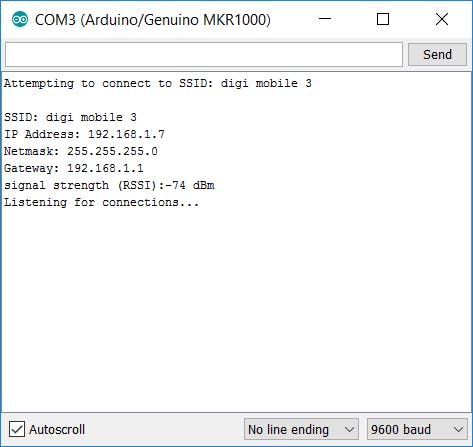
使用Tools > Serial Monitor菜单打开 Serial Monitor并记下显示的 IP 地址。
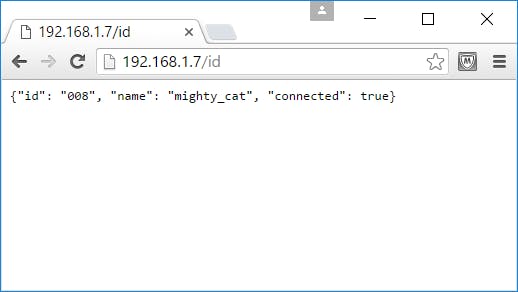
显示设备 ID 和名称:
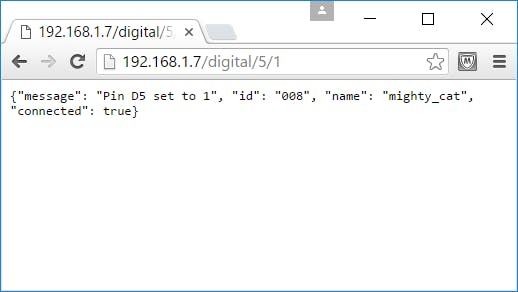
要打开引脚 5,请在 Web 浏览器中键入以下内容:
http:///digital/5/1
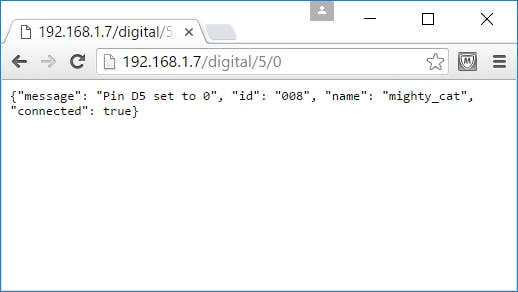
要关闭,请键入
http:///digital/5/0
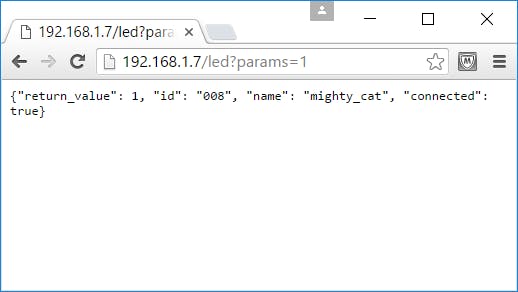
要打开使用公开的功能,请键入
http:///led?params=1
了解有关 aREST 的更多信息
请参阅 GitHub 上的 aREST Arduino 库页面
声明:本文内容及配图由入驻作者撰写或者入驻合作网站授权转载。文章观点仅代表作者本人,不代表电子发烧友网立场。文章及其配图仅供工程师学习之用,如有内容侵权或者其他违规问题,请联系本站处理。 举报投诉
- 相关下载
- 相关文章


