
资料下载


使用OpenCV的车道跟随机器人
分享资料个
描述
Small Intro
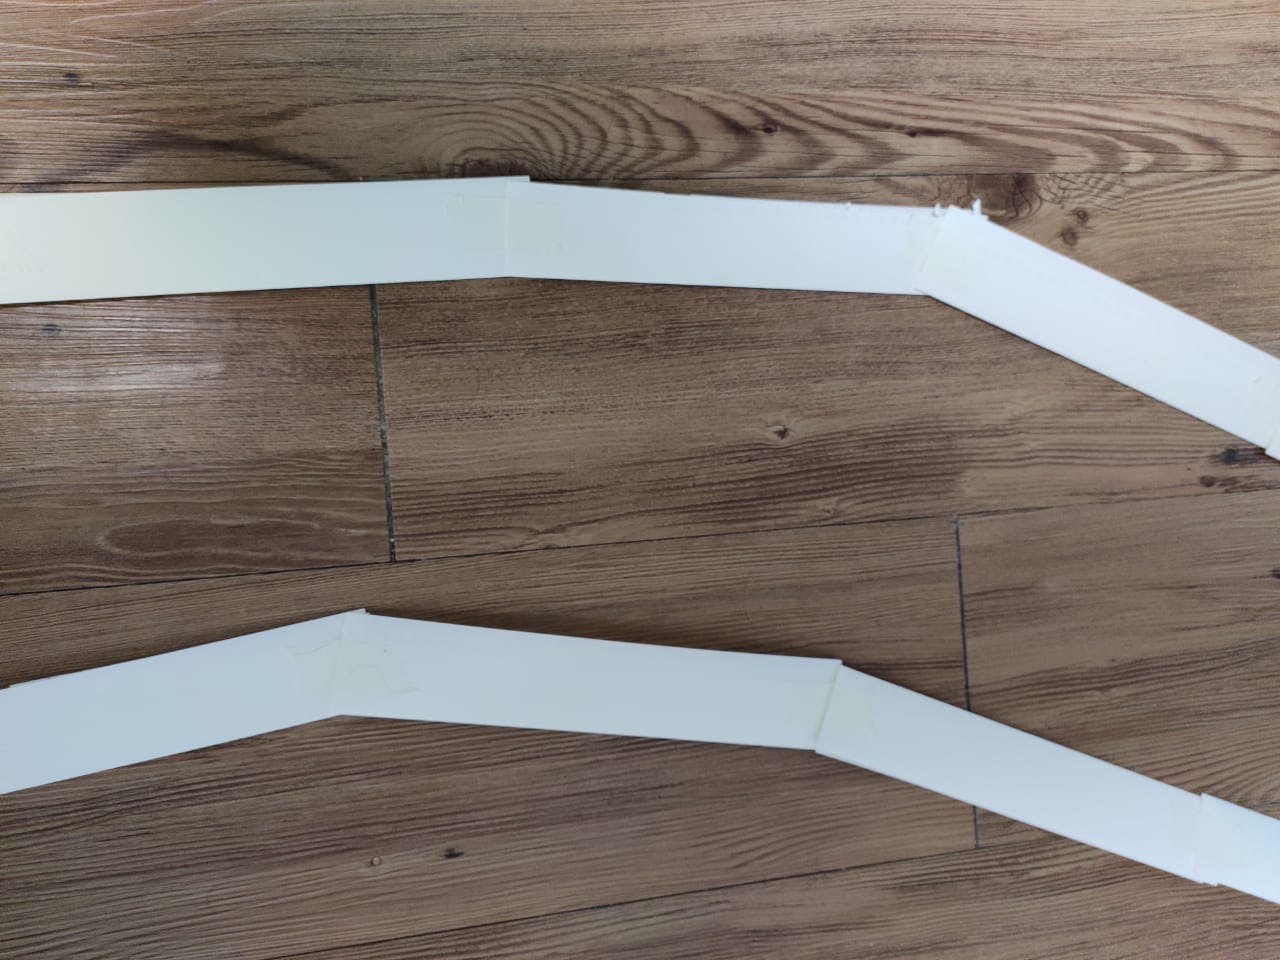
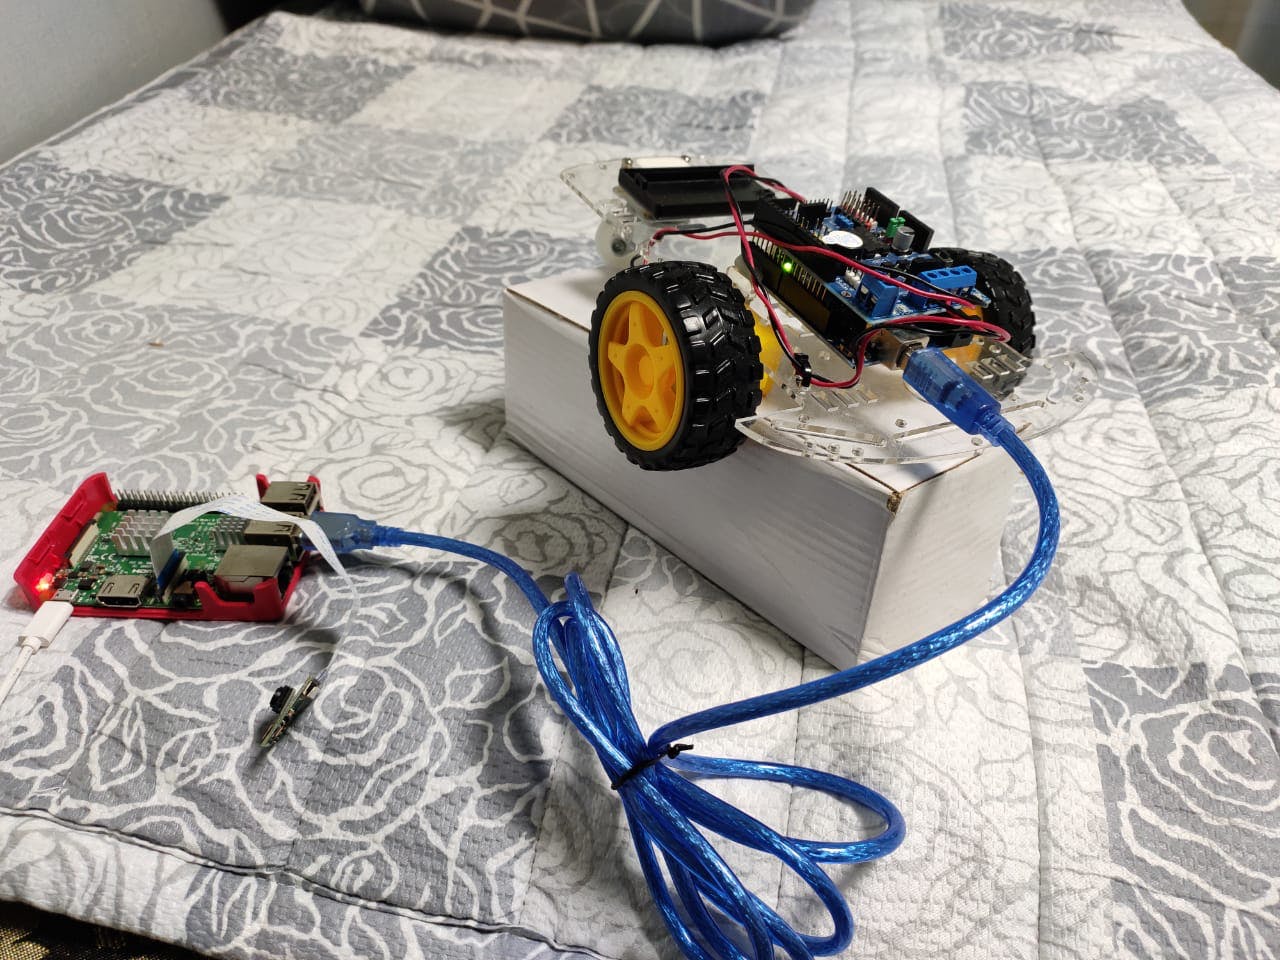
在这个项目中,我 使用OpenCV和Raspberry pi设计了一个车道跟随机器人。

Step 1 : Importing Libraries
首先我们导入 OpenCV、Numpy、数学和串行库。
import cv2
import numpy as np
import math
import serial
Step 2 : Read Image from your directory
image = cv2.imread(r'C:\Users\aasai\Desktop\new1.jpeg')
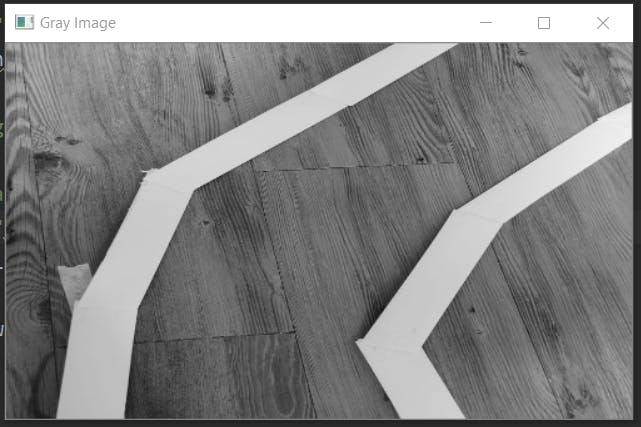
Step 3 : Color Conversion
将我们的 BGR 图像转换为灰色。灰度图像仅包含 [0-255] 范围内的值。
gray = cv2.cvtColor(image, cv2.COLOR_BGR2GRAY)
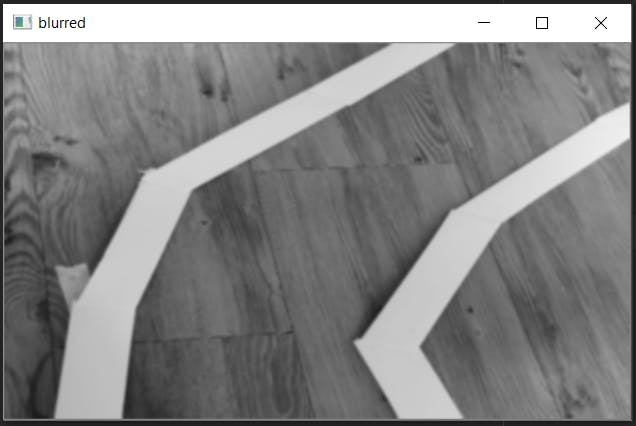
Step 4 : Image Smoothing
图像模糊/平滑图像平滑以减少噪点。它是在各种低通滤波器内核的帮助下完成的。这里我们使用了高斯核。了解更多关于不同内核的信息。点击这里
# given input image, kernel width =5 height = 5, Gaussian kernel standard deviation
k_width = 5
k_height = 5
blurred = cv2.GaussianBlur(gray, (k_width, k_height), 0)
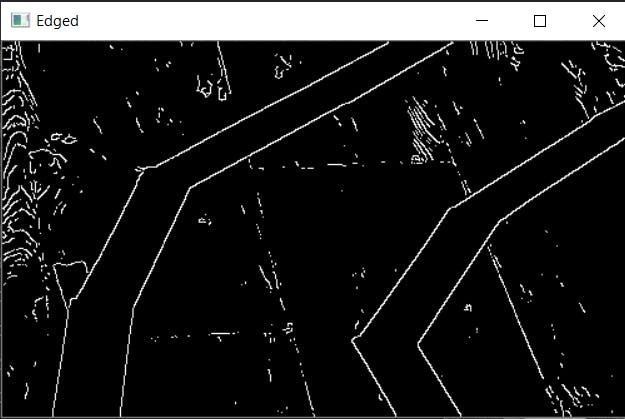
Step 5 : Edge Detection
Canny边缘检测算法是一种流行的边缘检测算法,用于检测图像中的边缘。为了保留图像中的高梯度值,我们选择低阈值和高阈值。这将帮助我们保留图像中的强边缘。
# Find the edges in the image using canny detector
threshold1 = 80
threshold2 = 80
edged = cv2.Canny(blurred, threshold1, threshold2)
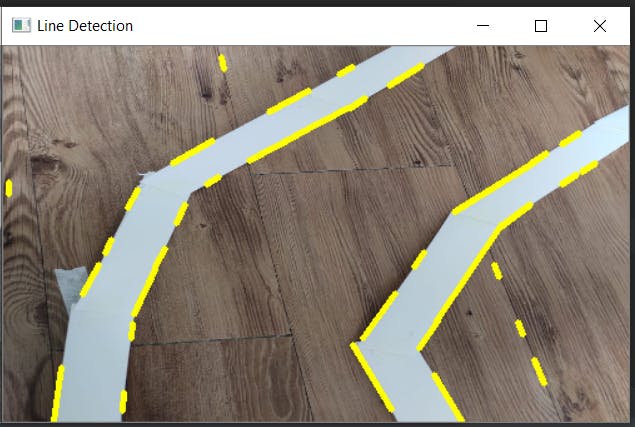
Step 6 : Find Lines
霍夫变换是一种特征提取方法,用于检测图像中的简单形状,如圆形、线条等。在这里,您可以了解更多相关信息。
# it will return line coordinates,it will return 3darray.
lines = cv2.HoughLinesP(edged,1,np.pi/180,max_slider,minLineLength,maxLineGap)

for x in range(0, len(lines)):
    for x1,y1,x2,y2 in lines[x]:
        # draw line in image using cv2.line function.
        cv2.line(image,(x1,y1),(x2,y2),(255,0,0),3)
        theta=theta+math.atan2((y2-y1),(x2-x1))
        print(theta)
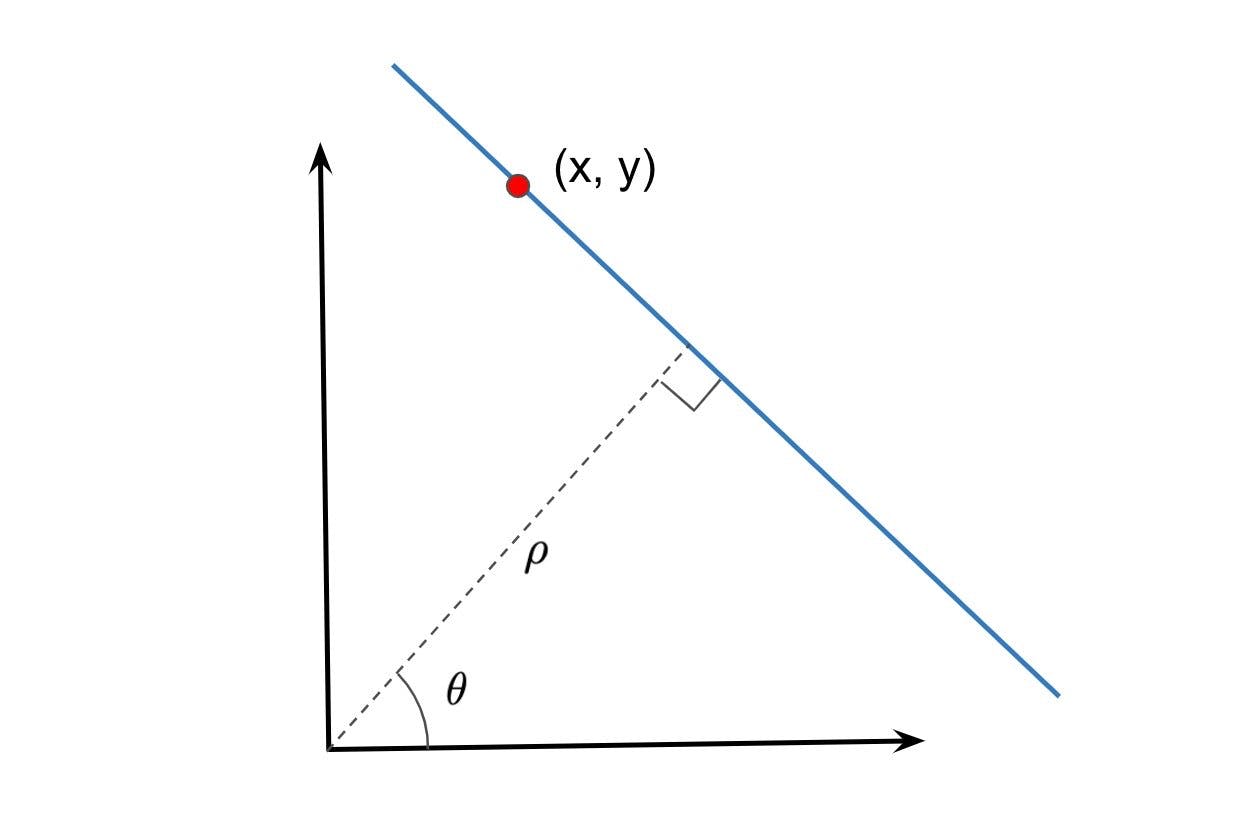
About theta calculation:
atan2() 函数以弧度为单位返回值,表示 -pi 和 pi 之间的值,表示 (x, y) 点与正 x 轴的角度 theta。
您可以使用这行代码获取第一行的坐标。
for x1,y1,x2,y2 in lines[0]:

Step 7 : Decision Making Part
现在,我们要设置阈值,根据阈值和θ值之间的差异,我们将向arduino发送命令以驱动特定方向的电机。
threshold=5
if(theta>threshold):
    print("Go left")
if(theta<-threshold):
    print("Go right")
if(abs(theta)<threshold):
    print("Go straight")
Step 8 : Integrate
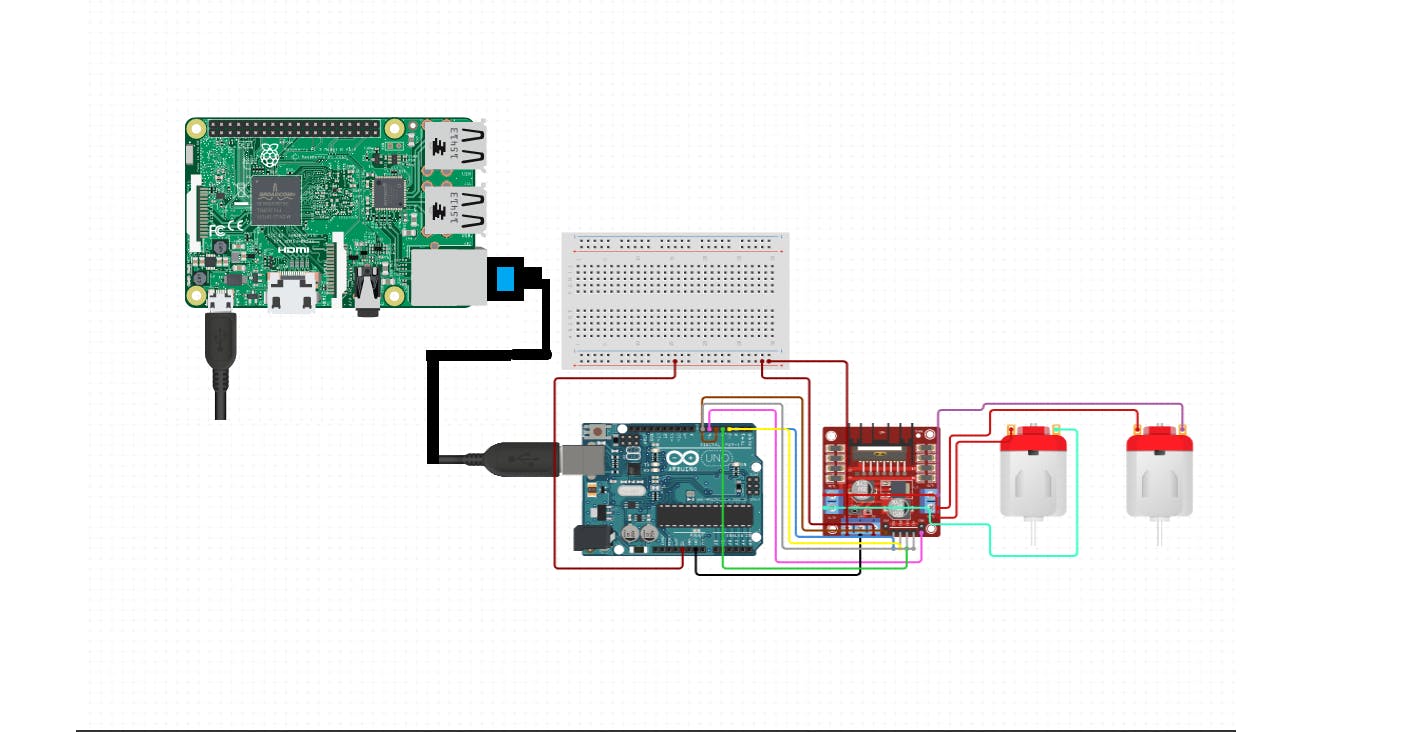
Arduino Code :
Arduino将从 Raspberry Pi 串行端口接收命令。
// assign pin num
int right_pin = 12;
int left_pin = 13;
int const ENA = 10;
int const ENB = 11;


// initial command
int command = 0;

void setup()

{
  pinMode(right_pin, OUTPUT);
  pinMode(left_pin, OUTPUT);
  pinMode(ENA, OUTPUT);   // set all the motor control pins to outputs
  pinMode(ENB, OUTPUT);

  Serial.begin(115200);

  while (!Serial);

  Serial.println("Opencv Lane Detect Autonomous Robot");

}

void loop() {

if (Serial.available())

{
  //int state = Serial.parseInt();
  int state = Serial.read();

  if (state == 4)
  {

    digitalWrite(left_pin, LOW);
    digitalWrite(right_pin, HIGH);
    digitalWrite(ENA, HIGH);
    digitalWrite(ENB, HIGH);
    Serial.println("Left");
  }

  if (state == 2)
  {
    digitalWrite(left_pin, LOW);
    digitalWrite(right_pin, LOW);
    digitalWrite(ENA, HIGH);
    digitalWrite(ENB, HIGH);
    Serial.println("Right");
    Serial.println("Reverse");
  }

  if (state == 3)
  {
    digitalWrite(left_pin, HIGH);
    digitalWrite(right_pin, LOW);
    digitalWrite(ENA, HIGH);
    digitalWrite(ENB, HIGH);

  Serial.println("Right");
  }
  if (state == 1)
  {
    digitalWrite(left_pin, HIGH);
    digitalWrite(right_pin, HIGH);
    digitalWrite(ENA, HIGH);
    digitalWrite(ENB, HIGH);

  Serial.println("Forward");
  }
  if (state == 5)
  {
    digitalWrite(left_pin, LOW);
    digitalWrite(right_pin, LOW);
    digitalWrite(ENA, LOW);
    digitalWrite(ENB, LOW);

  Serial.println("Stop");
  }
}
}
感谢信
感谢OpenCV Python 文档。
Thanks阅读这个项目。希望这个项目能给你一些关于 OpenCV Lane Follow 机器人的见解,你可以按照给定的步骤做同样的事情。
我在沉默中努力工作,我的机器人制造噪音。

声明:本文内容及配图由入驻作者撰写或者入驻合作网站授权转载。文章观点仅代表作者本人,不代表电子发烧友网立场。文章及其配图仅供工程师学习之用,如有内容侵权或者其他违规问题,请联系本站处理。 举报投诉
- 相关下载
- 相关文章


