
资料下载


Android和Arduino的电视、DVD和音频控制
王兰
分享资料个
描述
大家好,我想分享这个项目。
第一步:获取按键代码(一)
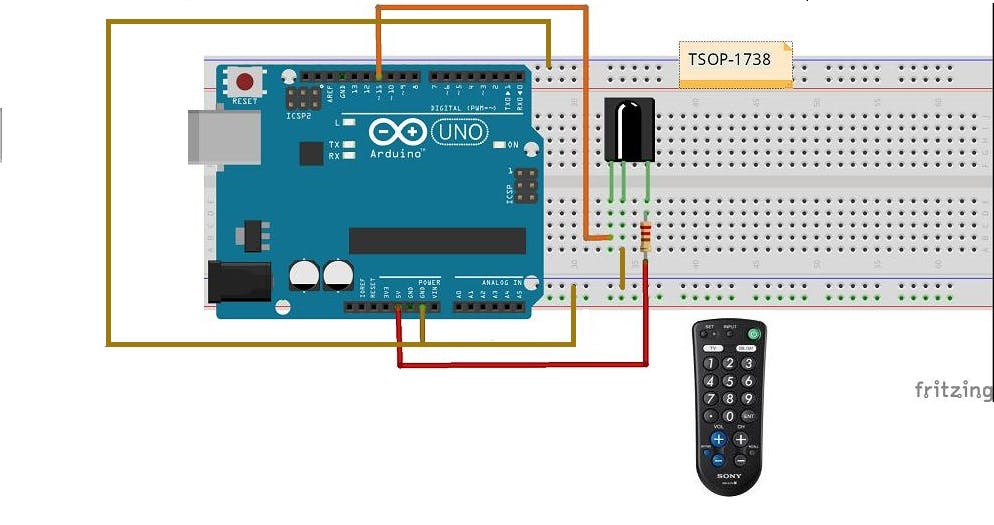
首先,我们必须获取遥控器每个按钮的代码。
因此,如图所示在面包板上构建电路。
Ir 接收器 TSOP 1738 具有三个引脚。
第一个是输出,连接到 Arduino 中的引脚 11。
第二个连接到 Gnd,第三个连接到 +5V。
下载由 Ken Shirriff 编写的 IrRemote 库。这个库让我们可以在 Nec、Philips RC5、Philips RC6 和 raw 等多种协议中发送和接收 Ir 远程代码。
我们必须将像 osp1738 这样的红外传感器连接到任何数字输入引脚。
#include int RECV_PIN = 11;

IRrecv irrecv(RECV_PIN);

decode_results results;

void setup() {

Serial.begin(9600);

irrecv.enableIRIn(); // Start the receiver

}

// Dumps out the decode_results structure.

// Call this after IRrecv::decode()

// void * to work around compiler issue

//void dump(void *v)

{ // decode_results *results = (decode_results *)v

void dump(decode_results *results)

{ int count = results->rawlen;

if (results->decode_type == UNKNOWN)

{ Serial.print("Unknown encoding: ");

}

else if (results->decode_type == NEC)

{ Serial.print("Decoded NEC: ");

} else if (results->decode_type == SONY)

{ Serial.print("Decoded SONY: ");

}

else if (results->decode_type == RC5)

{ Serial.print("Decoded RC5: "); }

else if (results->decode_type == RC6)

{ Serial.print("Decoded RC6: "); }

else if (results->decode_type == PANASONIC)

{ Serial.print("Decoded PANASONIC – Address: ");

Serial.print(results->panasonicAddress,HEX);

Serial.print(" Value: "); }

else if (results->decode_type == JVC)

{ Serial.print("Decoded JVC: "); }

Serial.print(results->value, HEX);

Serial.print(" (");

Serial.print(results->bits, DEC);

Serial.println(" bits)");

Serial.print("Raw (");

Serial.print(count, DEC);

Serial.print("): ");

for (int i = 0; i < count; i++)

{ if ((i % 2) == 1)

{ Serial.print(results->rawbuf[i]*USECPERTICK, DEC); }

else

{ Serial.print(-(int)results->rawbuf[i]*USECPERTICK, DEC); }

Serial.print(" "); }

Serial.println(""); }

void loop()

{

if (irrecv.decode(&results))

{

Serial.println(results.value, HEX);

dump(&results);

irrecv.resume(); // Receive the next value

}

}
第二步:获取代码(二)
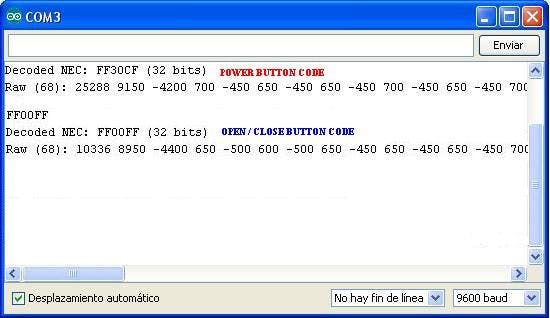
构建用于捕获代码的电路后,打开 Arduino Ide 上的串行监视器,按下遥控器中的所需按钮,查看 Arduino 正在接收哪些值,如图所示。Arduino 将收到协议、代码和原始代码。
例如。这些是我按下 DVD 播放器遥控器的电源和打开/关闭按钮时的代码。
保存或复制为您将用于控制设备的每个所需按钮收到的代码。
在我的草图中,我使用了电视:电源、音量+、音量-、频道+和频道-以及电视/DVD 按钮。
对于 DVD,电源、打开/关闭、播放和停止。
对于音频系统,我只想控制电源、播放 CD 和预设按钮。
这些代码将用于下一个草图。
安装:
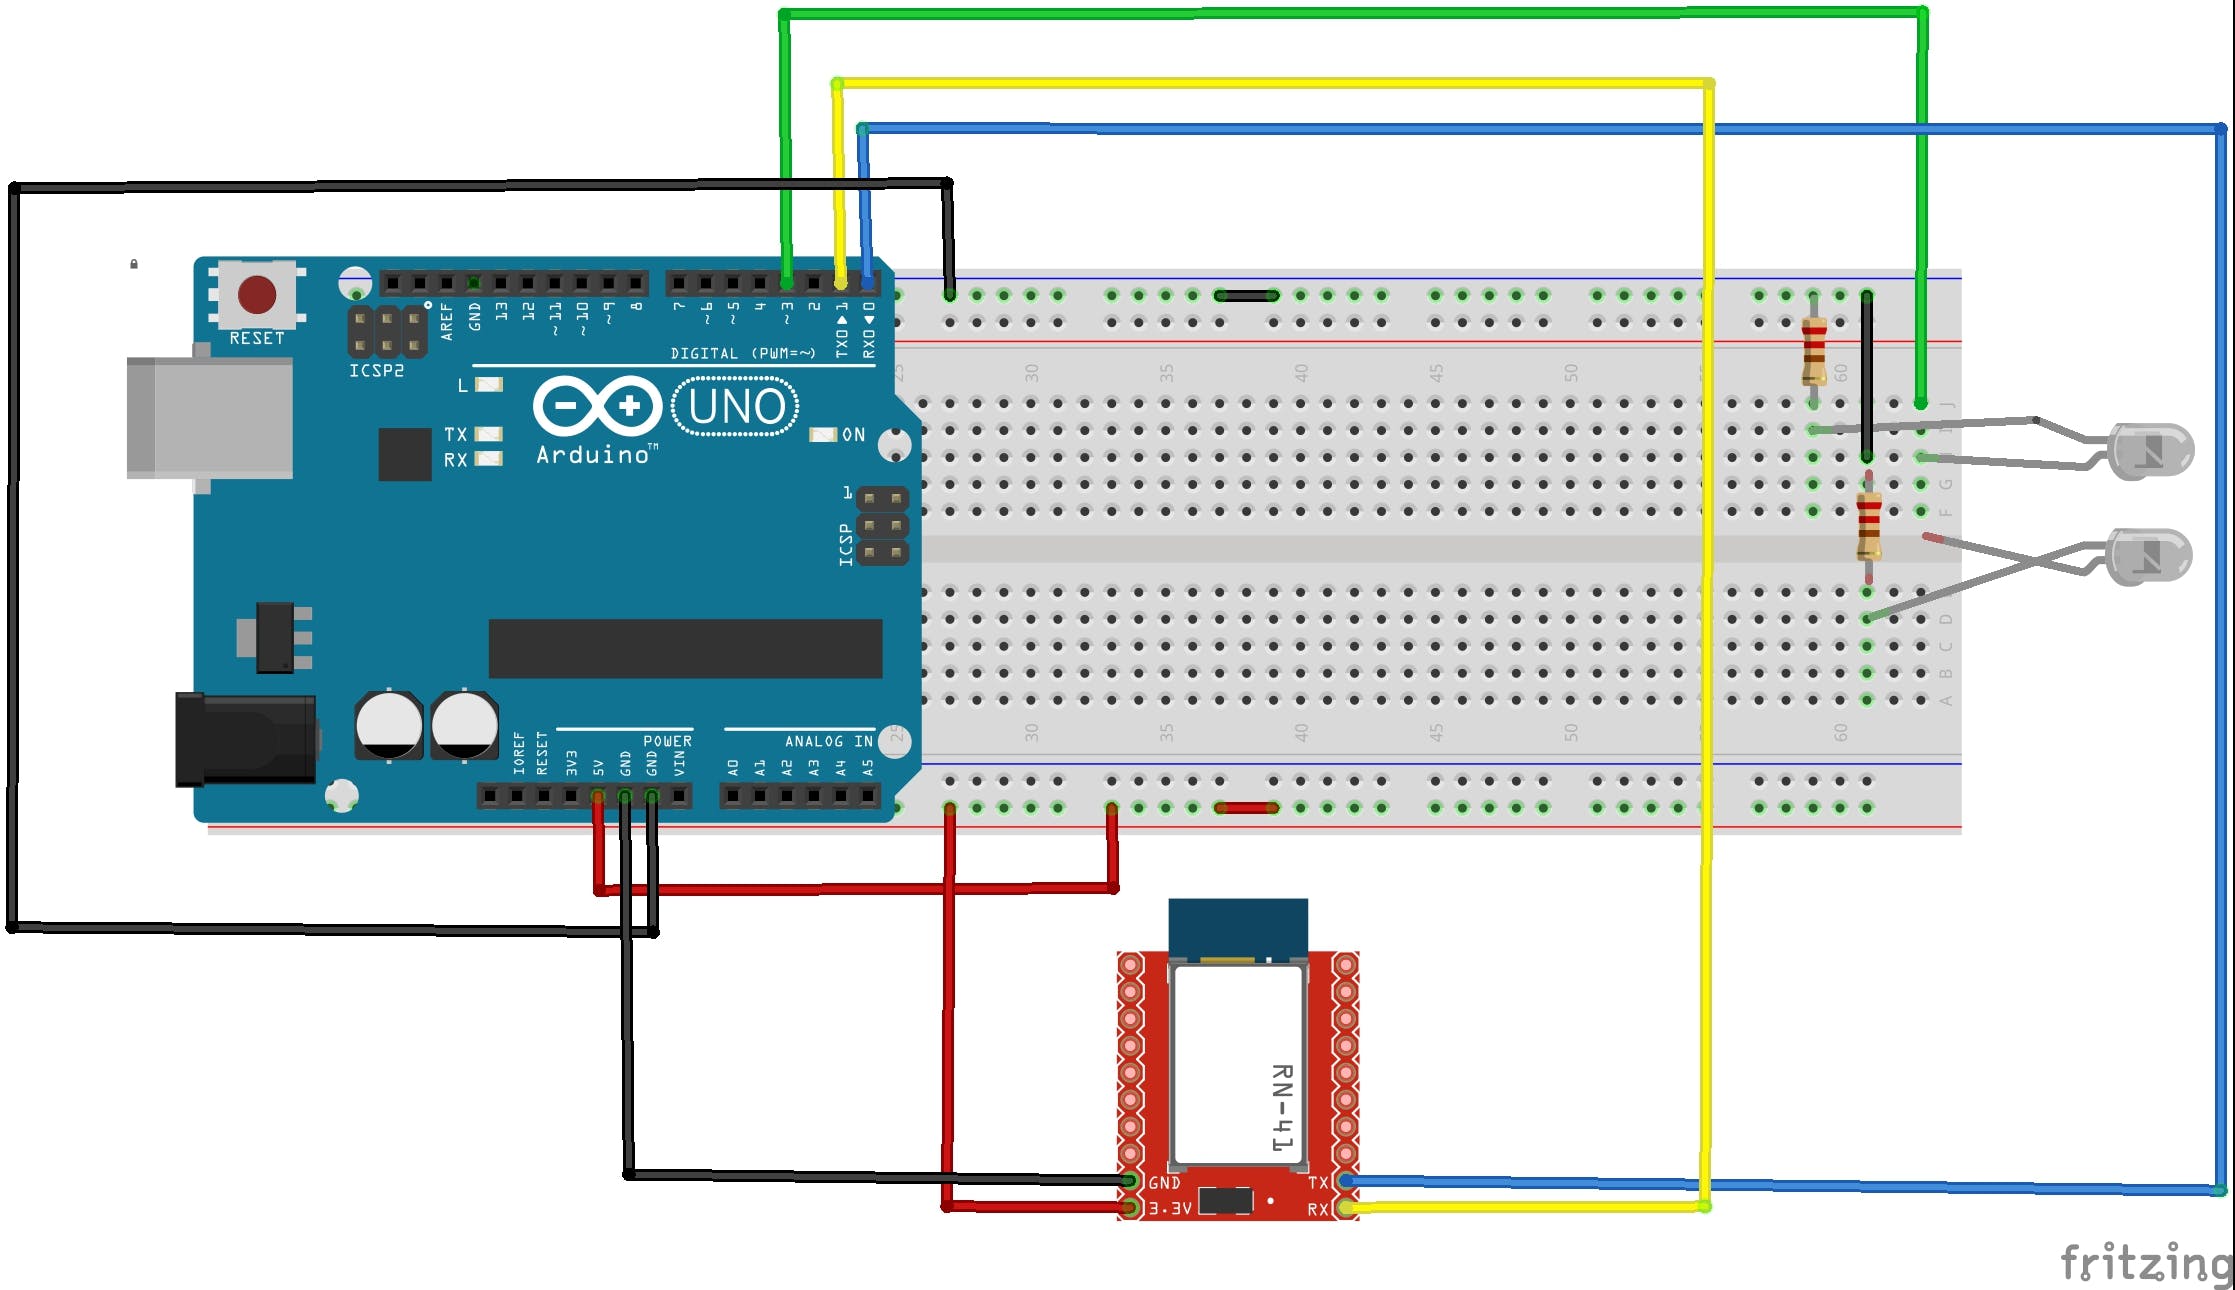
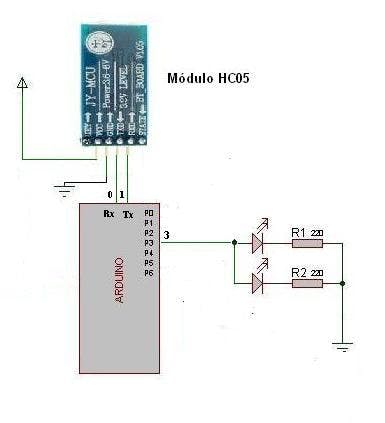
如您所见,我们只需要:
- 阿杜诺板。
- 蓝牙模块HC-05。
- 红外线 LED 的。(我用了两个来配置我的电视、DVD 和音响,红外 LED 的数量取决于您设备的配置)。
注意:红外 LED 必须连接到 arduino 引脚 #3。那是因为库是这样设置的。
Arduino 只使用了三个引脚:
别针
3 - 到 Led's
0 - 蓝牙模块引脚 Tx
1 - BT 模块引脚 Rx
请记住,当您将草图上传到 Arduino 时,必须断开蓝牙模块。
应用程式
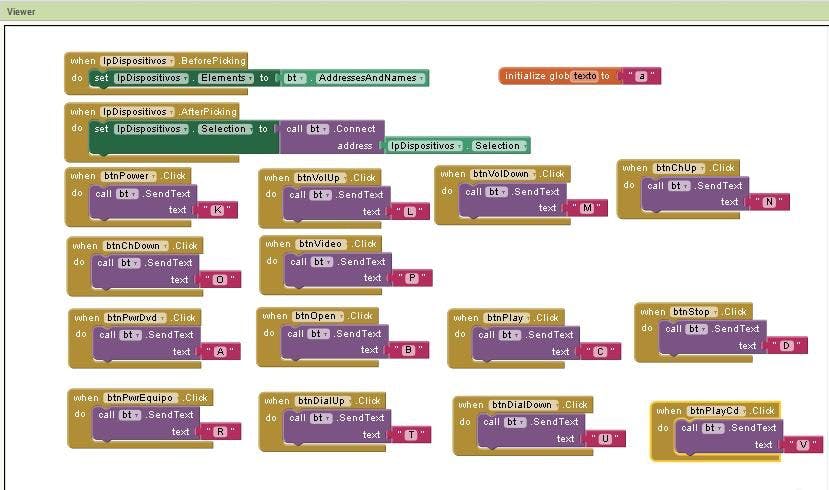
这是应用程序发明家 2 中制作的应用程序的框图。
声明:本文内容及配图由入驻作者撰写或者入驻合作网站授权转载。文章观点仅代表作者本人,不代表电子发烧友网立场。文章及其配图仅供工程师学习之用,如有内容侵权或者其他违规问题,请联系本站处理。 举报投诉
- 相关下载
- 相关文章


