资料下载

虚拟迷宫求解机器人开源分享
描述
自动驾驶汽车现在是最热门的话题。爱好者尝试使用树莓派和计算机视觉技术制作它们。这是一种方法。制造自动驾驶汽车的另一种更简单的方法是线路跟随器、路径跟随器、迷宫求解机器人。这种机器人遵循在特定环境的地板上绘制的特定颜色线。我们可以使用相机或红外传感器制作它们。如果我说我不想在地板上画任何线,我希望它在隐形线上运行。这实际上是我在这里所做的。这个虚拟迷宫解算器/路径跟随机器人遵循来自远程 PC 的路径。所以机器人没有任何传感器,它只是从 PC 获取坐标——另一个软件机器人试图解决难题——硬件机器人/汽车的移动方式与软件机器人汽车的移动方式相同。现在让我分享一下我是如何做到这一点的。
部分:
硬件 -
电子产品 -
- Arduino Nano(任何板都可以,但我的PCB支持)- 1x
- L298n 电机驱动模块(用于电机控制操作) - 1x
- 电机 - 4x
- 车轮(与电机兼容) - 4x
- HC05 蓝牙模块(发送/接收数据) - 1x
- 我制作的多功能机器人PCB(点此查看)- 1x
- 一些公母头针
- 焊线(在PCB上焊接东西)
使身体 -
- PVC 板(您可以使用任何板甚至纸张,我喜欢使用它们)
- 热胶和胶枪
软件 -
- Arduino.ide
- Python3(别担心,我会指导如何安装)
而已。现在让我们看看一切将如何运作。
原则(一切如何运作)
很简单,机器人将是一辆蓝牙控制的机器人汽车。python代码将在计算机上加载地图/迷宫并尝试解决它。硬件机器人将使用蓝牙从 Python 程序中获取数据并相应地移动。
python程序将通过比较颜色值来查找路径。我们的地图将包含白色路径。只要有一个白色像素,软件汽车就会前进,硬件机器人也会前进。现在让我们来吧。
制作机器人底盘

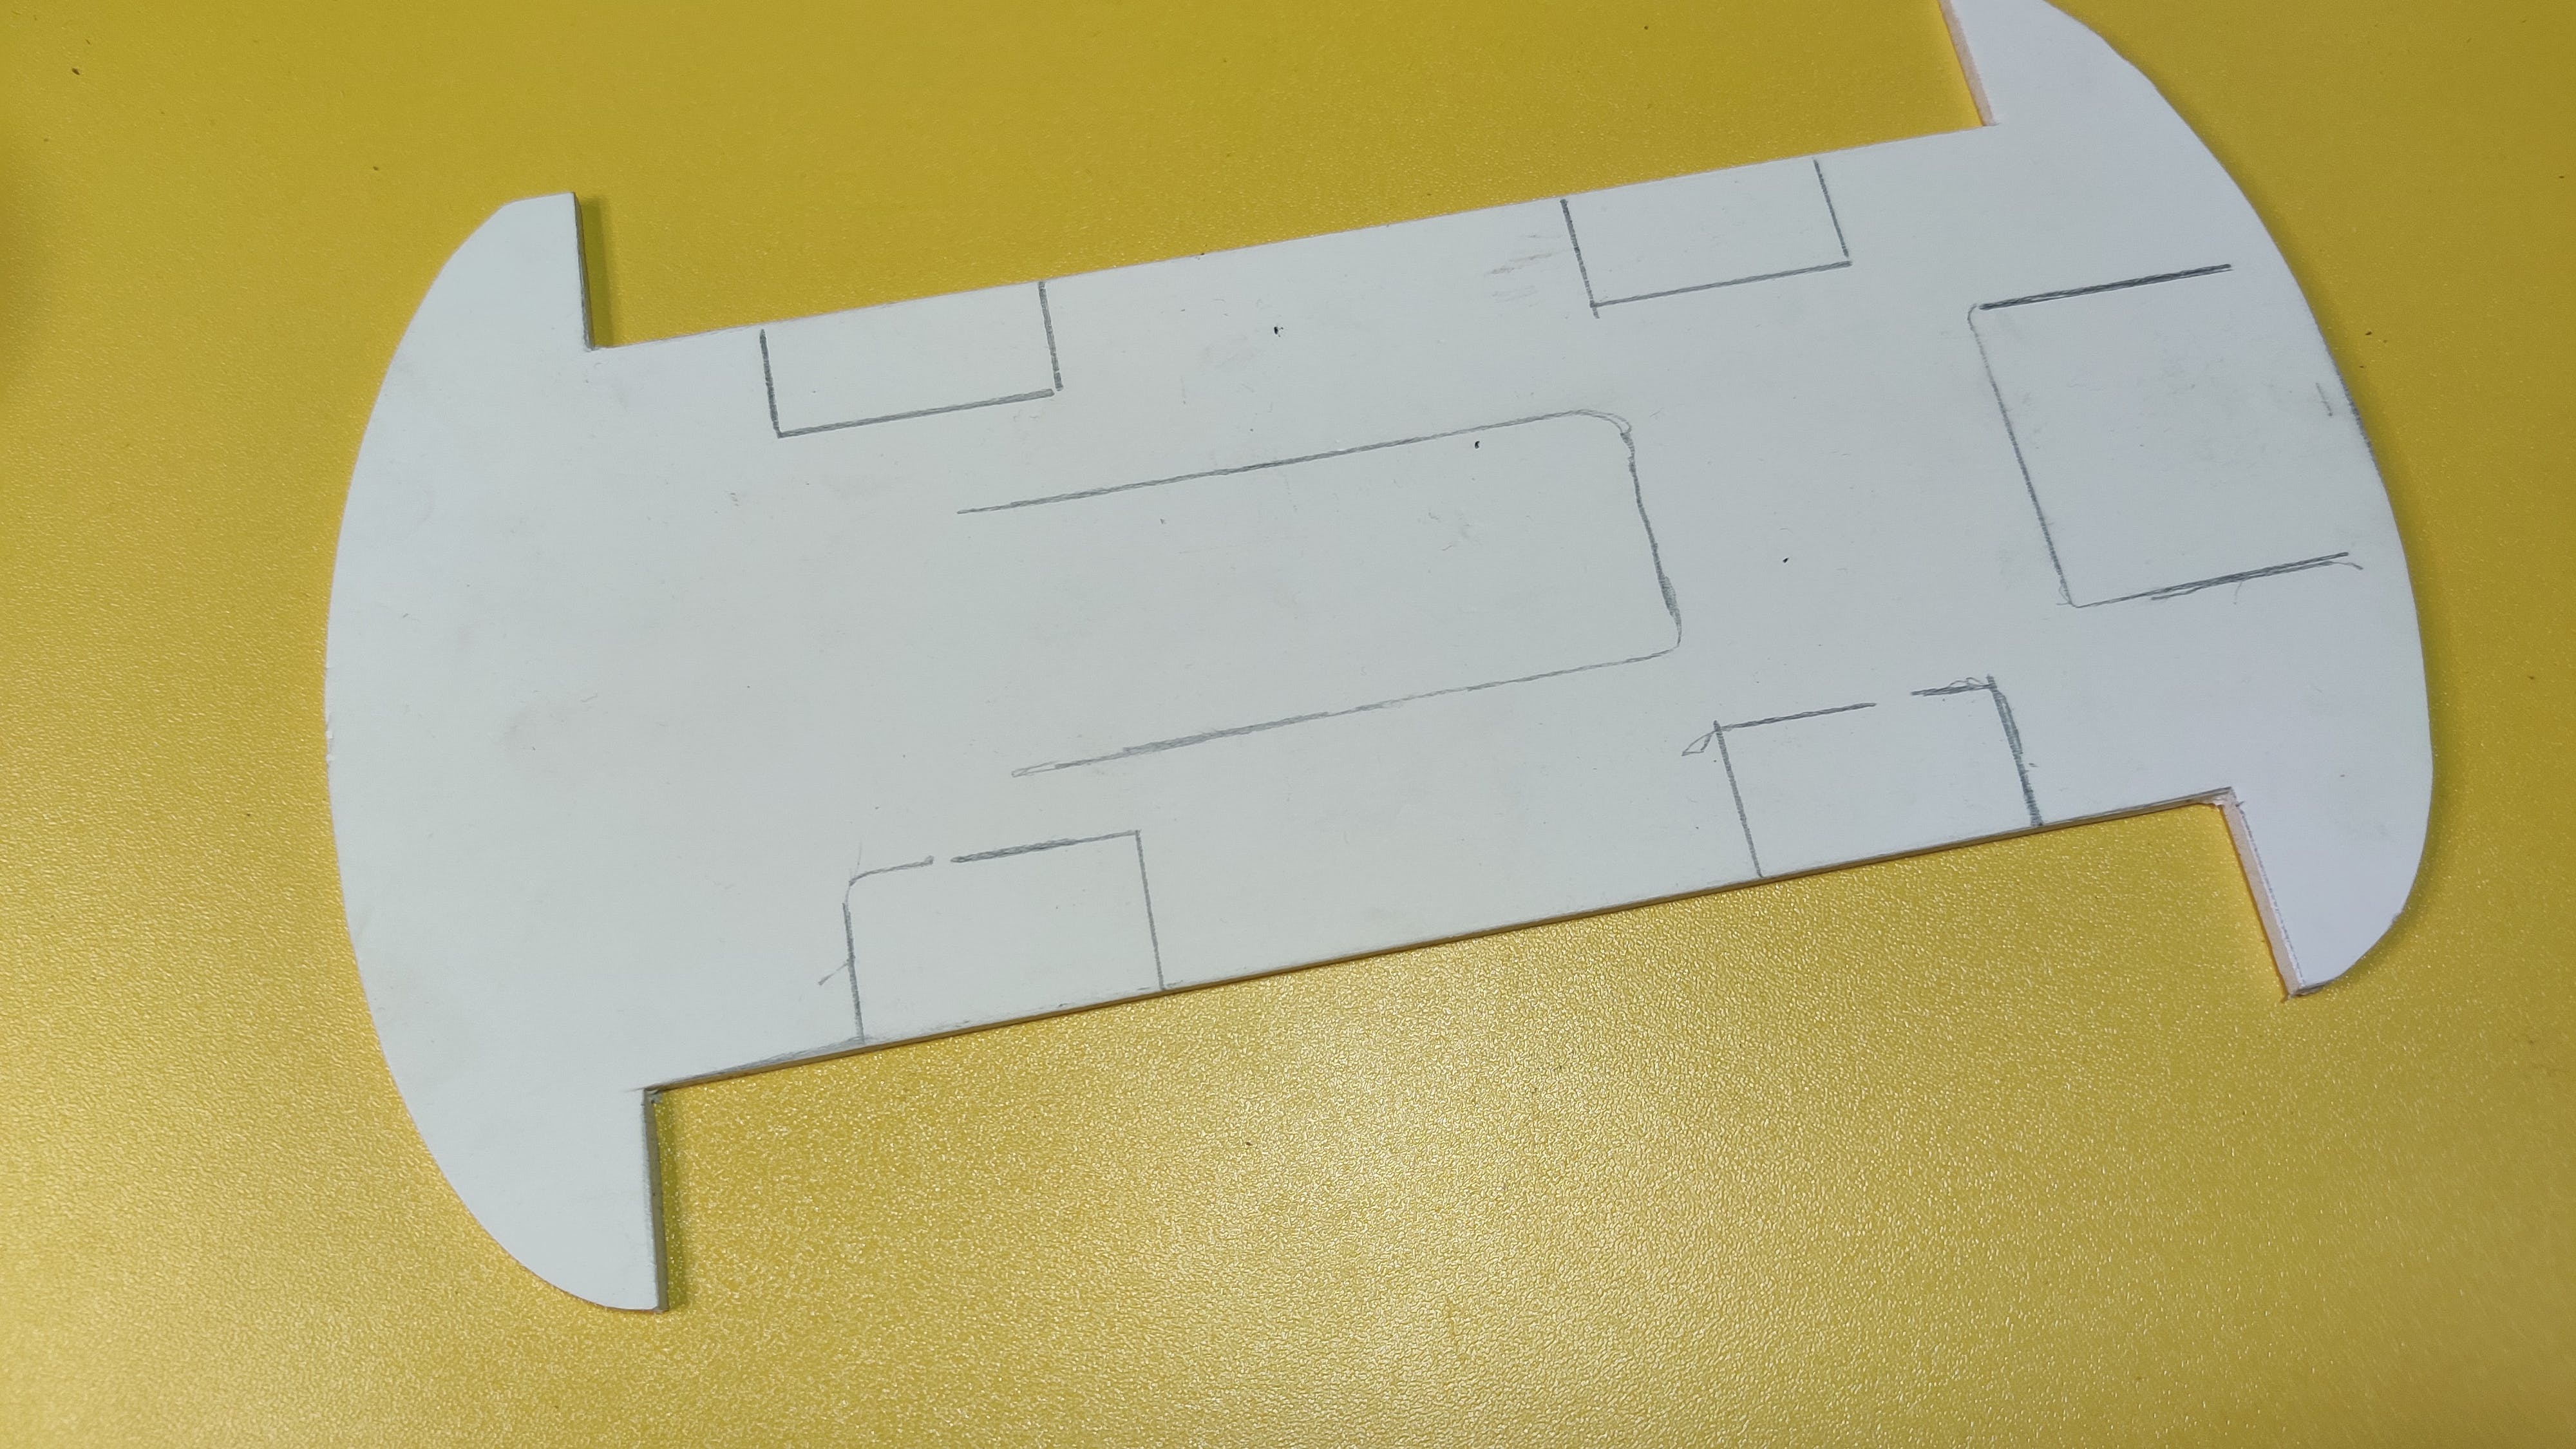
我拿了两张PVC片材,根据我的需要剪下来。你想怎么做是你的选择。切割板/床单后,我放置电机,用适当的电线连接它们。同一侧的两个电机作为一个电机,因此它们连接在一起。在图 6 中,我使用了一些母对母跳线将电机控制引脚连接到 PCB。之后,我添加了两个蓝色 PVC 件来装饰车身并连接轮子。
电路图和PCB

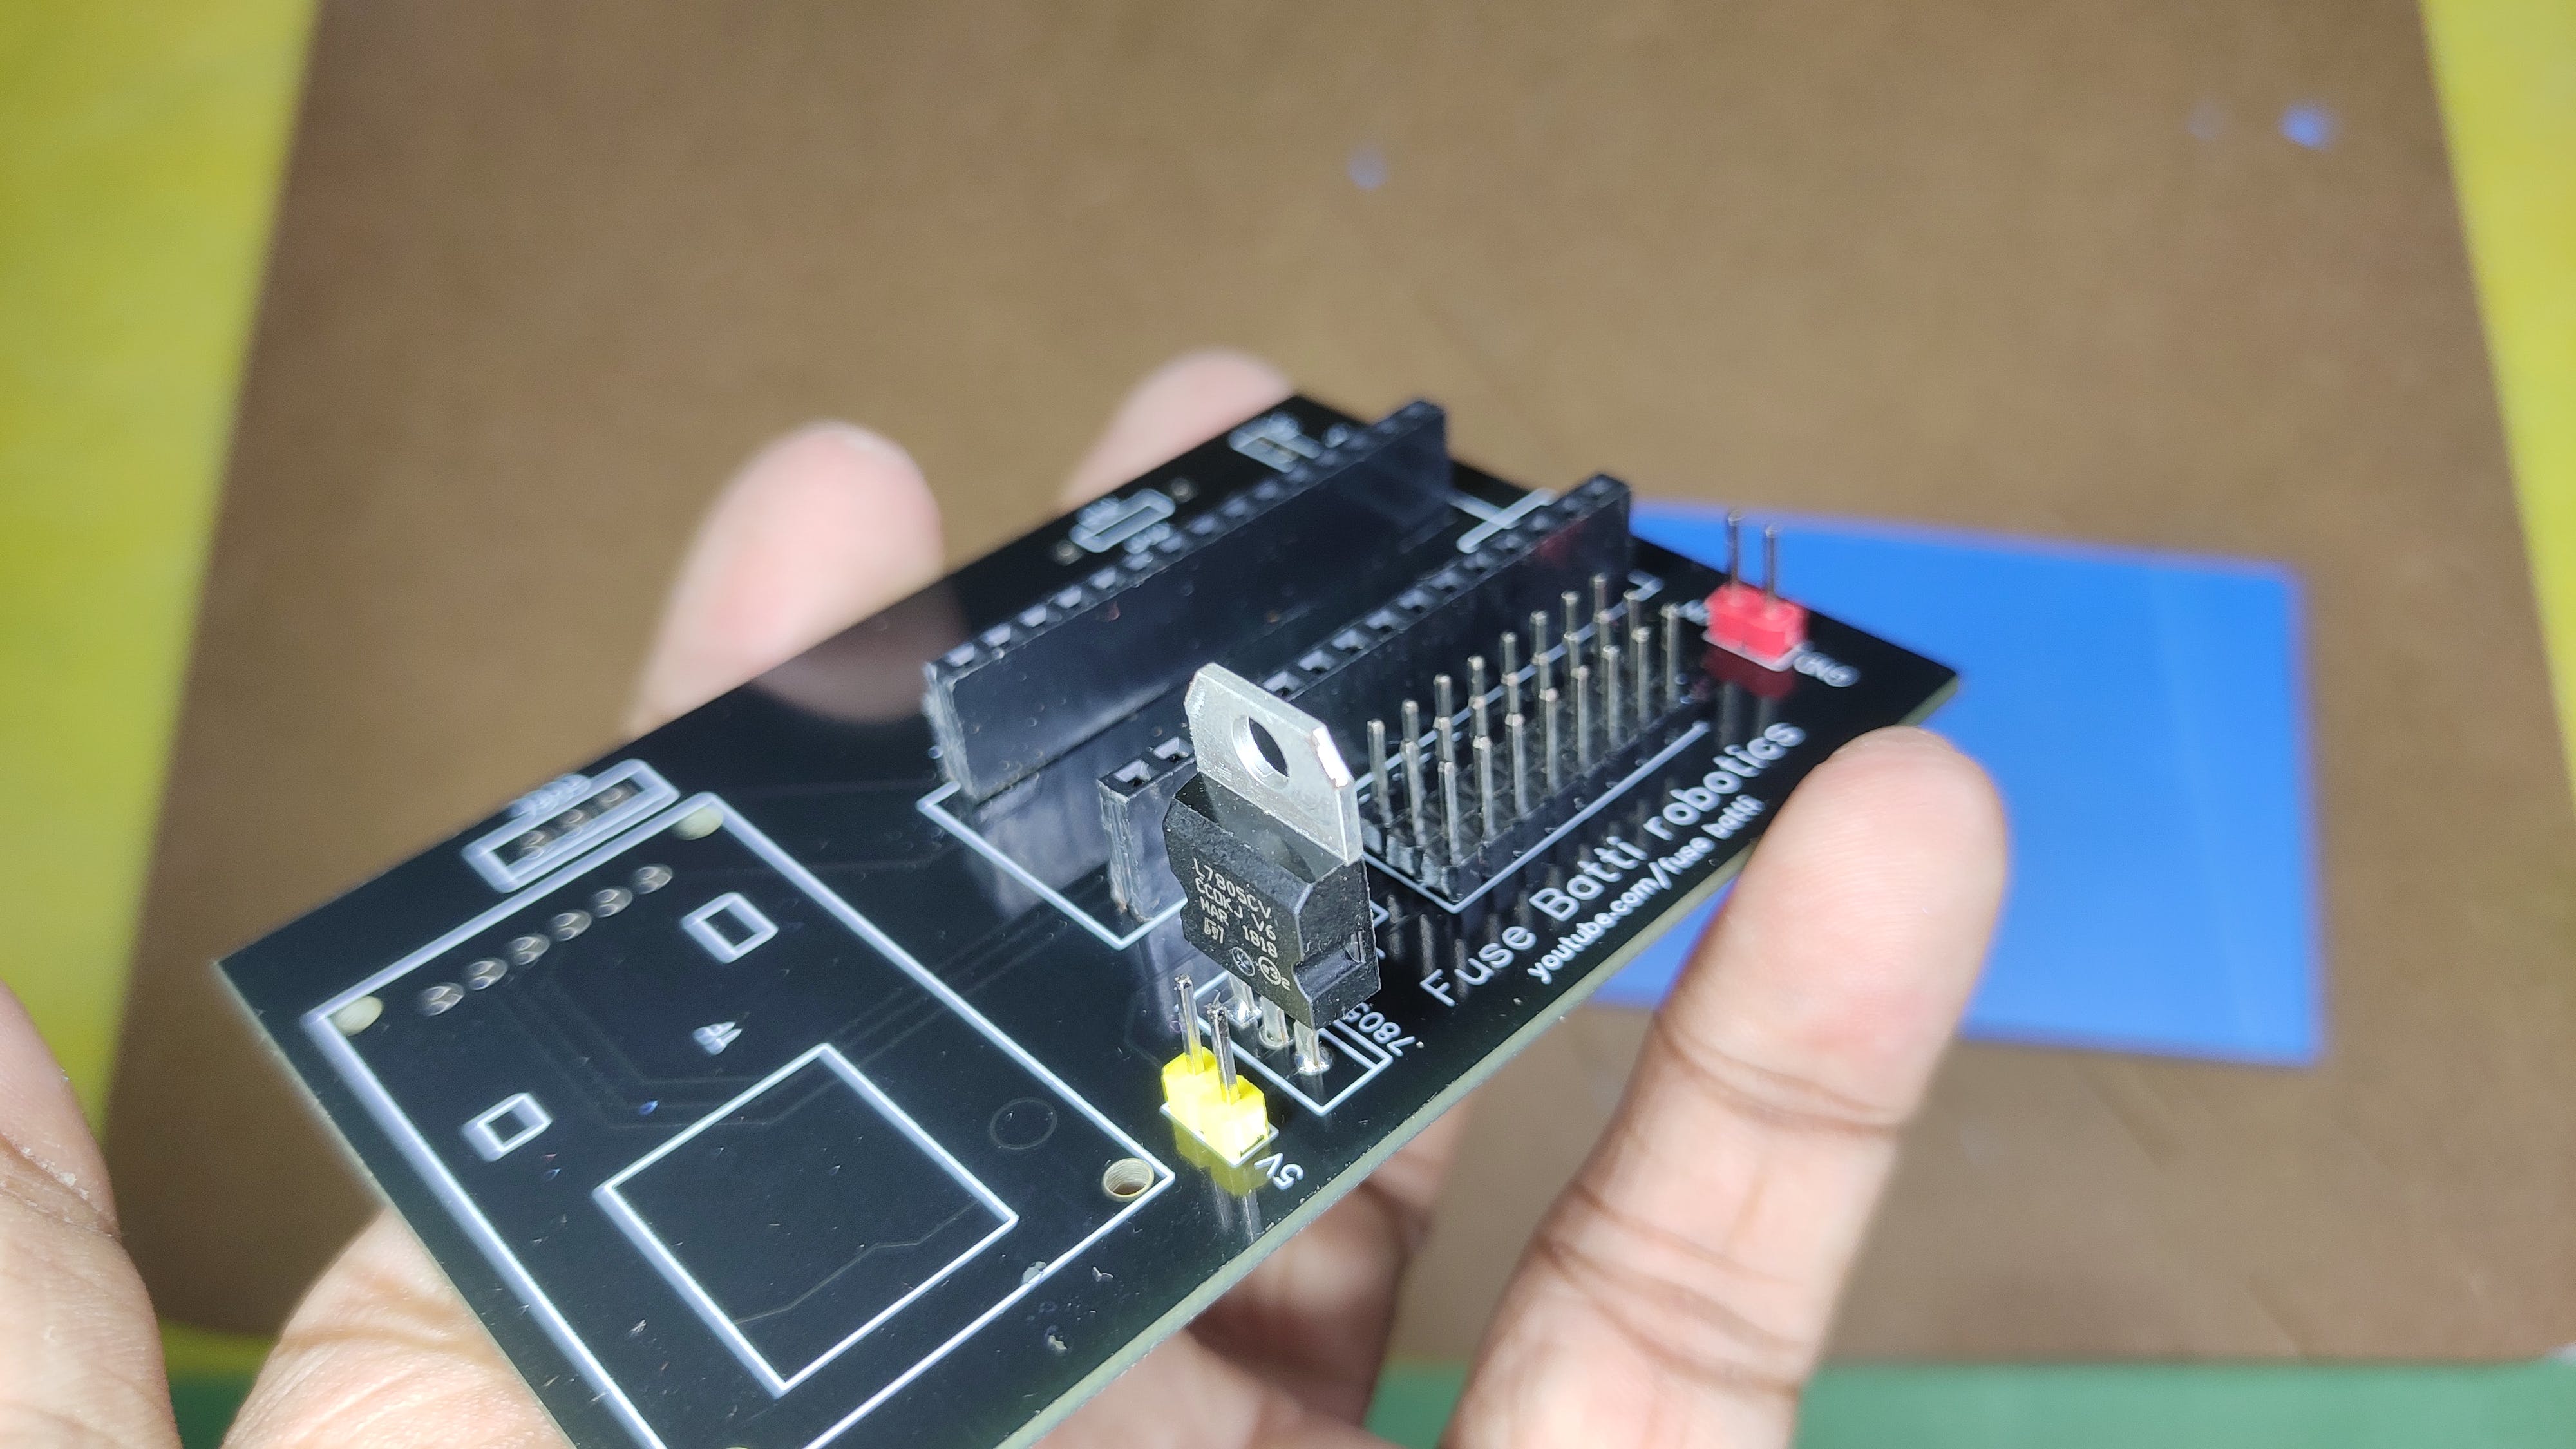
我使用EasyEDA 设计了电路。这很简单,我留下了除了 A4、A5(用于 I2C 通信)之外的所有模拟引脚,并添加了 SD 卡读卡器、蓝牙模块和 Arduino nano 的位置。蓝牙模块由跳线隔开(上传数据时,我们需要断开它)。我们不需要电阻,因为 Arduino 只会接收数据,不会写入。
之后,我从PCBWay.com 打印了 PCB。我发现他们的服务非常令人印象深刻。由于他们以更少的钱提供优质产品,我更喜欢将他们的服务用于我的 PCB。我去了pcb快速订购并上传了gerber文件。一切都是由网站自动完成的。在他们的工程师检查了我的 PCB 后,我在 3 天内付款并将它们从中国运到孟加拉国。质量令人惊叹,阻焊层,线条,玻璃般的外观一如既往地让我感到惊讶。
从这里获取 PCB 。
连接:
我连接了
- 左电机至 D5、D6
- 右电机至 D3、D4
蓝牙模块连接在专用端口上,但要准确
- VCC 至 5v
- 接地到接地
- 发送到 Arduino Rx
- Rx 到 Arduino Tx
你发什么,我收什么。所以Arduino的接收引脚(Rx)连接到蓝牙模块发送引脚(Tx)。
之后,从电机驱动模块为 PCB 供电。我总是喜欢在我的机器人项目中使用 7.4V 电源。两个锂电池就可以完成这项工作。3.7+3.7=7.4V,非常适合此类项目。
所以现在我们的蓝牙机器人已经准备好了。下一步是对其进行编程。
编程1:Arduino代码
现在是时候将程序上传到机器人了。由于蓝牙模块连接在硬件串行上,我在上传代码之前拔下了跳线。
首先,我定义了电机连接的引脚 -
// Declare motor pins
// motors of same side work as one
// so we can consider both as one.
int rightMotor1 = 2;                // right side
int rightMotor2 = 3;
int leftMotor1 = 5;                 // left side
int leftMotor2 = 6;
然后我在 setup() 函数中将电机引脚声明为输出 -
 // Set pin modes
pinMode(rightMotor1, OUTPUT);
pinMode(rightMotor2, OUTPUT);
pinMode(leftMotor1, OUTPUT);
pinMode(leftMotor2, OUTPUT);
然后我初始化串行通信以从蓝牙模块接收数据 -
 // Initialize serial communication
Serial.begin(9600);
它检查蓝牙模块所连接的串行端口的字节数据。
// Variable to store received data
byte command;
// Get command data from bluetooth serial port
command = Serial.read();
如果它收到 -
- 'f' 前进
- 'b' 向后
- l' 代表左和
- 'r' 表示正确的动作
每个电机都有两个引脚。如果我们需要将它们运行到一个方向,我们需要将一个引脚设为高电平,另一个引脚设为低电平。如果它们同时为高或低,电机将不会旋转。请参阅此示例以将汽车向前移动 -
if (command == 'f'){
// indicates forward motion
digitalWrite(rightMotor1, HIGH);
digitalWrite(rightMotor2, LOW);
digitalWrite(leftMotor1, HIGH);
digitalWrite(leftMotor2, LOW);}
通过这种组合,我们可以使机器人工作。
从 github 下载代码或从下面复制。我更喜欢下载以避免错误。
/* ** Virtual Path Following Robot *
*  Robot Actuator's program
*
*  This robot takes commands from a python program
*  and follows those commands. This robot demonstrates
*  virtual path following robots and it's scopes.
*
*  *********** License: GPL3+  *************
*  You should receive a copy of the license
*  with this program.
*
*  (c) author: ashraf minhaj
*      mail  : ashraf_minhaj@yahoo.com
*
*  Tutorial for this project:
*      http://youtube.com/fusebatti
*      http://ashrafminhajfb.blogspot.com
*
*  written on 15th Feb 2021
*/
// Declare motor pins
// motors of same side work as one
// so we can consider both as one.
int rightMotor1 = 2;                // right side
int rightMotor2 = 3;
int leftMotor1 = 5;                 // left side
int leftMotor2 = 6;
// Variable to store received data
byte command;
void setup() {
 // Set pin modes
 pinMode(rightMotor1, OUTPUT);
 pinMode(rightMotor2, OUTPUT);
 pinMode(leftMotor1, OUTPUT);
 pinMode(leftMotor2, OUTPUT);
 // Initialize serial communication
 // at 9600 buad rate
 // sender/python code will also use
 // the same buad
 Serial.begin(9600);
}
void loop() {
 // Get command data from bluetooth serial port
 command = Serial.read();
 // Decide which way to go based on received data
 if (command == 'f'){
   // indicates forward motion
   digitalWrite(rightMotor1, HIGH);
   digitalWrite(rightMotor2, LOW);
   digitalWrite(leftMotor1, HIGH);
   digitalWrite(leftMotor2, LOW);
 }
 if (command == 'b'){
   // Backward motion
   digitalWrite(rightMotor1, LOW);
   digitalWrite(rightMotor2, HIGH);
   digitalWrite(leftMotor1, LOW);
   digitalWrite(leftMotor2, HIGH);
 }
 if (command == 'r'){
   // Right turn
   digitalWrite(rightMotor1, LOW);
   digitalWrite(rightMotor2, HIGH);
   digitalWrite(leftMotor1, HIGH);
   digitalWrite(leftMotor2, LOW);
 }
 if (command == 'l'){
   // Left turn
   digitalWrite(rightMotor1, HIGH);
   digitalWrite(rightMotor2, LOW);
   digitalWrite(leftMotor1, LOW);
   digitalWrite(leftMotor2, HIGH);
 }
 if (command == 's'){
   // Stops the robot/car
   digitalWrite(rightMotor1, LOW);
   digitalWrite(rightMotor2, LOW);
   digitalWrite(leftMotor1, LOW);
   digitalWrite(leftMotor2, LOW);
 }
}
现在使用 Arduino.ide 上传代码并继续下一步。
Programmin2:Python 代码
我想你的电脑上安装了 python。如果没有,请转到并安装最新的稳定版 python。我使用 Python3.7.1,因为我发现它最稳定。在下载下载可执行安装程序时,双击它进行安装,然后单击“将python添加到环境变量路径”框,否则您将陷入灾难。
无论如何,现在让我们谈谈python程序。
我需要这个程序的两个库,pygame 和 pySerial。我像这样从命令提示符安装它们 -
$ pip install pygame
$ pip install pySerial
您在顶部看到的两个图像是迷宫和软件汽车。python程序读取它们-
bg  = pygame.image.load("track1.png")
car = pygame.image.load("car.png")
要将数据从 PC 发送到 Arduino 蓝牙,我首先将蓝牙模块连接到我的 PC。步骤是 -
- 打开蓝牙
- 转到控制面板>设备管理器
- 搜索新设备
- 使用密码添加设备 (HC05) [默认密码为“0000”或“1234”]
而已。然后单击设备属性以获取端口号。在 HC05 中,在 py PC 中它位于“COM8”中。所以python像这样连接 -
PORT = "COM8"
BUADRATE = 9600
robot = serial.Serial(PORT, BUADRATE)  # connect robot
为了让机器人先检查周围环境,我找到了汽车的中心,然后检查了周围环境——
# find the center of the car and draw a point on that
center_x, center_y = (int(car_x + 40 /2), int(car_y + 40 / 2))
代码的其余部分是检查周围环境并转动或移动汽车。如果它向前或任何方向,它会通过这样的串行端口(字节数据)将该数据发送到 Arduino -
# start the robot
robot.write(b'f')
# turn left
robot.write(b'l')
现在从 github 下载完整代码或从下面复制 -
"""
   ** Virtual Path Follower Robot **
   License: GPL3
   You should receive a copy of license with this program.
   (c) author: ashraf minhaj
       mail  : ashraf_minhaj@yahoo.com
   Written on 15th Feb 2021
"""
""" install -
$ pip install pygame
$ pip install pySerial
"""
# import library
import pygame
import serial
from time import sleep
# robot port and buadrate
# change these according to your need
PORT = "COM8"
BUADRATE = 9600
# initialize things
pygame.init()
robot = serial.Serial(PORT, BUADRATE)  # connect robot
# create window with size (our image size)
window = pygame.display.set_mode((700,400))  # track 1
#window = pygame.display.set_mode((1155,399))   # track 2
# load image file
bg  = pygame.image.load("track1.png")
#bg  = pygame.image.load("track2.png")
car = pygame.image.load("car.png")
car = pygame.transform.scale(car, (40, 40)) # resize car image
""" main loop varibales and things """
# set up timer clock
clock = pygame.time.Clock()
# initial x y axis position of the car
car_x = 30
car_y = 260
JUMP_VALUE = 25     # turning point value
direction = 'y_up'  # cars current direction
run = 1
# start the robot
robot.write(b'f')
DELAY = .400
# main loop
while run:
   clock.tick(30)         # update the window/run loop by this speed
   #check for events
   for event in pygame.event.get():
       # quit button clicked
       if event.type == pygame.QUIT:
           run = 0
   # position images
   window.blit(bg, (0, 0))          # load the track image
   window.blit(car, (car_x, car_y)) # the car image
   # record last x, y pos of car
   last_x, last_y = car_x, car_y
   # find the center of the car and draw a point on that
   center_x, center_y = (int(car_x + 40 /2), int(car_y + 40 / 2))
   pygame.draw.circle(window, (0,255,255), (center_x, center_y), 5, 5)
   # check surrounding (4 direction data)
   # the calibration value is the pixel from car's sensor/mid point
   # so it checks for road info 30 pixels far from the sensor.
   # 255 means we have a clear white road
   cal_value = 30              # calibrate this to get good data
   y_up      = window.get_at((center_x, center_y - cal_value))[0]
   y_down    = window.get_at((center_x, center_y + cal_value))[0]
   x_right   = window.get_at((center_x + cal_value, center_y))[0]
   x_left    = window.get_at((center_x - cal_value, center_y))[0]
   #print("y_up   ", y_up)
   #print("y_down ", y_down)
   #print("x_right", x_right)
   #print("x_left ", x_left)
   #print("-----------")
   # determine which way to go
   # go up
   if y_up == 255 and direction == 'y_up' and x_left != 255 and x_right != 255:
       # move up
       car_y -= 2  # decrease pixel and move the car on y axis
   # make the turn
   if y_up == 255 and direction == 'y_up' and x_left != 255 and x_right == 255:
       # make a right turn
       direction = 'x_right'
       car_y -= JUMP_VALUE
       car_x += JUMP_VALUE
       car = pygame.transform.rotate(car, -90)
       window.blit(car, (car_x, car_y))
       print('Turn Right')
       robot.write(b'r')
       sleep(DELAY)
       robot.write(b'f')
   # go x right
   if y_up != 255 and direction == 'x_right' and y_down != 255 and x_right == 255:
       car_x += 2
   if y_down == 255 and direction == 'x_right' and x_left == 255 and x_right == 255:
       # make a turn from x_right
       car = pygame.transform.rotate(car, -90)
       direction = 'y_down'
       car_y += JUMP_VALUE + 5
       car_x += JUMP_VALUE
       window.blit(car, (car_x, car_y))
       print('Turn Right')
       robot.write(b'r')
       sleep(DELAY)
       robot.write(b'f')
   # go y down
   if y_down == 255 and direction == 'y_down' and x_left != 255 and x_right != 255:
       # move down
       car_y += 2
   # left turn
   if y_down == 255 and direction == 'y_down' and x_left != 255 and x_right == 255:
       # turn from y_down
       car = pygame.transform.rotate(car, 90)
       direction = 'x_right'
       car_y += JUMP_VALUE
       car_x += JUMP_VALUE
       print('Turn left')
       robot.write(b'l')
       sleep(DELAY)
       robot.write(b'f')
   # turn to y up
   if y_up == 255 and direction == 'x_right' and x_left == 255 and x_right == 255:
       # turn from y_down
       car = pygame.transform.rotate(car, 90)
       direction = 'y_up'
       car_y -= JUMP_VALUE + 5
       car_x += JUMP_VALUE
       print('Turn left')
       robot.write(b'l')
       sleep(DELAY)
       robot.write(b'f')
   # if car is stopped
   if car_x == last_x and car_y == last_y:
       # stop the engine sound
       print("STOPPED")
       robot.write(b's')
   pygame.display.update()  # update the window
pygame.quit()      #close everything
通电,我们走吧
我使用两节 18650 电池为机器人供电。然后运行 Python 程序。它的表现如何?你可以在视频中看到。
这个机器人最好的部分是你不需要不时更改机器人的代码。您只需要相应地更改 python 程序。而已。
未来范围:
该机器人可用于带有一些板载传感器的行业,以确定错误或滑出路径并避开障碍物。天空是极限,你的大脑是主人。
谢谢你。
声明:本文内容及配图由入驻作者撰写或者入驻合作网站授权转载。文章观点仅代表作者本人,不代表电子发烧友网立场。文章及其配图仅供工程师学习之用,如有内容侵权或者其他违规问题,请联系本站处理。 举报投诉
- 相关下载
- 相关文章


