资料下载

×
如何使用Arduino UNO制作LAN/以太网中继开关
消耗积分:0 |
格式:zip |
大小:0.11 MB |
2022-11-22
描述
如何使用 Arduino UNO 和以太网屏蔽 ENC28j60 制作 LAN/以太网继电器开关。这是一个简单的教程,通过局域网远程控制。
为了控制它,我使用了 HTTP 和 JSON。该电子电路可用作更大系统 IoT 物联网的一部分。
查看更多: 如何使用 Arduino UNO 制作 LAN/以太网中继开关。
第 1 步:组件
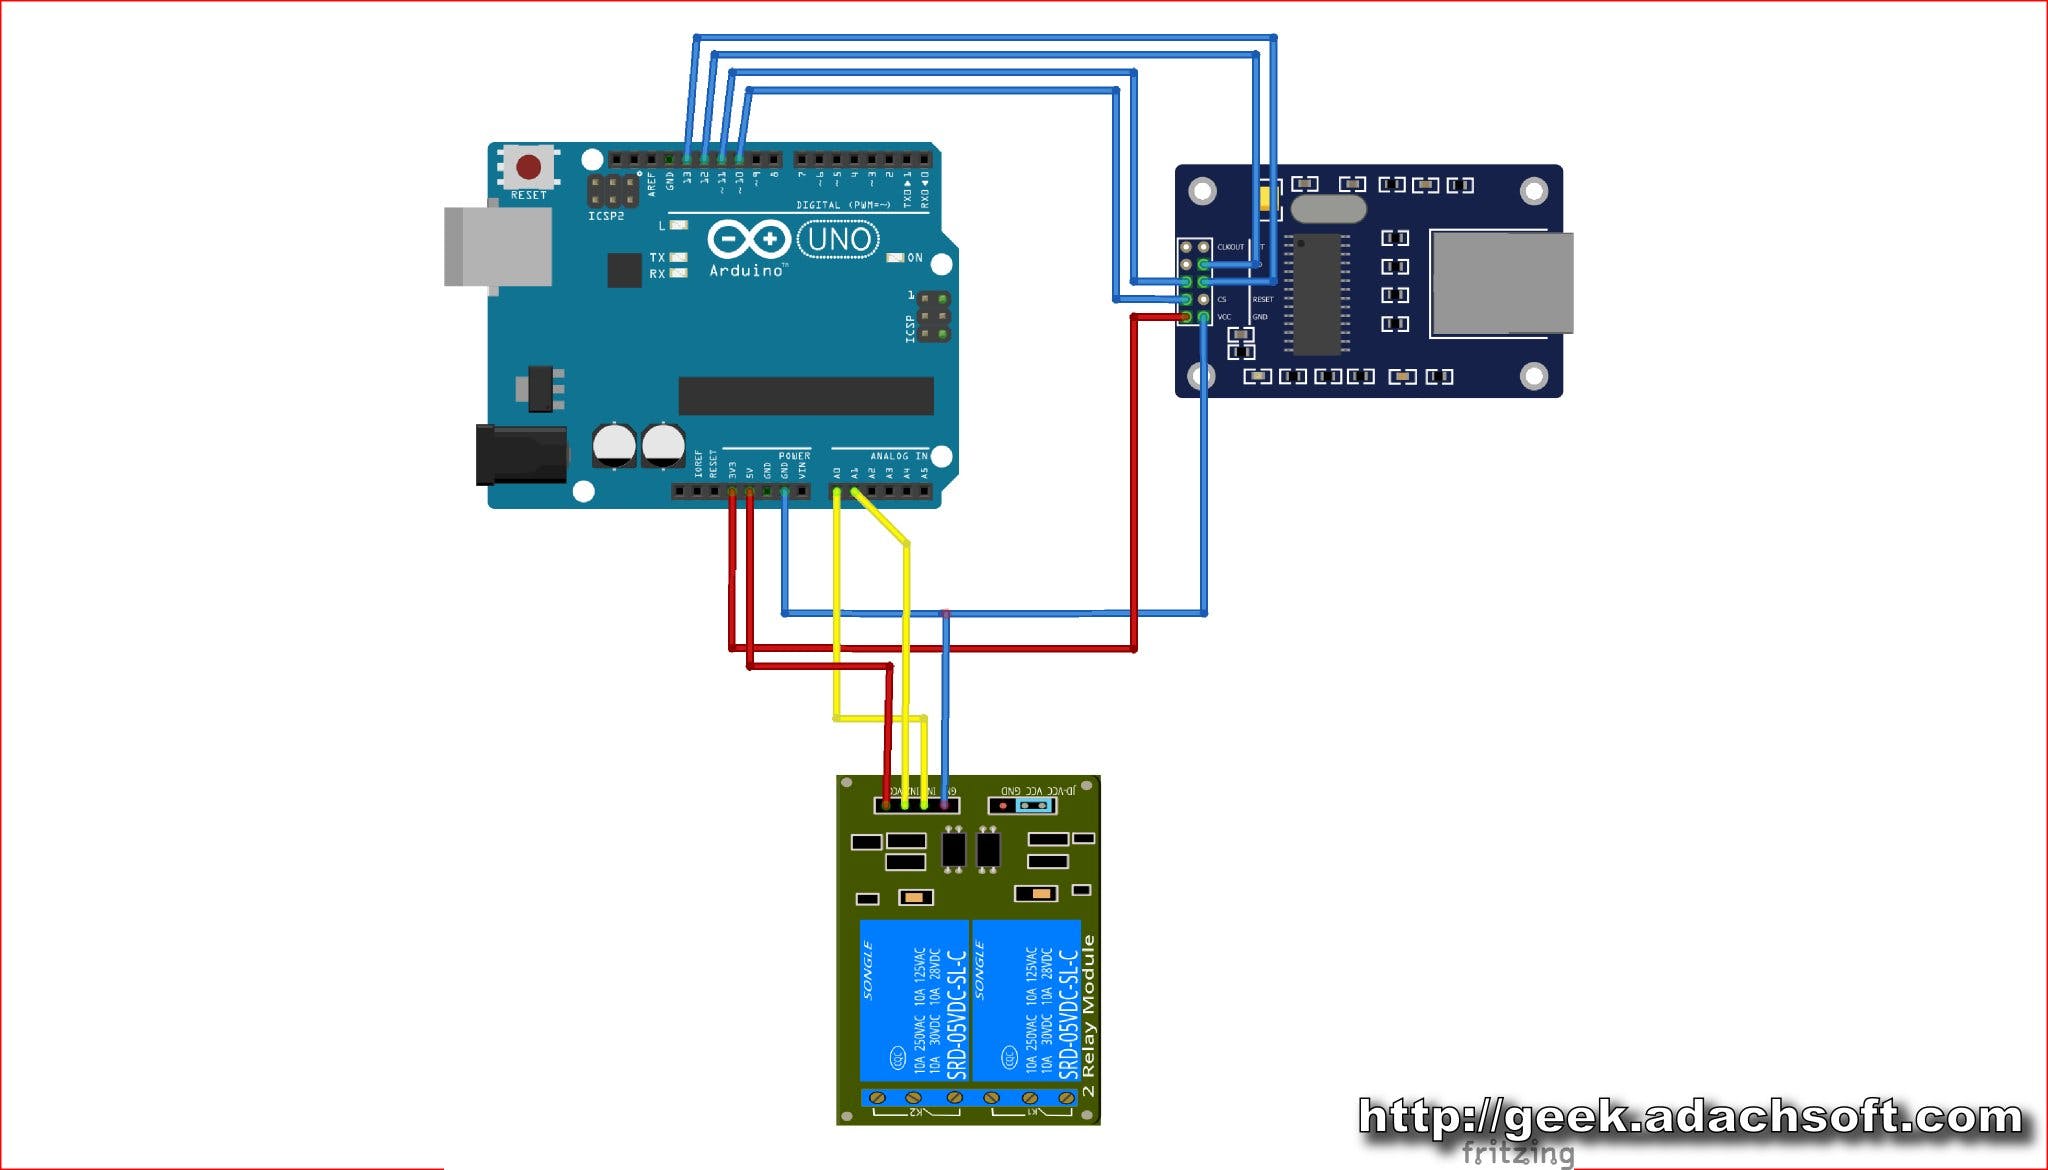
第 2 步:示意图

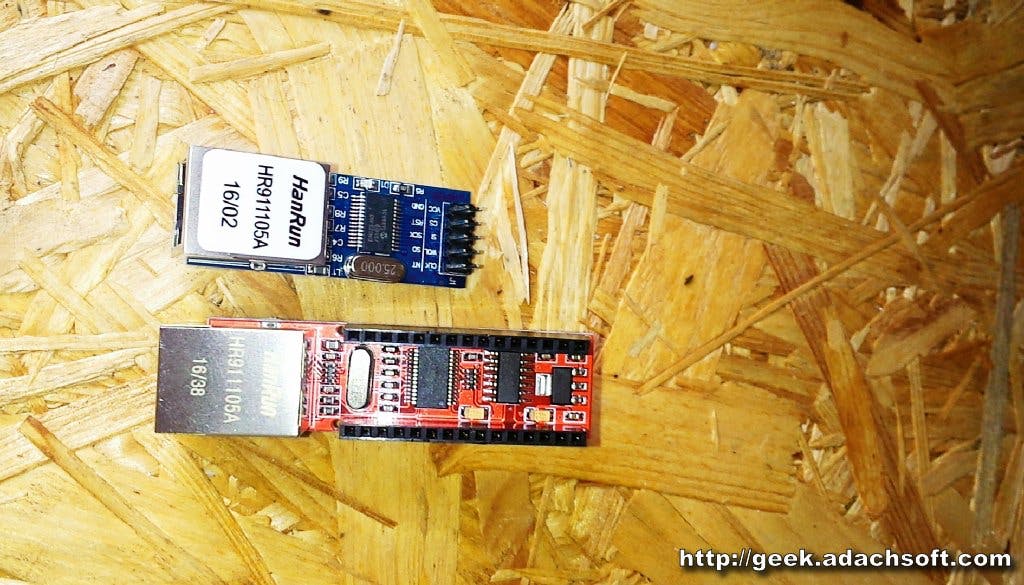
第 3 步:以太网模块 ENC28J60

两个版本的 ENC28J60 模块

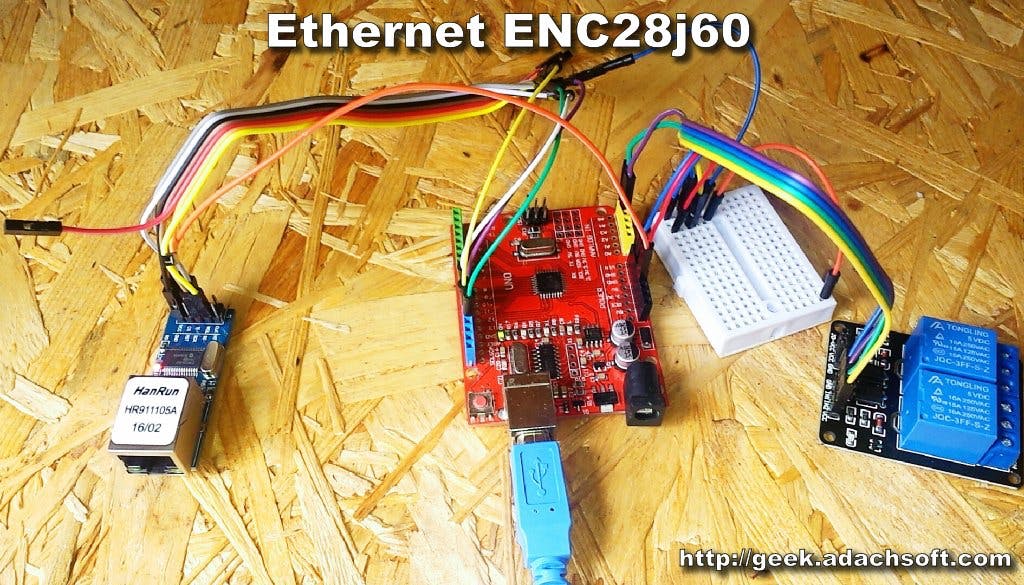
以太网 ENC28j60

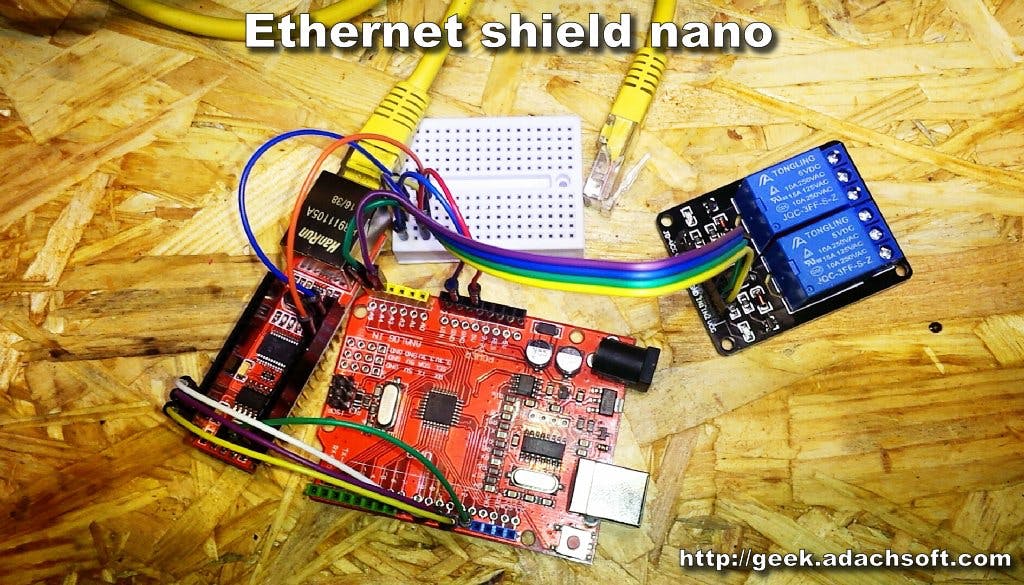
以太网屏蔽纳米
第 4 步:软件
该软件支持两个继电器,但增加它们的数量不是问题。IP 设备永久分配给 192.168.0.101。如果您有更多设备在同一网络上工作,则必须记住唯一的 IP 和 MAC 地址。
#include // Used for Ethernet #define PIN_LED 2 #define PIN_RELAY_0 A5 #define PIN_RELAY_1 A4 // **** ETHERNET SETTING **** // Ethernet MAC address - must be unique on your network byte mac[] = { 0x41, 0x44, 0x41, 0x43, 0x48, 0x41 }; //Ethernet interface IP address (unique in your network) IPAddress ip(192, 168, 0, 101); //ethernet interface IP port (80 = http) EthernetServer server(80); EthernetClient client; String str = ""; void setup() { Serial.begin(115200); Serial.print("START"); pinMode(PIN_RELAY_0, OUTPUT); pinMode(PIN_RELAY_1, OUTPUT); SW(0, LOW); SW(1, LOW); // start the Ethernet connection and the server: Ethernet.begin(mac, ip); server.begin(); Serial.print("IP Address: "); Serial.println(Ethernet.localIP()); Serial.println(); } void loop() { client = server.available(); if( client ){ Serial.println("BEGIN-------------->\n"); boolean currentLineIsBlank = true; String line = ""; bool firstLine = true; while (client.connected()){ if (client.available()) { char c = client.read(); Serial.print(c); if (c == '\n' && currentLineIsBlank) { String html = "{"; for(int i=0; i<2; i++){ if( SW_state(i) ){ html += "\"sw_"+String(i)+"\":1 "; }else{ html += "\"sw_"+String(i)+"\":0 "; } if( i<1 ) html += ","; } html += "}"; client.println(html); break; } if (c == '\n') { currentLineIsBlank = true; if( firstLine ) { firstLine = false; Serial.println("-------------------------------" + line); if( line.indexOf( "sw_on=0" ) >= 0 ){ SW(0, HIGH); }else if( line.indexOf( "sw_on=1" ) >= 0 ){ SW(1, HIGH); }else if( line.indexOf( "sw_off=0" ) >= 0 ) { SW(0, LOW); }else if( line.indexOf( "sw_off=1" ) >= 0 ){ SW(1, LOW); } } }else if (c != '\r') { currentLineIsBlank = false; if( firstLine ) { line = line + c; } } } } delay(10); client.stop(); Serial.println("END-------------->\n"); } } bool SW_state(byte num){ bool val; switch(num){ case 0: val = digitalRead(PIN_RELAY_0); break; case 1: val = digitalRead(PIN_RELAY_1); break; } return !val; } void SW(byte num, bool val){ val = !val; switch(num){ case 0: digitalWrite(PIN_RELAY_0, val); break; case 1: digitalWrite(PIN_RELAY_1, val); break; } }
第 5 步:测试
要打开继电器,只需在浏览器中输入链接。http://192.168.0.101/sw_on=1 ,“1”为继电器编号。关闭继电器http://192.168.0.101/sw_off=1 。作为响应,我们得到一个 JSON 中继状态。{"sw_0":0 ,"sw_1":0 }

打开继电器。

关闭继电器。
声明:本文内容及配图由入驻作者撰写或者入驻合作网站授权转载。文章观点仅代表作者本人,不代表电子发烧友网立场。文章及其配图仅供工程师学习之用,如有内容侵权或者其他违规问题,请联系本站处理。 举报投诉
评论(0)
发评论
- 相关下载
- 相关文章


