资料下载

使用CPS120和Arduino Nano进行压力测量
描述

4.Arduino Nano的I2C屏蔽
Step 2: Hardware Hookup

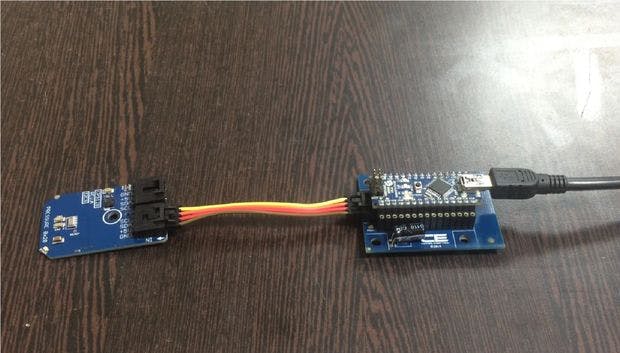
The hardware hookup section basically explains the wiring connections required between the sensor and the Arduino Nano. Ensuring correct connections is a basic necessity while working on any system for the desired output. So, the requisite connections are as follows:
- The CPS120 will work over I2C. Reference the example schematic demonstrating how to wire up each interface of the sensor.
- Out-of-the-box, the board is configured for an I2C interface, as such we recommend using this hookup if you’re otherwise agnostic. All you need is four wires!
Only four connections are required: Vcc, Gnd, SCL and SDA pins. These are connected with the help of an I2C cable. These connections are demonstrated in the pictures above.
Step 3: Code for Pressure Measurement

Lets start with the Arduino code now.
While using the sensor module with the Arduino, we include Wire.h library. The Wire library contains the functions which facilitate the I2C communication between the sensor and the Arduino board.
The entire Arduino code is given in the below Code section for the convenience of the user.
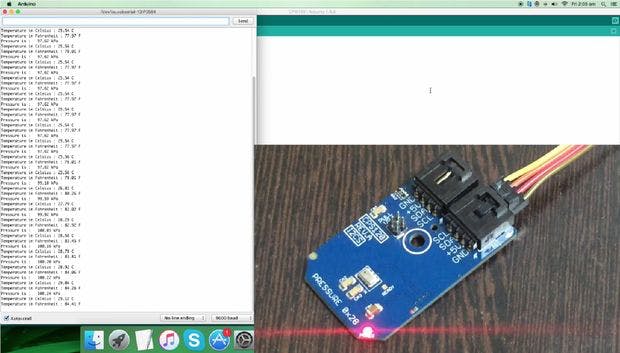
In the Wire library, Wire.write() and Wire.read() are used to write the commands and read the sensor output. Serial.print() and Serial.println() are used to display the output of the sensor on the serial monitor of the Arduino IDE. The output of the sensor is shown in the picture above.
Step 4: Applications
CPS120 has a variety of applications. It can be employed in portable and stationary barometers, altimeters etc. Pressure is an important parameter to determine the weather conditions and considering that this sensor can be installed at weather stations too. It can be incorporated in air control systems as well as vacuum systems.
声明:本文内容及配图由入驻作者撰写或者入驻合作网站授权转载。文章观点仅代表作者本人,不代表电子发烧友网立场。文章及其配图仅供工程师学习之用,如有内容侵权或者其他违规问题,请联系本站处理。 举报投诉
- 相关下载
- 相关文章


