连接 LCD 屏幕从未如此简单。无需使用任何电线即可将 LCD (16*2) 连接到 Arduino MEGA 2560。
你只需要这两件事,你已经完成了本教程的要求。
本教程在这里无需过多解释!!!
你什么都不做。只需将液晶屏按如下方式连接即可。
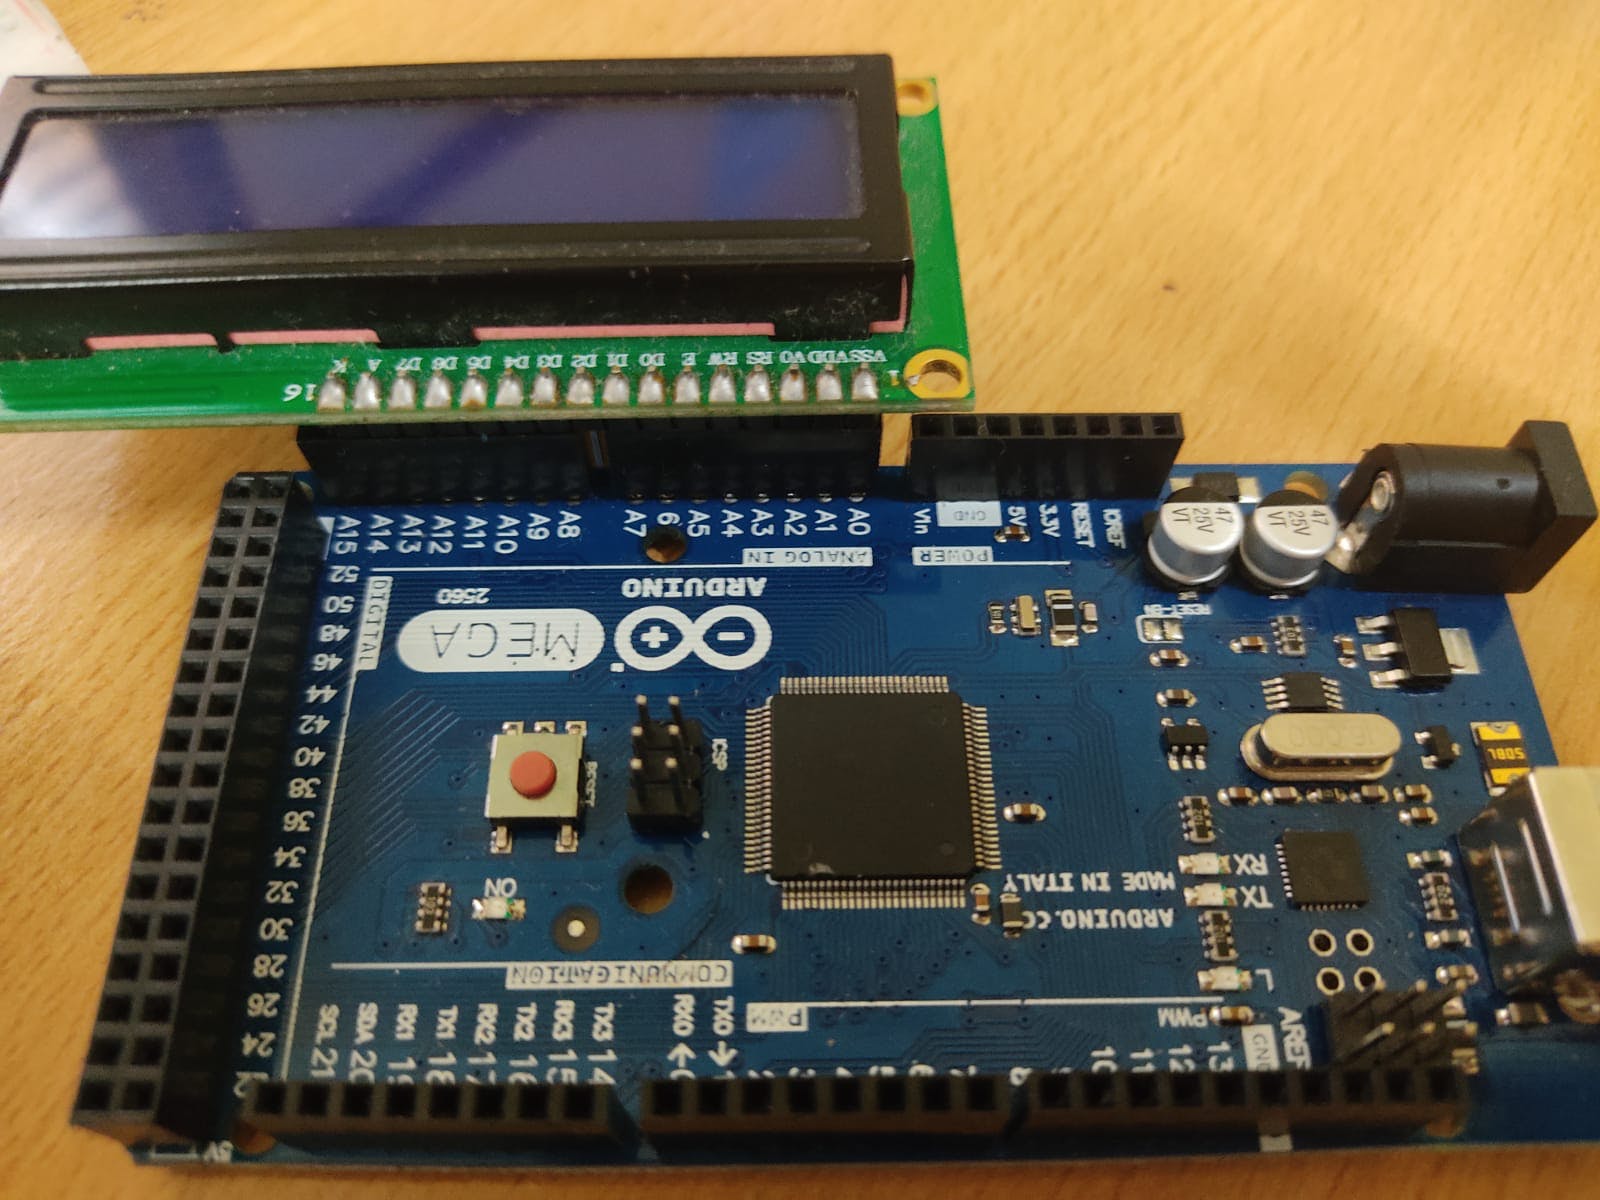
只需使用图像作为参考将 VSS 连接到 A0。其他引脚会自然插入。
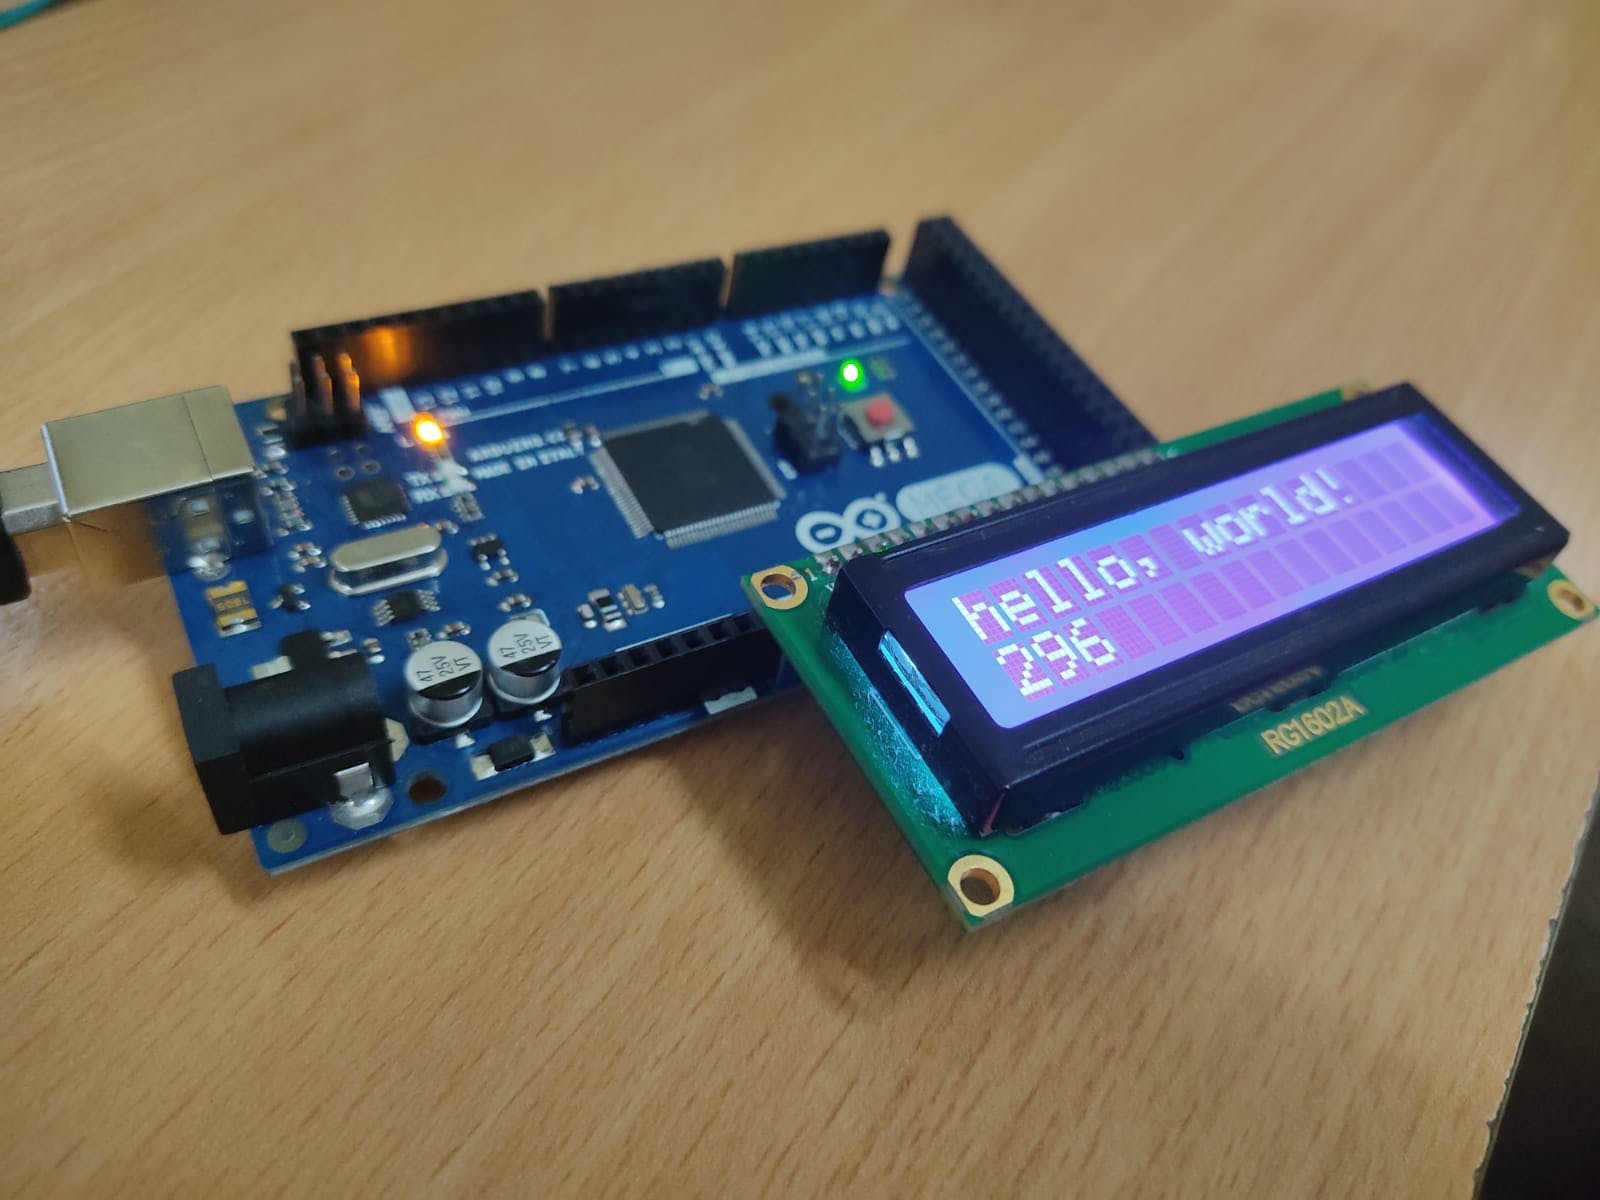
恭喜!您的电路在 10 秒内完成!
(不用担心 d2(lcd 的)pin 没有进入任何标题内。本教程实际上不需要 D3 到 D0。)
但是,是的,这里的主要区别在于代码。我只给你代码,也不需要解释。只需更改代码中的引脚即可,无需额外添加。
例如。这是显示“hello world”的原始液晶示例:
// include the library code:
#include
// initialize the library by associating any needed LCD interface pin
// with the arduino pin number it is connected to
const int rs = 12, en = 11, d4 = 5, d5 = 4, d6 = 3, d7 = 2;
LiquidCrystal lcd(rs, en, d4, d5, d6, d7);
void setup() {
// set up the LCD's number of columns and rows:
lcd.begin(16, 2);
// Print a message to the LCD.
lcd.print("hello, world!");
}
void loop() {
// set the cursor to column 0, line 1
// (note: line 1 is the second row, since counting begins with 0):
lcd.setCursor(0, 1);
// print the number of seconds since reset:
lcd.print(millis() / 1000);
}
这是修改后的版本:
#include
// initialize the library by associating any needed LCD interface pin
// with the arduino pin number it is connected to
const int rs = A3, en = A5, d4 = A9, d5 = A10, d6 = A11, d7 = A12;
LiquidCrystal lcd(rs, en, d4, d5, d6, d7);
void setup() {
pinMode(A14,OUTPUT);
pinMode(A13,OUTPUT);
pinMode(A4,OUTPUT);
pinMode(A0,OUTPUT);
pinMode(A2,OUTPUT);
pinMode(A1,OUTPUT);
digitalWrite(A14,LOW);
digitalWrite(A13,HIGH);
digitalWrite(A4,LOW);
digitalWrite(A0,LOW);
digitalWrite(A2,LOW);
digitalWrite(A1,HIGH);
lcd.begin(16, 2);
// Print a message to the LCD.
lcd.print("hello, world!");
}
void loop() {
// set the cursor to column 0, line 1
// (note: line 1 is the second row, since counting begins with 0):
lcd.setCursor(0, 1);
// print the number of seconds since reset:
lcd.print(millis() / 1000);
}
同样,只需删除打印秒和“hello world”的部分代码,现在您可以将此代码用作片段。
如果您喜欢该项目,请关注,分享和评论!
声明:本文内容及配图由入驻作者撰写或者入驻合作网站授权转载。文章观点仅代表作者本人,不代表电子发烧友网立场。文章及其配图仅供工程师学习之用,如有内容侵权或者其他违规问题,请联系本站处理。 举报投诉
全部0条评论
快来发表一下你的评论吧 !