
资料下载

×
构建温度传感设备并将其连接到Arduino IOT云
消耗积分:2 |
格式:zip |
大小:0.15 MB |
2022-12-14
描述
介绍:
在这个动手实验室中,您将构建温度传感设备并将其连接到 Arduino IOT 云。
这是智慧城市计划系列实验室中的第二个,介绍了物联网的简单应用,能够通过互联网将数据发送到云端。
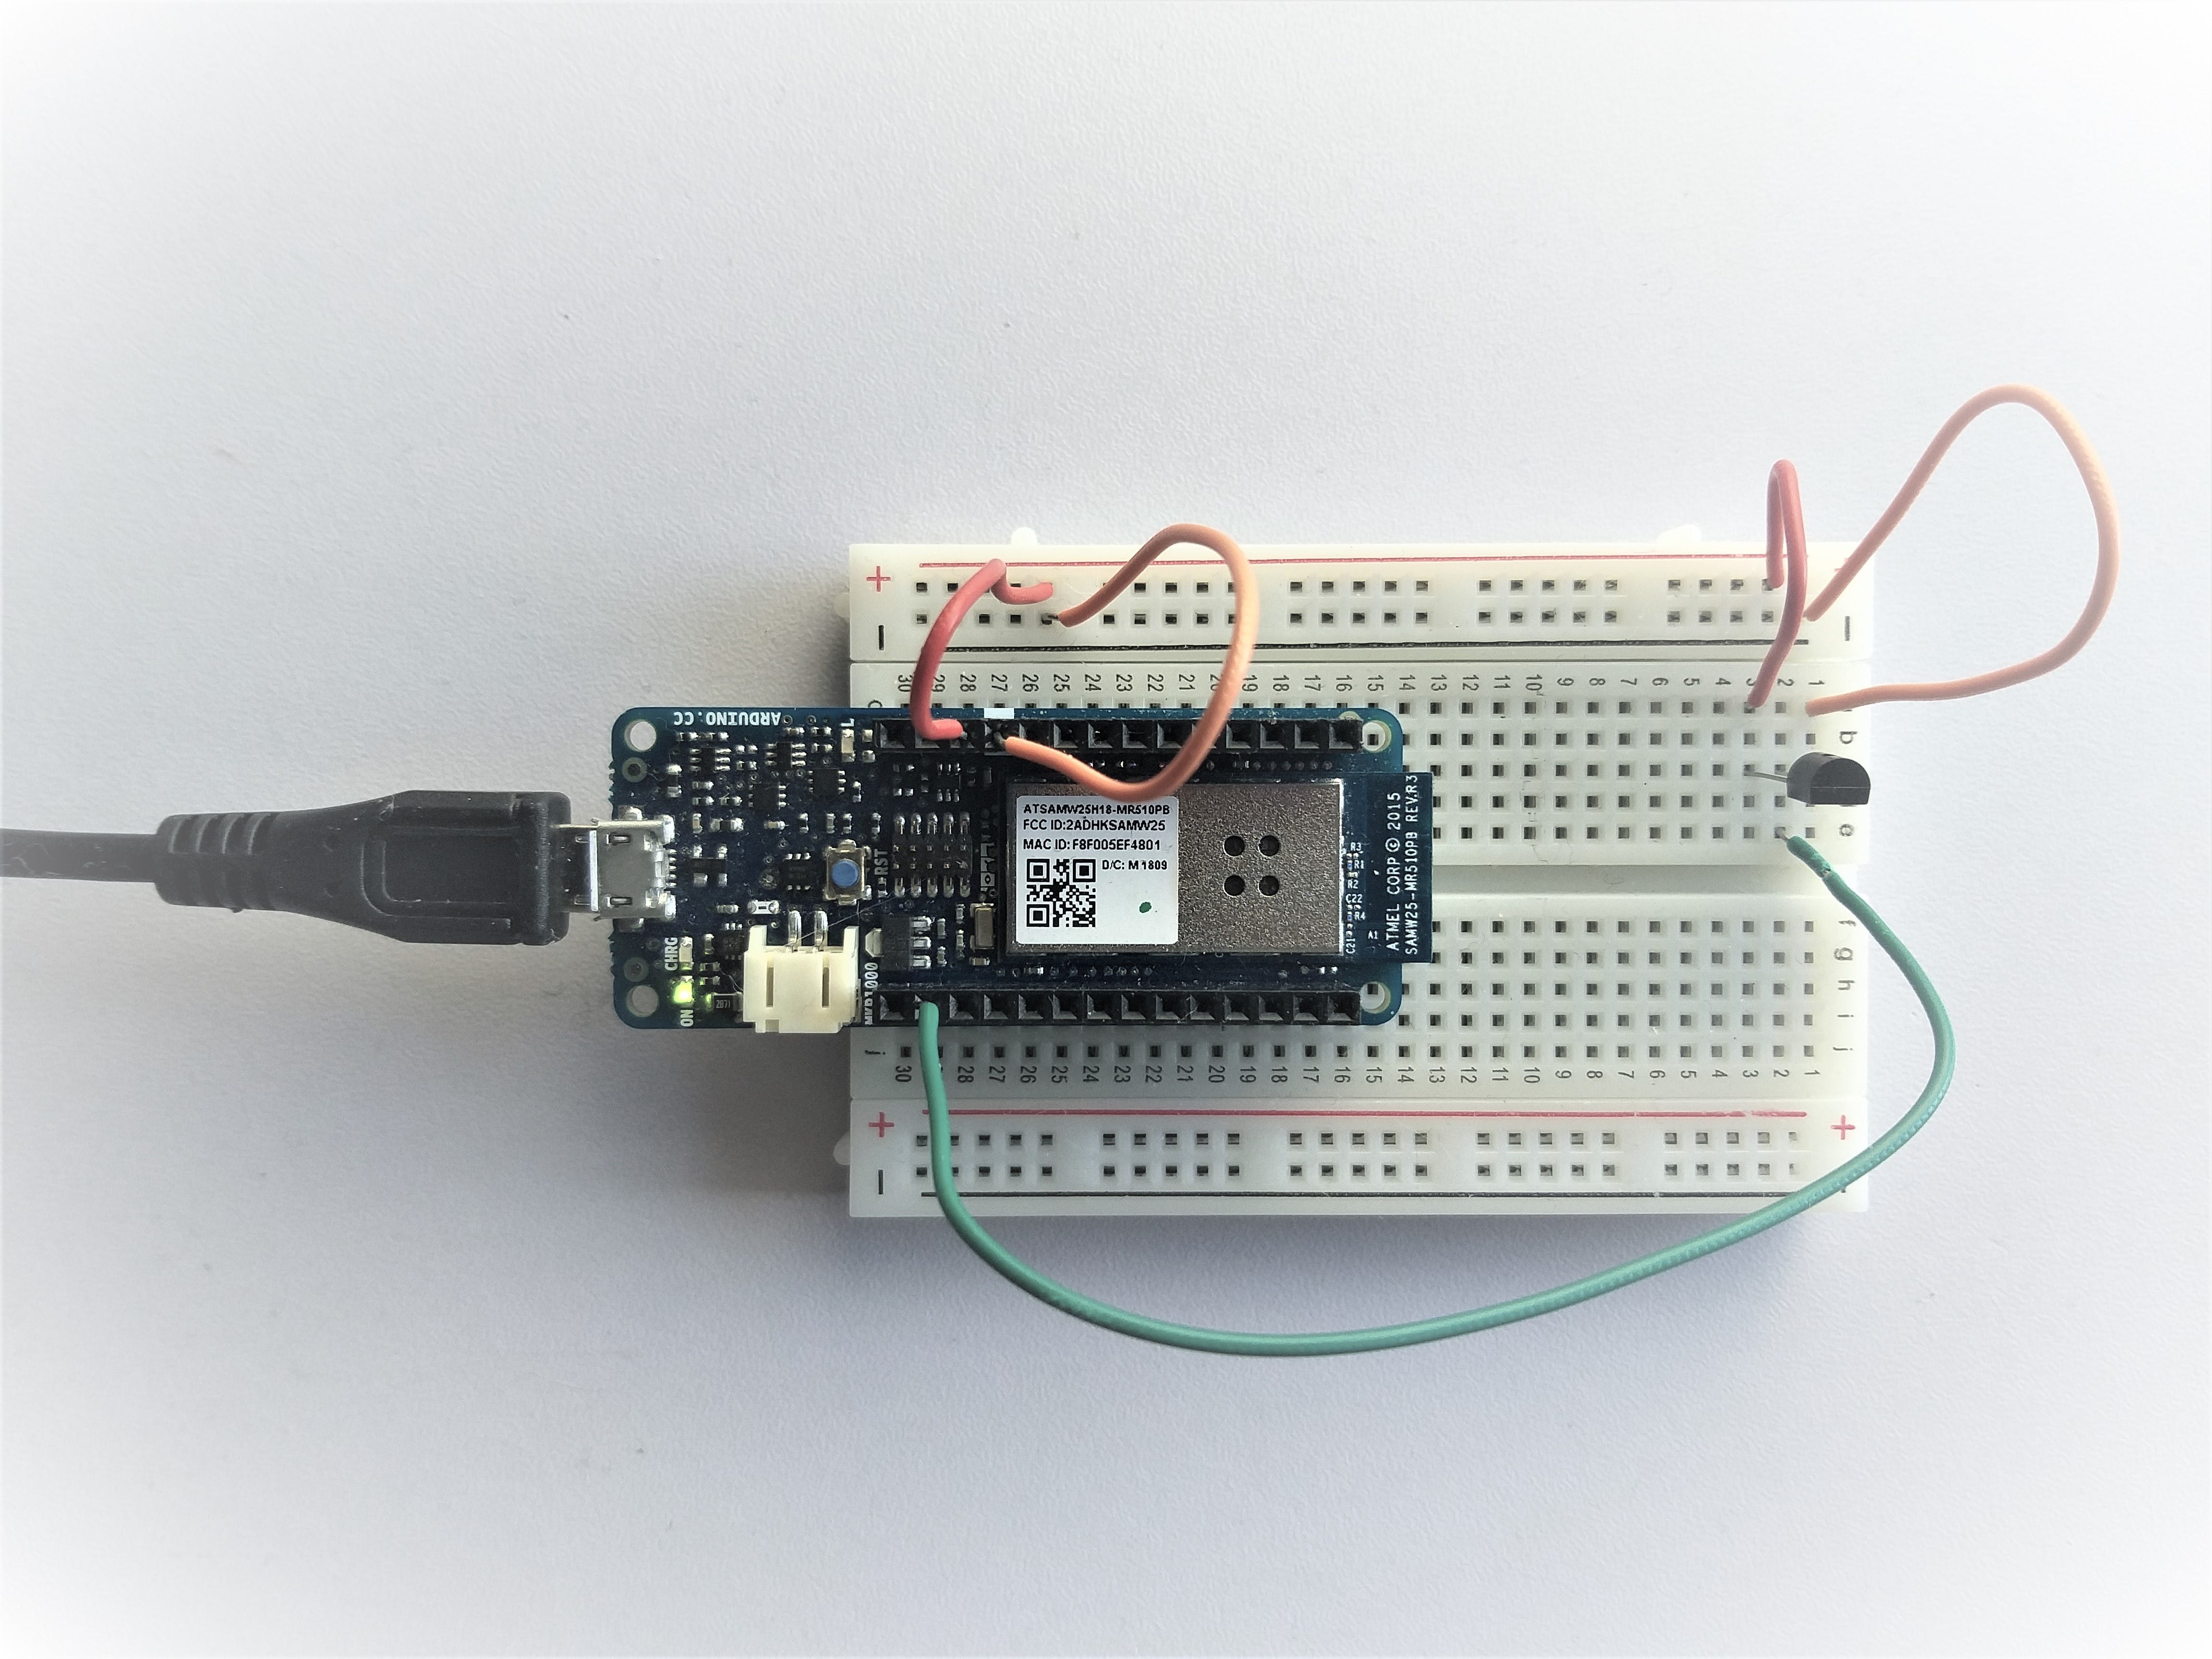
把它放在一起:
本教程分为五个部分:
- 安装 Arduino Create 插件
- 组装电路
- 在云中设置您的董事会
- 设置物联网云
- 添加您的代码
第 1 部分 - 安装 Arduino Create 插件

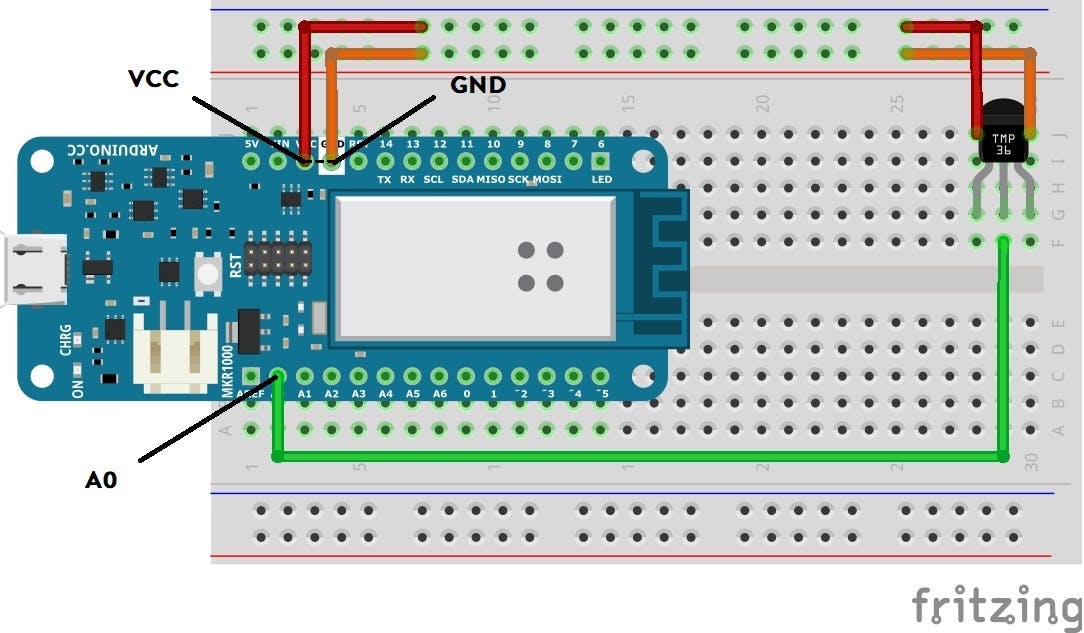
第 2 部分 - 组装电路
使用下面的接线图作为参考组装您的设备
笔记:
- 温度传感器 (TMP36) 连接到引脚 A0
- 插入温度传感器时,确保平面朝向您。
第 3 部分 - 在云中设置您的电路板
要配置您的开发板,请导航至Arduino Create并完成以下步骤(以橙色突出显示)
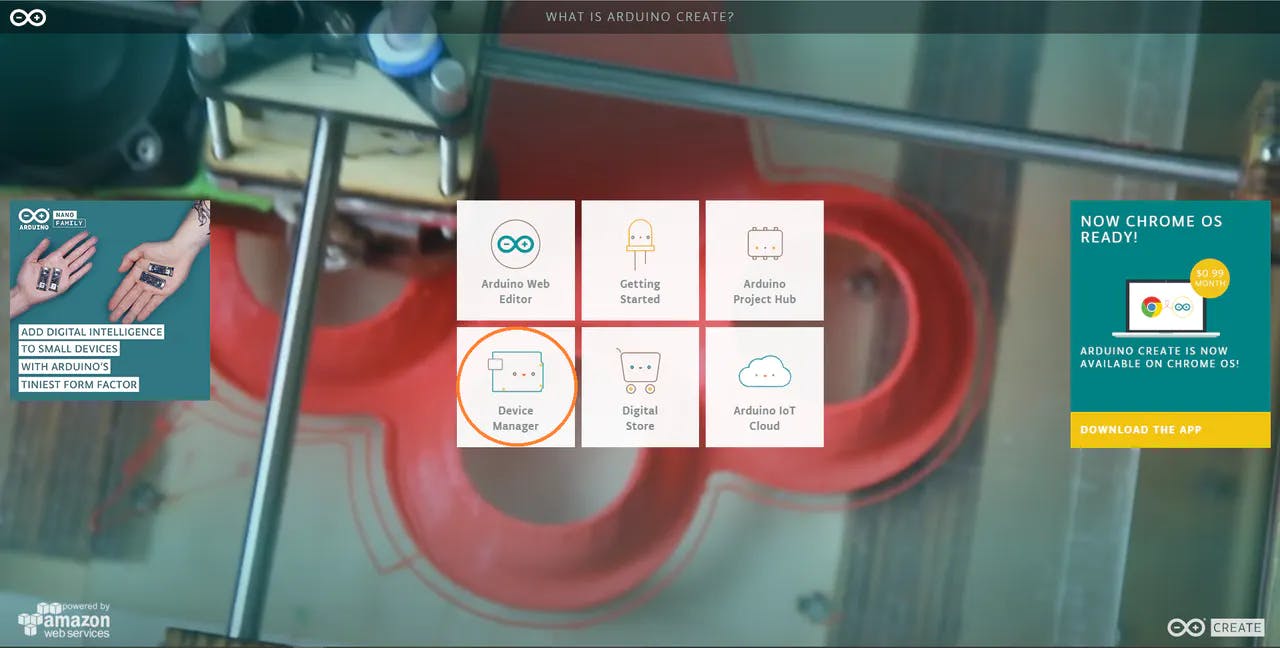
1 / 11 •步骤 1 - 选择设备管理器
您现在将看到您的 MKR1000 板列出并命名为“MyThing”,如下所示(以橙色圈出)
这样就完成了板子在云端的注册
第 4 部分 - 设置物联网云
使用在云中注册的设备导航到Arduino 创建并完成以下步骤(以橙色突出显示)
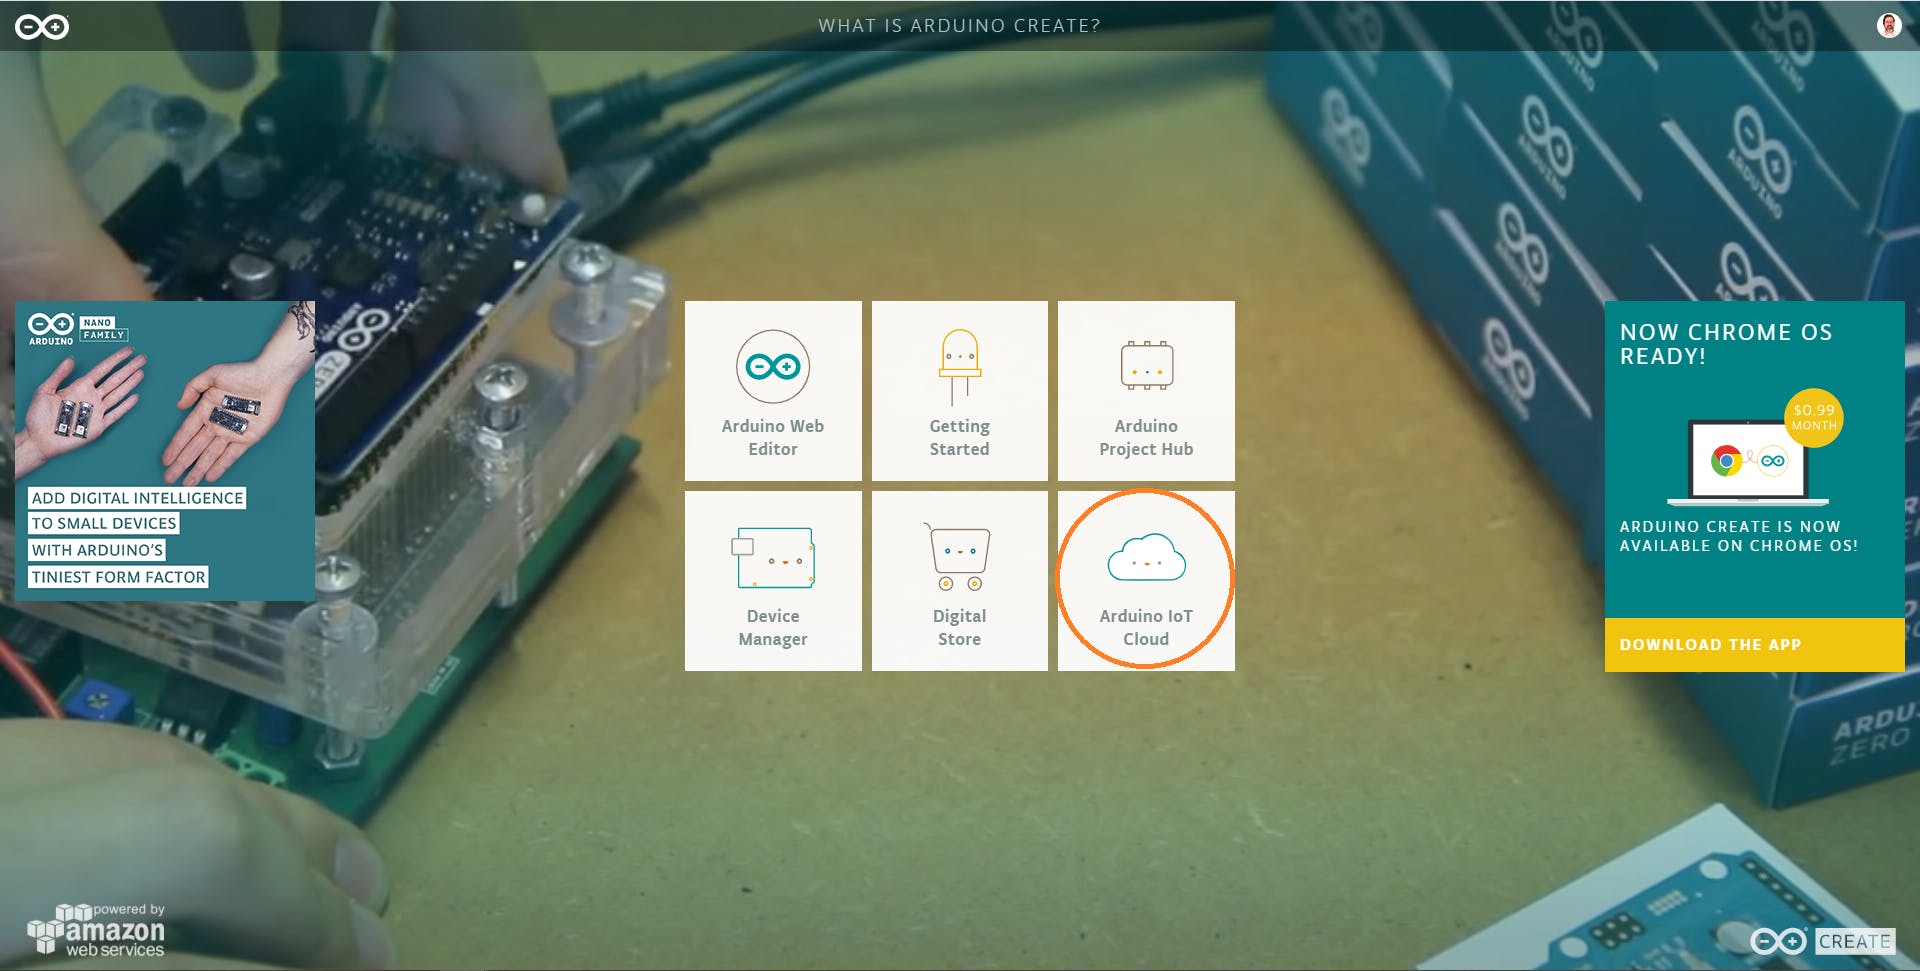
1 / 6 •第 1 步 - 选择 Arduino IOT Cloud
这样就完成了 Arduino IOT Cloud 中设备的设置。
第 5 部分 - 添加代码
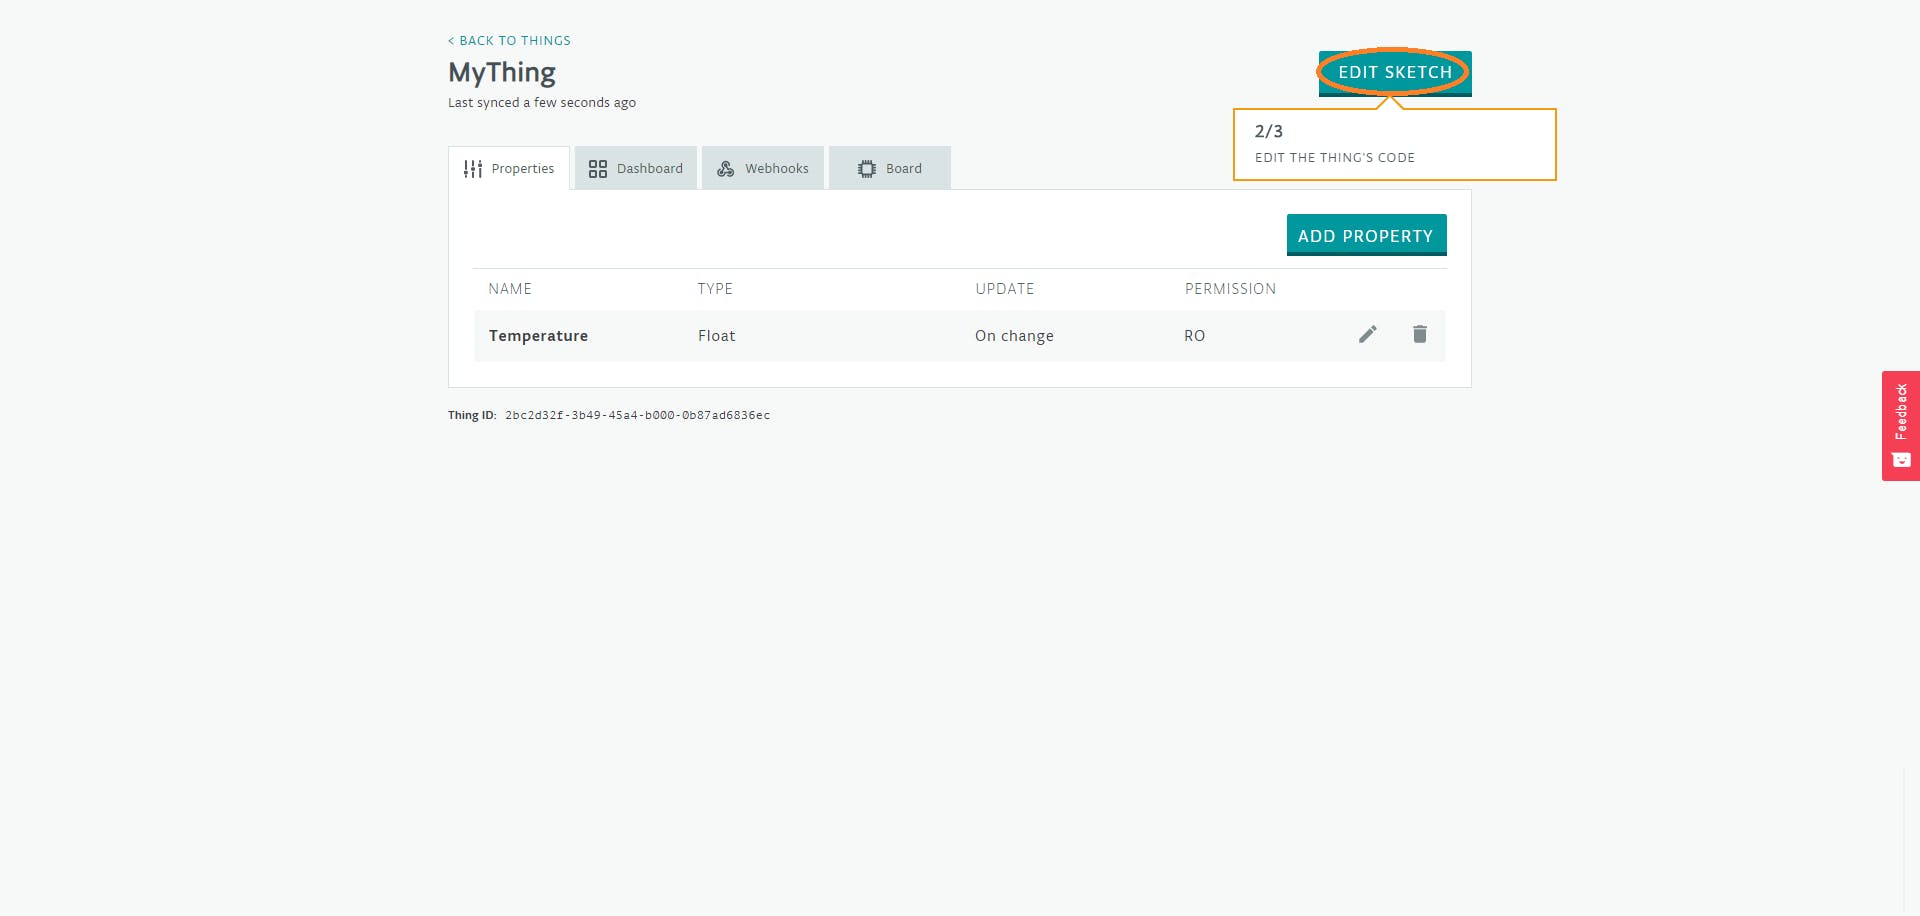
1 / 2 •第 1 步 - 单击编辑草图
第 1 步- 在第 18 行输入温度传感器变量(片段 1)
// Temperature Sensor variables
int sensorPin = A0;
int sensorValue = 0;
int Dres = 1024;
int VCC = 3300;          // set VCC voltage milliVolts
int offset = 500;        // set tolerance of 500 milliVolts
int scaling = 10;        // set the voltage scaling at 10mM / deg C
float voltage = 0.0;     // set the initial voltage to 0
第 2 步- 在第 36 行的 void setup () 中添加以下设置函数(片段 2)
// Set 10bit read resolution
analogReadResolution(10);
第 3 步- 在第 59 行添加主代码(片段 3)
 // read the value from the sensor:
 sensorValue = analogRead(sensorPin);
 Serial.print("sensorValue = ");
 Serial.print(sensorValue);
 // Calculate the voltage
 voltage = sensorValue * (VCC/Dres); // milliVolts
 Serial.print(" voltage = ");
 Serial.print(voltage);
 Serial.print(" VCC = ");
 Serial.print(VCC);
 // Calculate the temperature
 temperature = (voltage - offset ) / scaling;
 Serial.print(" temperature(C) = ");
 Serial.println(temperature);
 delay(1000);
第 4 步- 导航到 Secret 选项卡,输入您的 Wifi 网络名称和密码
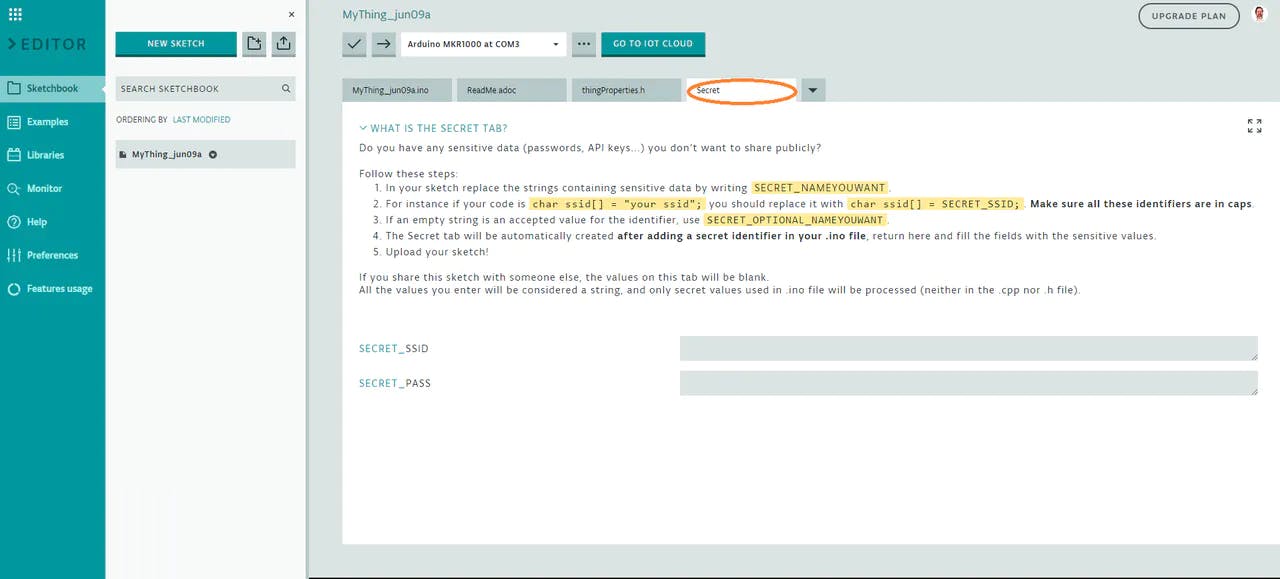
输入您的 Wifi 详细信息
第 5 步- 保存并验证代码

第 6 步- 上传代码

您现在已经完成了设备的编码!
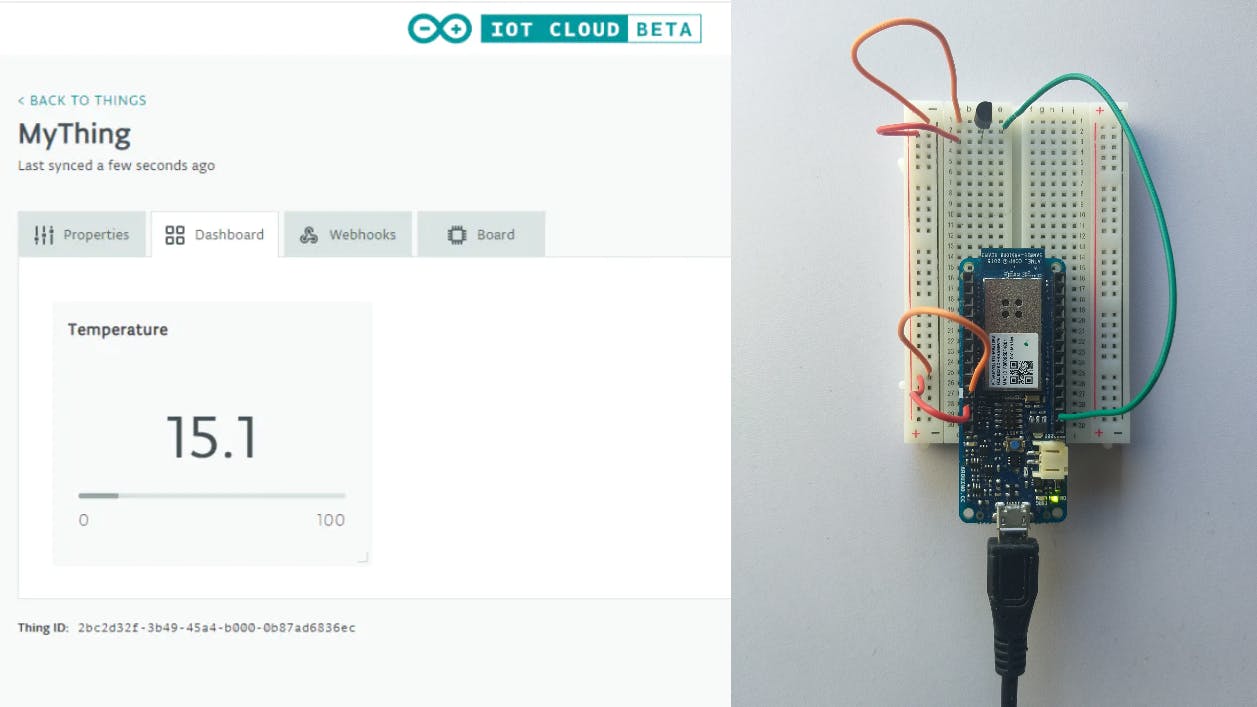
最终结果
完成后,设备将在 Arduino IOT Cloud 仪表板上显示温度。
声明:本文内容及配图由入驻作者撰写或者入驻合作网站授权转载。文章观点仅代表作者本人,不代表电子发烧友网立场。文章及其配图仅供工程师学习之用,如有内容侵权或者其他违规问题,请联系本站处理。 举报投诉
评论(0)
发评论
- 相关下载
- 相关文章


